Modifying the Hubble Palette to Show More Details.

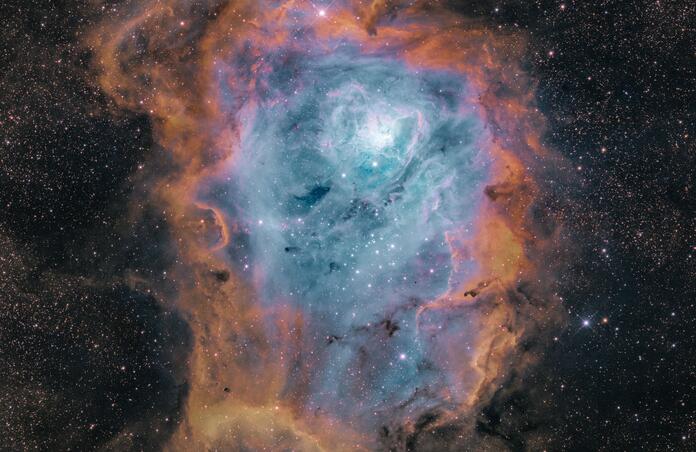
I wanted to talk about doing something slightly different with the Hubble Palette to bring out extra details. I decided to try to really bring out detail in Messier 8, so instead of sticking with the standard mix I decided to make slight changes to the mix to get some separation on the colors.
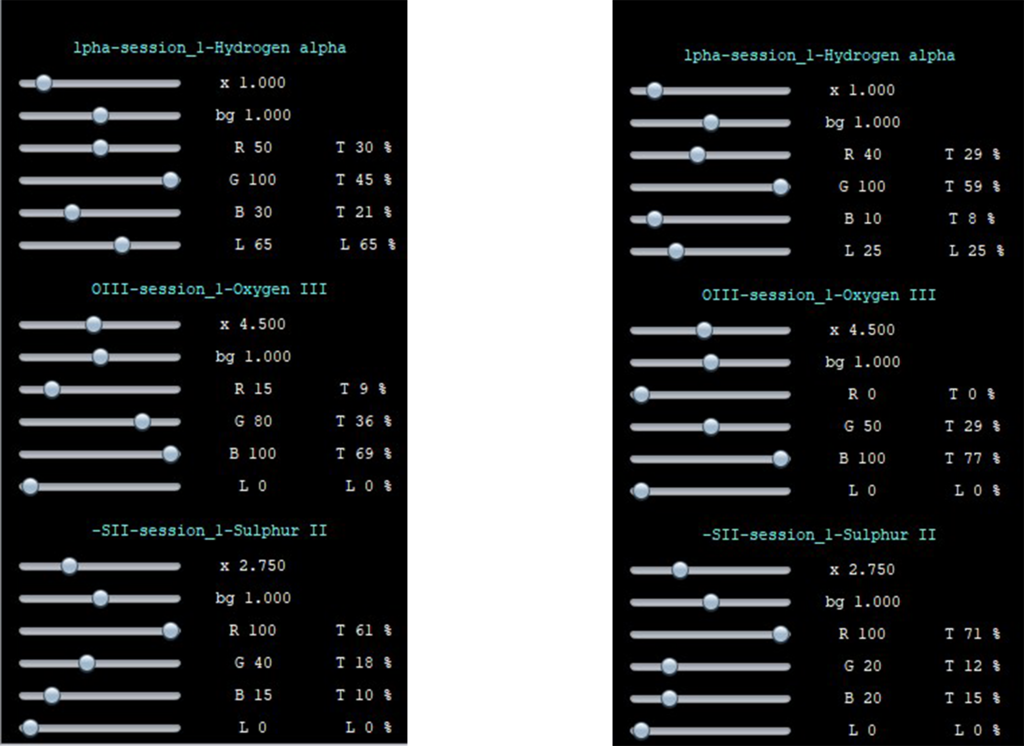
Normally I will pull my standard Hubble Palette mix in APP that has Ha as R 50, G 100, B 30 and L 65, Oiii with the x (multiplier) at 4.500, R at 15, G at 80, and B at 100, and then Sii with the x at 2.750, R at 100, G at 40, and B at 15, then I pull it into selective color and make some adjustments there to bring them all up.
With this I went a bit different on that mix. I did my Ha as R at 40, G at 100, B at 10, and L at 25, Oiii with x at 4.500, R at 0, G at 50, and B at 100, then Sii with x at 2.750, R at 100, G at 20, and B at 20. Again I brought it into selective color and made my adjustments to taste.

Of course I finished up processing in Photoshop with a light amount of noise and star reduction, boosts in contrast, clarity, and saturation/vibrance. I also did my final stretching there as well.
Go ahead and give this a try on your next SHO narrowband target and see if you like the results! Also, don't be afraid to switch things up to get to a mix you like!
This blog post was originally published in our Telescope Live Community.
The Community represents Telescope Live's virtual living room, where people exchange ideas and questions around astrophotography and astronomy.
Join the conversation now to find out more about astrophotography and to improve your observation and post-processing skills!
