Advanced Request Planning - Getting More Objects at Once
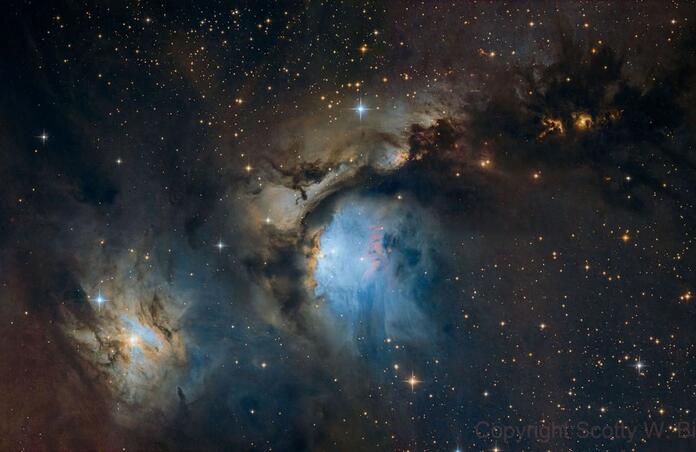
One of the cool things we can do at Telescope Live is to book Advanced Requests or make suggestions for new One Click Observations. Some would assume that you have to do a named object and leave it centered on that. Fortunately that is not the case, so you can do interesting compositions!
The ability to put custom RA and Dec in after you have centered an object allows for you to make mosaics and to get other objects in the FoV that wouldn't be there unless you moved things around.
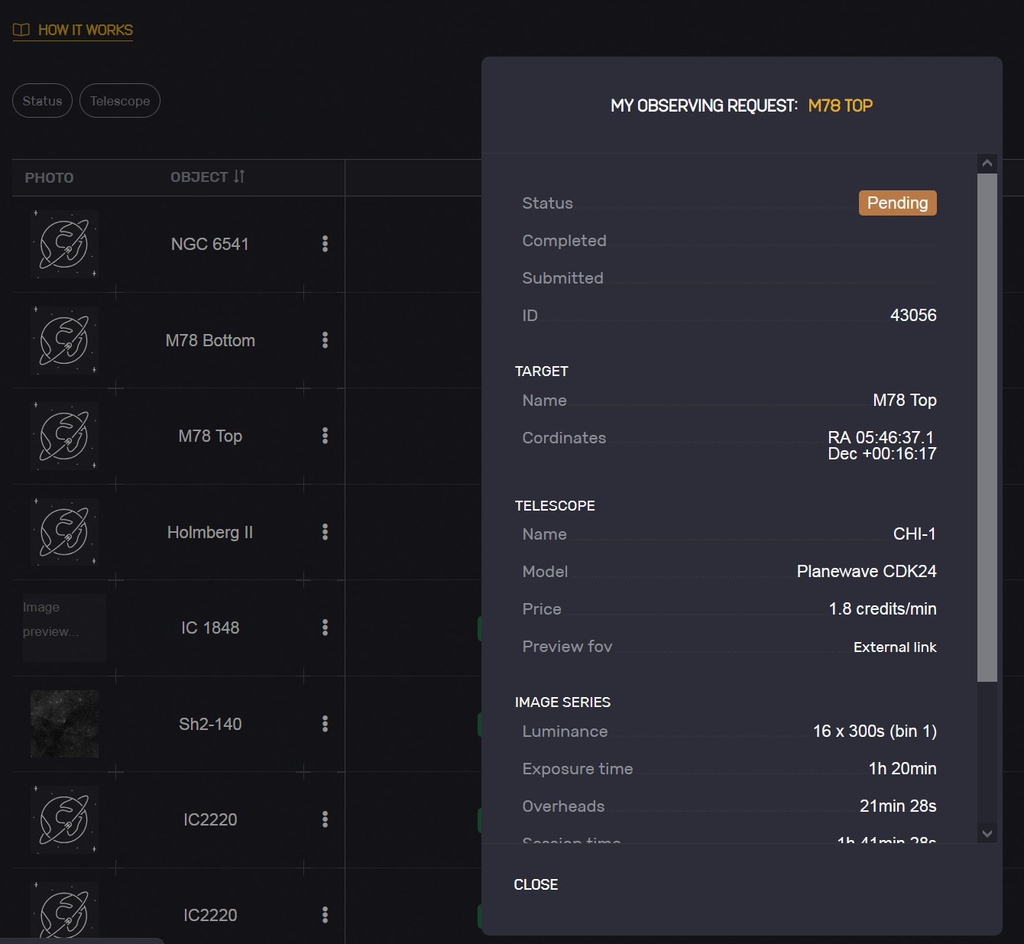
In the case of a mosaic having the ability to center a target on a different custom RA and Dec is what allowed the M78 mosaic that is found here: https://app.telescope.live/click-grab/all?telescope=13...
I used the coordinates on that to go ahead and put in a couple advanced requests for luminance so I can really get this object the way I want it. As you can see I also named it following the same naming convention that the original set of One Click Observations follow.
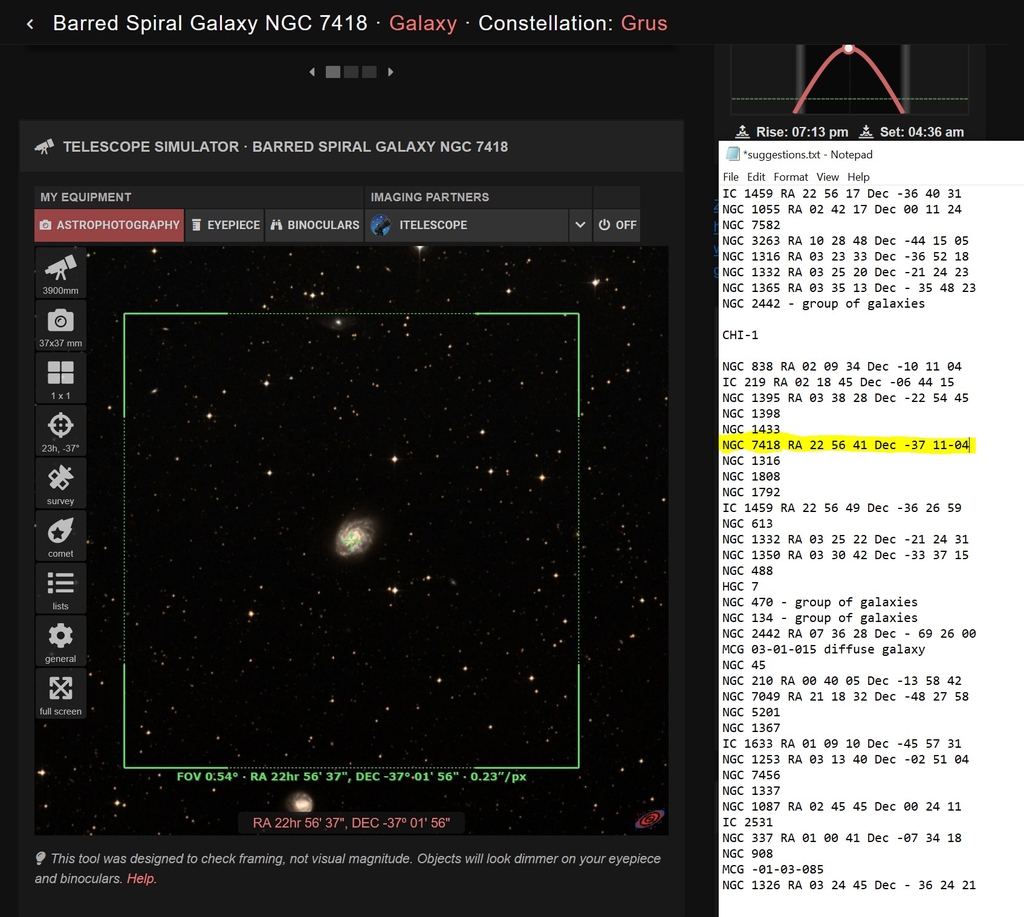
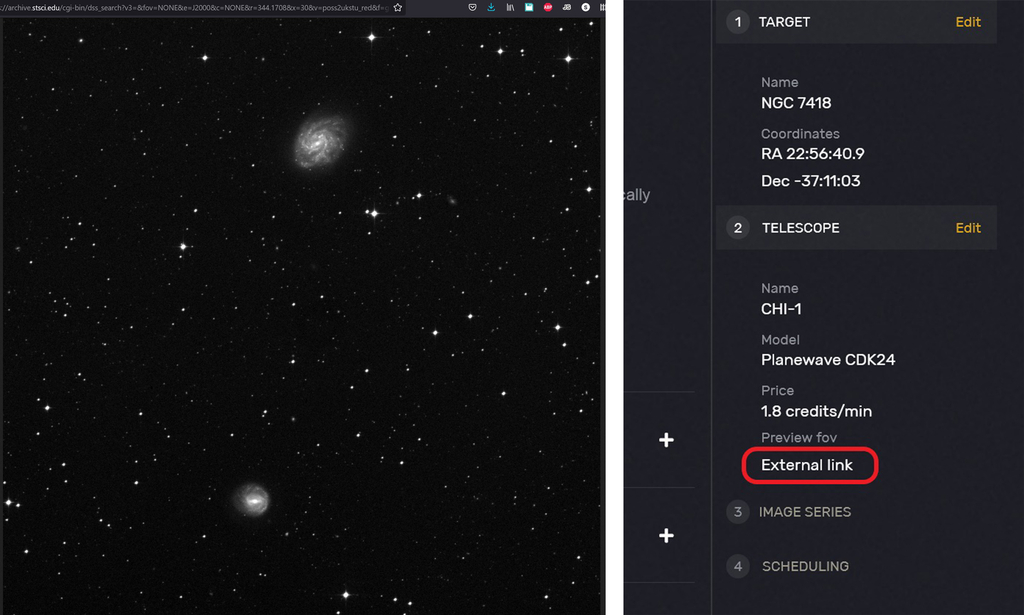
The next thing is how you can move your coordinates around. You can see that I have NGC 7418 in here and if I keep it centered I will miss out on the other galaxy that is just off screen.
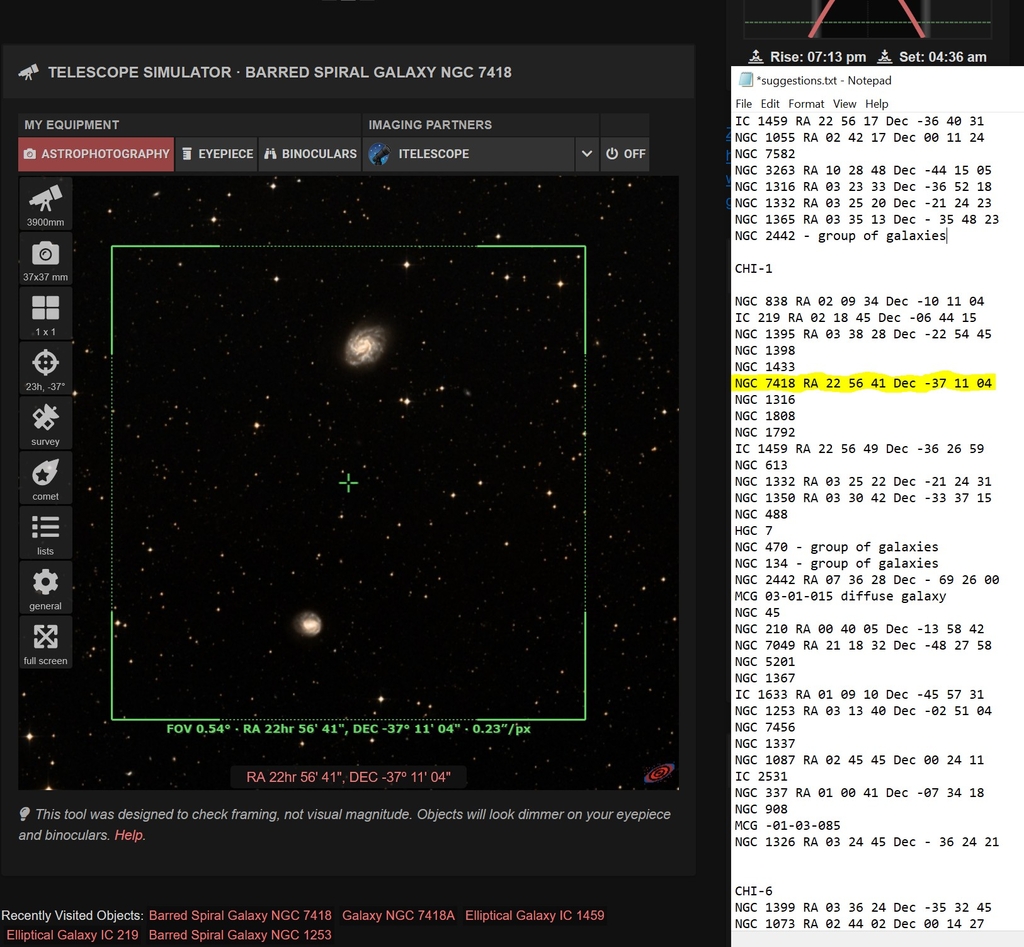
Now moving it to the coordinates I have listed gets me another galaxy in there at the same time. You can do this for any object you want, of course you want other things in the FoV to do this, so you might want to put in the sensor sizes and focal lengths of all the Telescope Live telescopes on your Telescopius account, and save their locations in there as well. On this I am using the specs for CHI-1.
As a warning, if doing a single object or centering on a single object use the following because it is an exact match to what you get. If you know how to edit the RA and Dec you can do that on it too. https://ruuth.xyz/AstroMosaic.html?service=Telescope%20Live
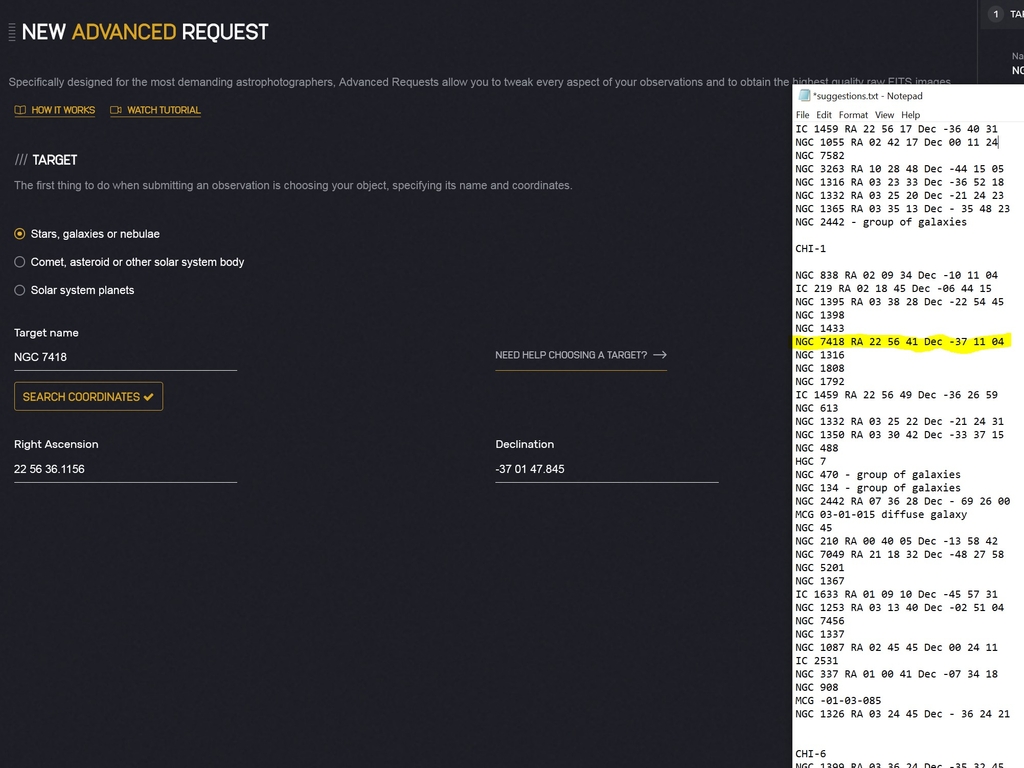
As you can see on entering a new Advanced Request it will put your default RA and Dec for an object. Go ahead and edit those to what you want. You will get an error if you input invalid coordinates. Also, do not worry about the error you get while entering them as long as it goes away when done.
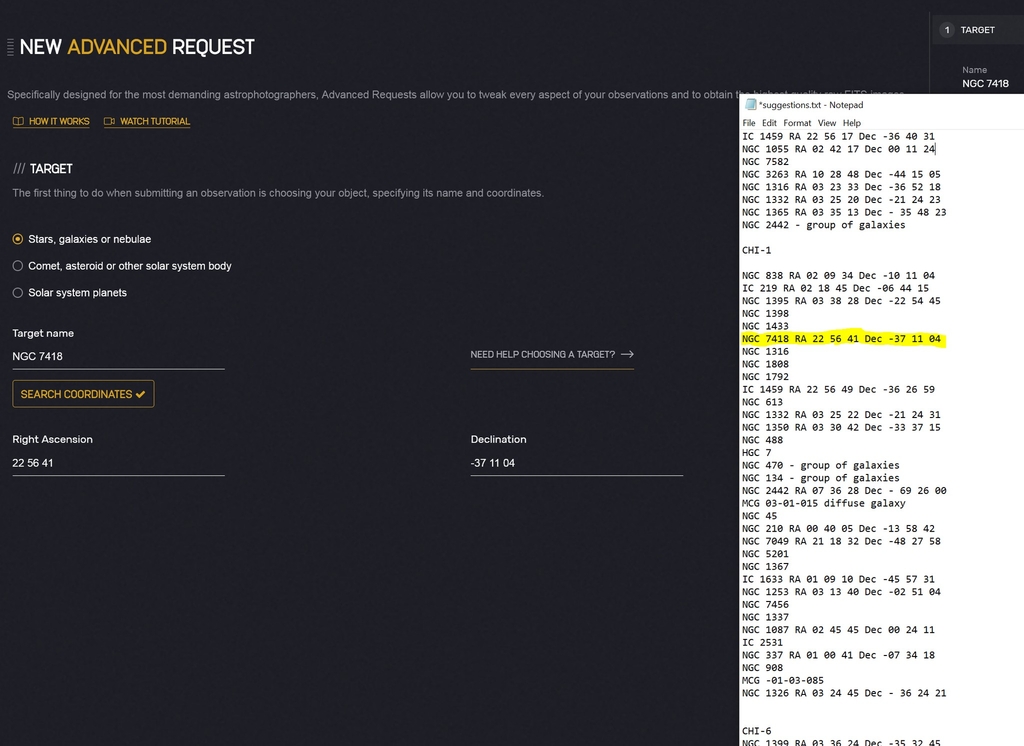
Now we have our valid edited coordinates in and it will allow us to pick a telescope. In this case since I did this with CHI-1 as a plan I will go ahead and choose it. On some scopes, and CHI-1 is one of them, you can get a preview of what it is going to look like in grayscale. That is how you can confirm that you have what you want. Simply click External Link under Preview fov to check it. On some telescopes it is not available and will state that.
Now you know how to set custom RA and Dec in on objects. You can even do a custom name as long as it does not end in a space as long as you have your RA and Dec to put in. See what you can come up with.
I have included the M78 that I processed from the One Click Observations linked above to show what you can get with custom RA and Dec doing a mosaic.
This blog post was originally published in our Telescope Live Community.
The Community represents Telescope Live's virtual living room, where people exchange ideas and questions around astrophotography and astronomy.
Join the conversation now to find out more about astrophotography and to improve your observation and post-processing skills!
