Creating a Timelapse in Photoshop
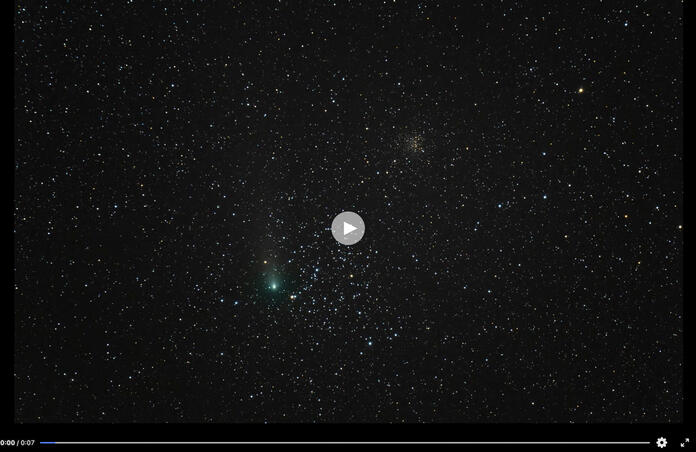
Sometimes when there is a cool event like a comet, or even if you want to show the progression of the stars through the sky a timelapse can be an awesome way to do it. But, who do you make one? If you have Photoshop it is easy to do!
First you will make sure to have all your images in one folder and all of them already set as JPGs and adjusted how you would like them to look. If they are pretty big in resolution you will need to adjust them down. Lightroom is a good tool to do this, but any program you want to use to do that with is fine, just make sure they are in one folder.
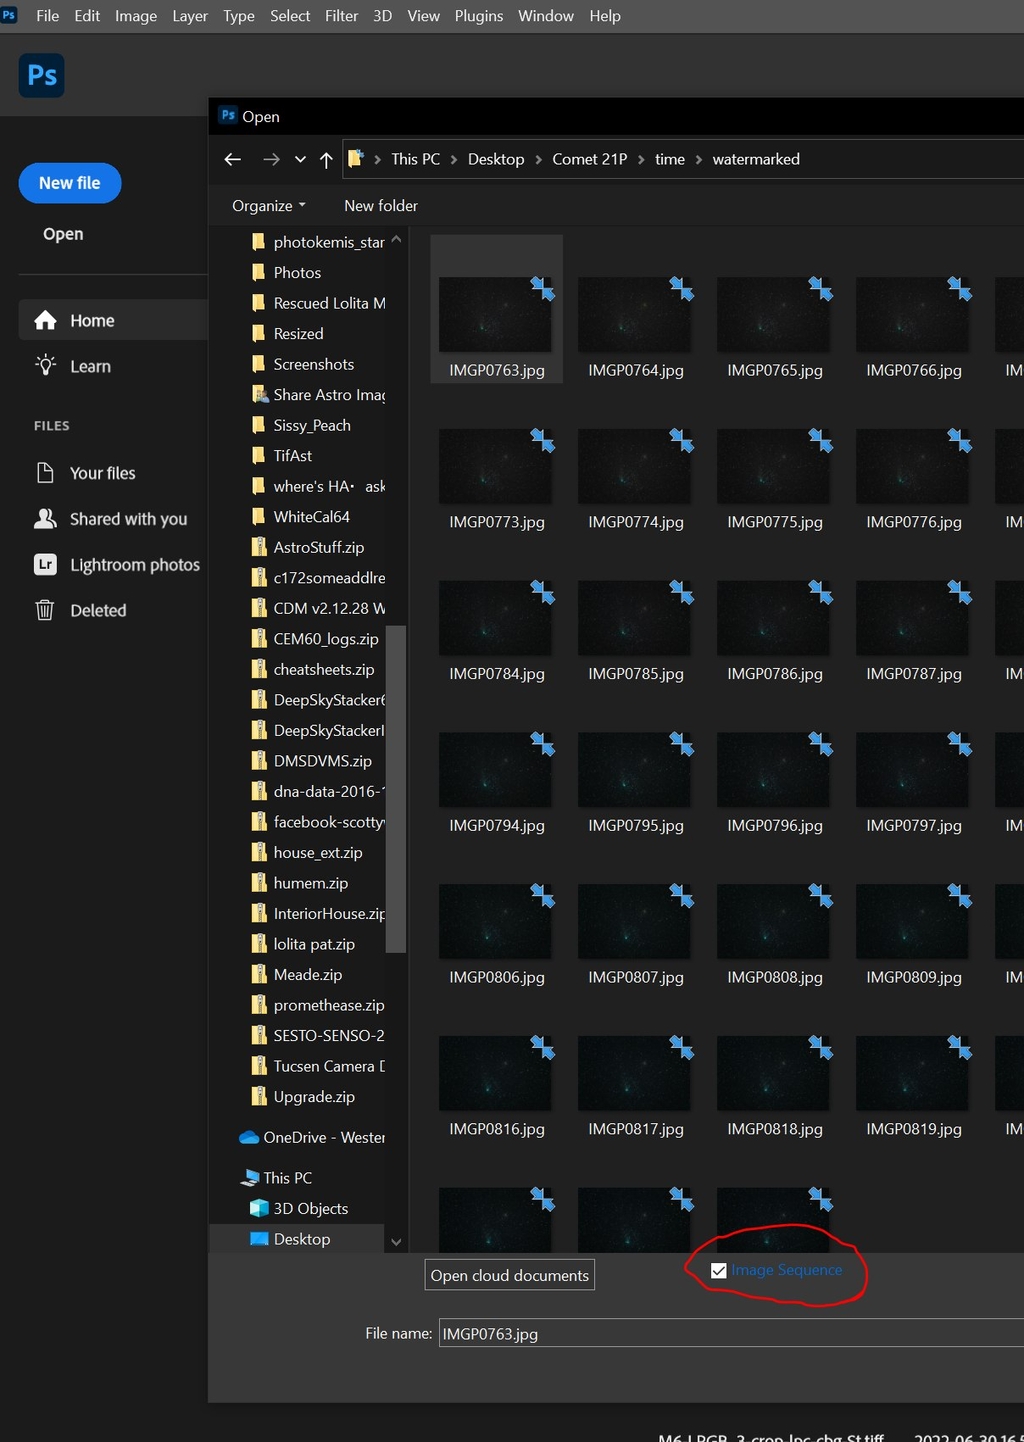
Next, you will open Photoshop. This will work with any version from CS6 onward. Simply hit File > Open, then navigate to your folder, select the first .jpg, then select the Image Sequence box and hit open. You will be asked what framerate you want and you can use a preselected one (default is 30fps) or put in your own.
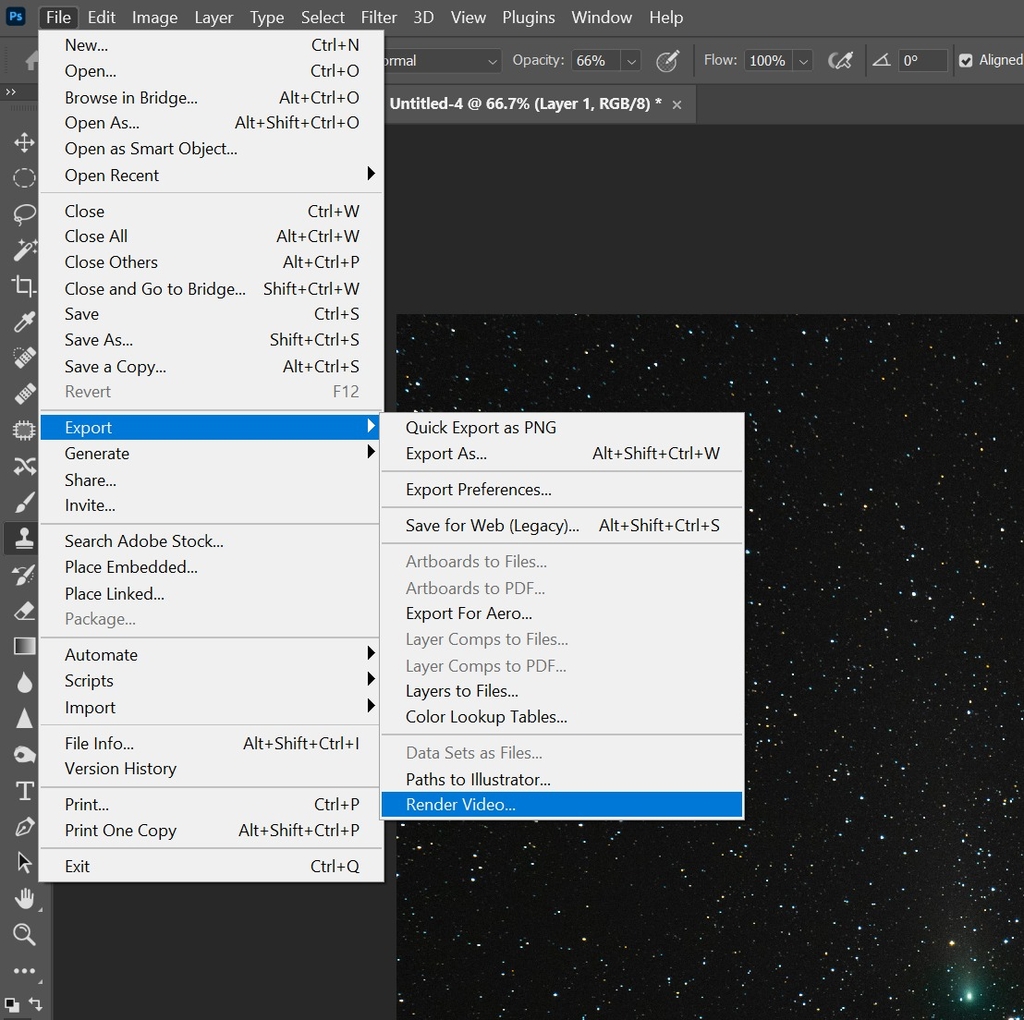
After it finishes pulling that into Photoshop the next thing to do is to hit File > Export > Render to Video.
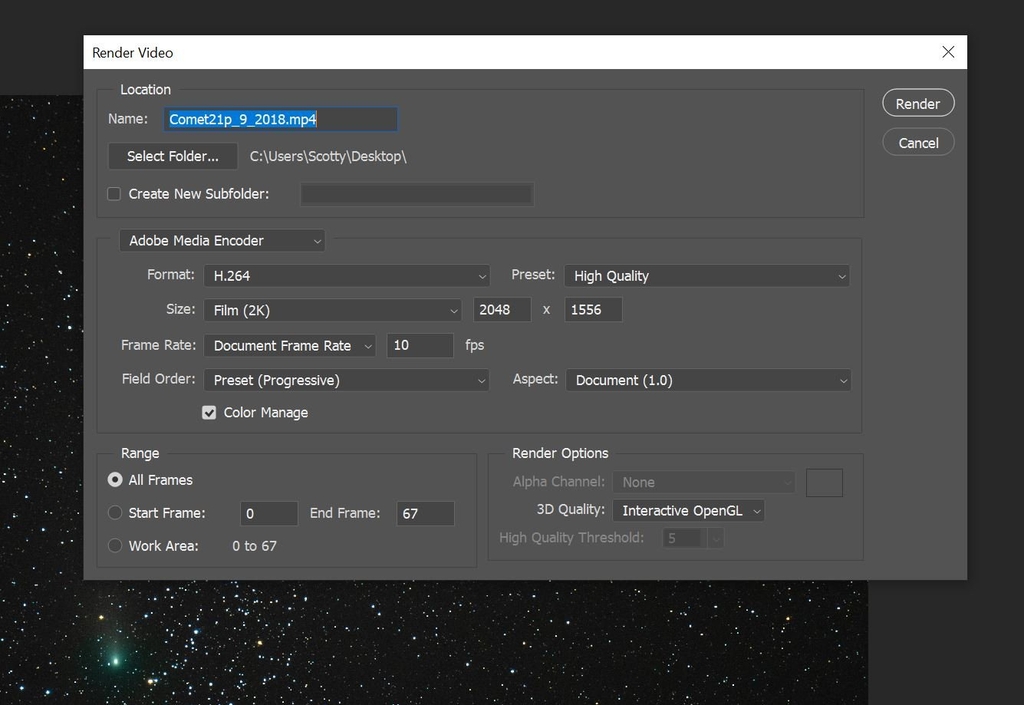
After this you will get a popup that allows you to rename things, check what kind of video you want, where to save the video, etc. I have this one renamed to what it is and when I took the images, set as mp4, and saved on my desktop. This is comet 21P from on back in September 2018, so as you can see I think it is a great idea to keep your data. Simply hit render and let Photoshop do it's work.
Once it is done you can simply double click and it will play in your default media player. You can also post to Youtube or Facebook if you want. I have went ahead and added it here. There are a few gaps because of me messing with things during capture, but here it is. A little over an hour of movement.
So if you have data that you would like to turn into a timelapse and you have Photoshop this is the easy method to do this with. Enjoy and post your results if you do one!
-----
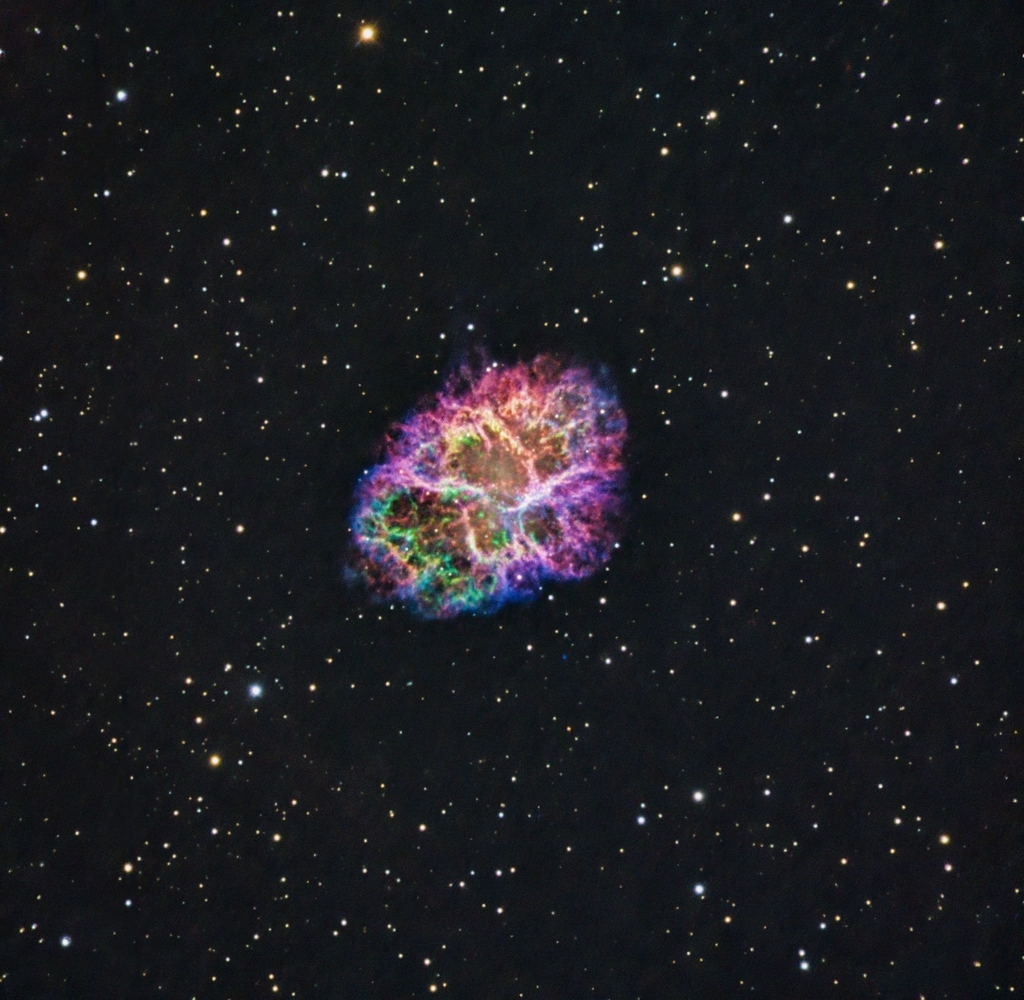
Of course any posting wouldn't be complete without an image from Telescope Live, so here is M1, the Crab Nebula from SPA-2. You can obtain this here: https://app.telescope.live/click-grab/all?telescope=42...
This blog post was originally published in our Telescope Live Community.
The Community represents Telescope Live's virtual living room, where people exchange ideas and questions around astrophotography and astronomy.
Join the conversation now to find out more about astrophotography and to improve your observation and post-processing skills!
