Fixing Gradients and Flat Field Issues in APP
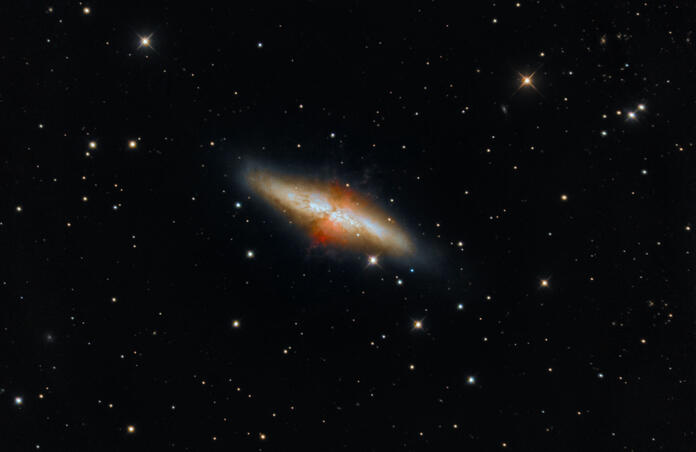
I imagine you have ran into a problem with uneven illumination or gradients in some of your images, and sometimes those simply will not calibrate all the way out with flats. When I first started on this astrophotography journey I had them all the time. I struggled with calibration frames, especially flats.
Manually doing what amounted to a background extraction and then burying the blacks was my first way to get around it. I was later told about this thing called Gradient Exterminator, and I got that, but in certain circumstances it would fall short giving a darkening around the object I was working on, basically overcorrecting things.
Later on I got this thing called Astro Flat Pro, and not only did it remove gradients, but also took care of noise. Unfortunately it would work too well and eat some of the object you wanted to keep, or if you pushed another slider to combat that it would cause you to introduce noise into your objects. I thought I was simply going to have to live with that, until I went with APP. It was a game changed on flat field correction (I don't use the correct vignetting tool). The Remove Light Pollution tool will be your friend, if you know how to use it.
Here I have an example from Telescope Live, an older set, the Cigar Galaxy from SPA-2, and found here: https://app.telescope.live/click-grab/all?target=Cigar
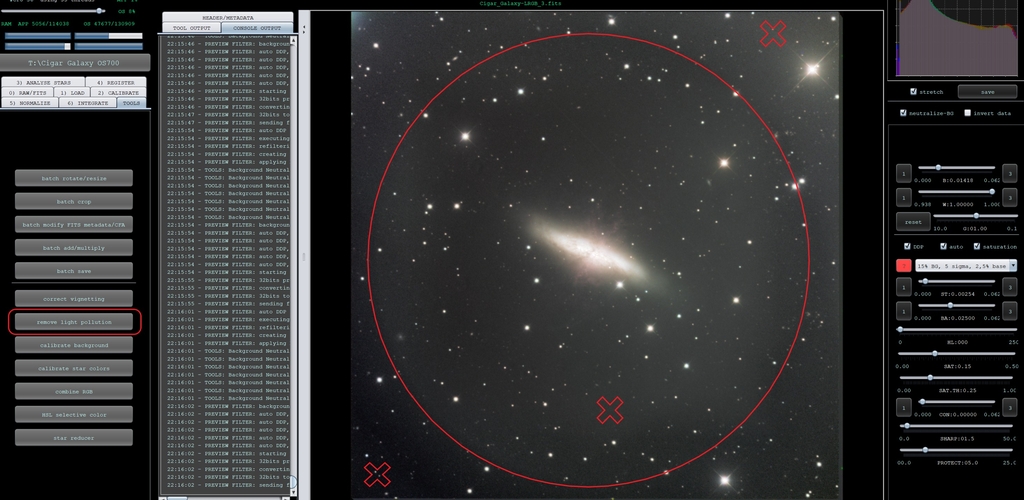
It is a nice set, but unfortunately it does have a weird gradient where it seems the field wasn't quite flat. It is a nice dataset, but there is that little bit in there that in the past I would have struggled with because if how it is not an evenly spread gradient, so I would have probably resorted to burying the blacks, which gives a look to the image that isn't so pleasing. In the past I also did this to try hiding blotchy color noise that looked worse after noise reduction turned it into smears, but dealing with that is a tutorial for another time.
As you can see where the X marks are, you have different levels of illumination, and where the large circle is you have a ring of darkness. We are going to use the Remove Light Pollution tool to get rid of this. Note that I did use the stretching feature and pulled the stretch higher than you would while doing a regular processing of this, and that is so I can see where my uneven illumination is. Also, you do not want to pull it so high that you start getting noise or blotchy areas in it. You want it to show where the problems are while still staying relatively smooth.
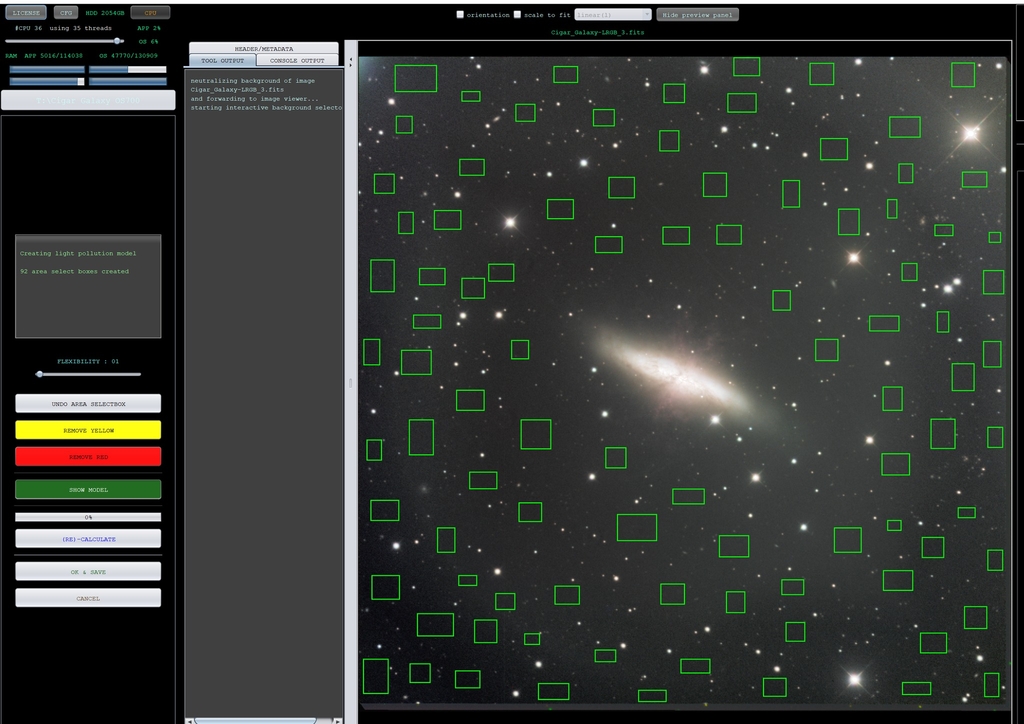
Normally you will need maybe 6 to 10 boxes when correcting a gradient, but in this case you will need to use a bunch in star free areas because of the complexity of this gradient. As you can see I put a ton of green boxes all over, making sure to keep stars out of them, and making sure to zero in around the gradient areas since this tool will try to calculate an average of the background and then put it in place, and if there is a light or a dark spot through an area that didn't get averaged out it will still be there, or worse, if you put them on the light areas around a dark area or vice versa you will actually introduce a worse gradient in there that is harder to fix.
Now that I have pushed the (re) - Calculate button you can see that I now have some red boxes, yellow boxes, and green boxes. The red and yellow are where the most correction was needed. Looking at the image it looks fairly even (ignore the upper left corner, that will be cropped out) and so I will go ahead and hit the OK & Save button right below the (re) - Calculate button.
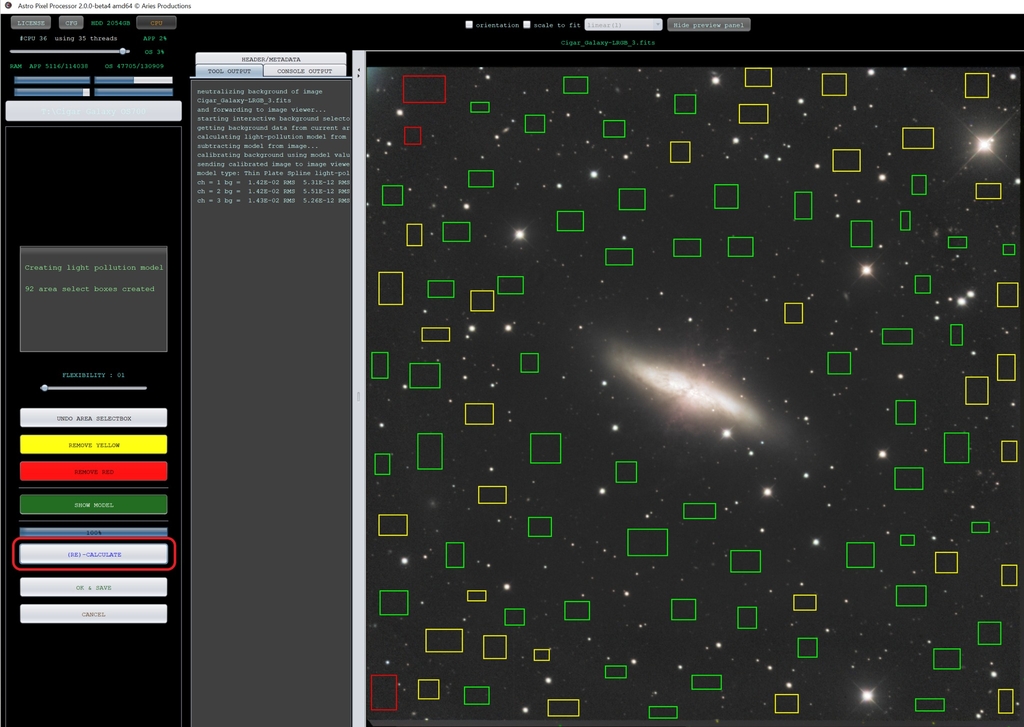
As you can see that took care of almost all of it. If you want to go back and try to finish off the little bit that is still in the top right quadrant you can use the tool again. In fact sometimes doing this is an iterative process that you can remove the red boxes and yellow boxes to keep going at it. In this case though I will easily take care of the remnant in post processing.
There you have it, the easiest way to get rid of gradients. It is far more user-friendly than ABE or DBE in PI, and it seems to work better than that does too. It blows away pretty well any other method. Best part is if you save it as an unstretched fits you still have a nice linear file to work with. I think the same holds true as a tiff file if you want to do all your stretching in Photoshop or another photo program that reads tiff files rather than fits files.
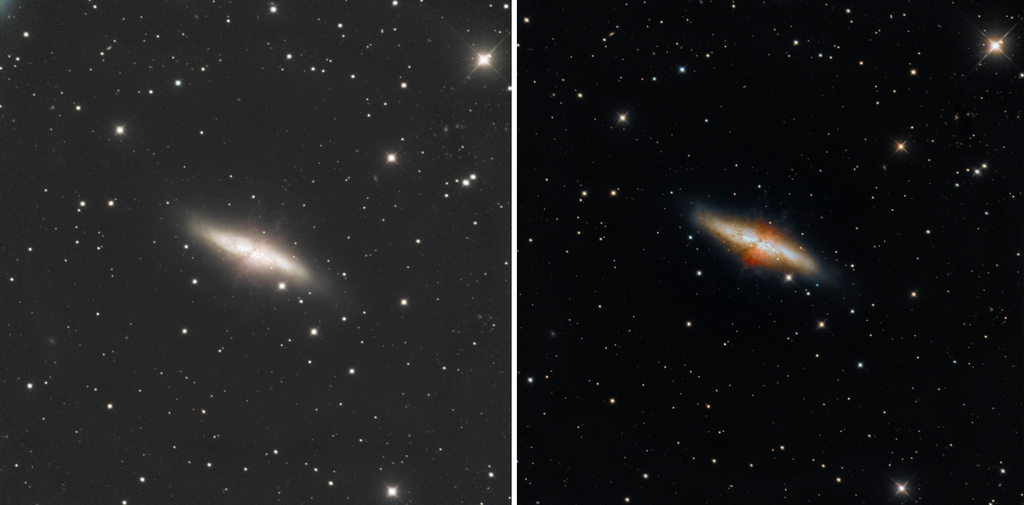
Here is what the final product looks like after doing this, M82, the Cigar Galaxy, taken with the SPA-2 setup and processed in APP and Photoshop.
This blog post was originally published in our Telescope Live Community.
The Community represents Telescope Live's virtual living room, where people exchange ideas and questions around astrophotography and astronomy.
Join the conversation now to find out more about astrophotography and to improve your observation and post-processing skills!
