How to do Mosaics in APP
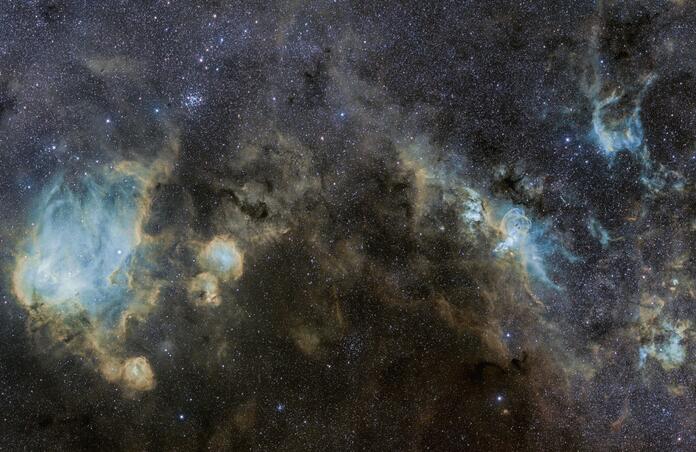
Astro Pixel Processor is an amazing tool for making mosaics. However making mosaics in Astro Pixel Processor is not very intuitive. If you simply threw everything you wanted to be part of a mosaic into it and let it run you are going to be waiting a while, and depending on how many subs you have, that while could mean a day or two.
Even though it doesn't seem to be in any of the instructions on it there is a way to make mosaics go pretty quickly! That is by doing standard stacks of each panel one at a time, then taking your masters and putting them back in as lights and running that as a mosaic.
First, group all your stuff and group it properly. I did a set of the Running Chicken, Statue of Liberty, and Eta Carina as a mosaic, so they are in one folder as a working folder.

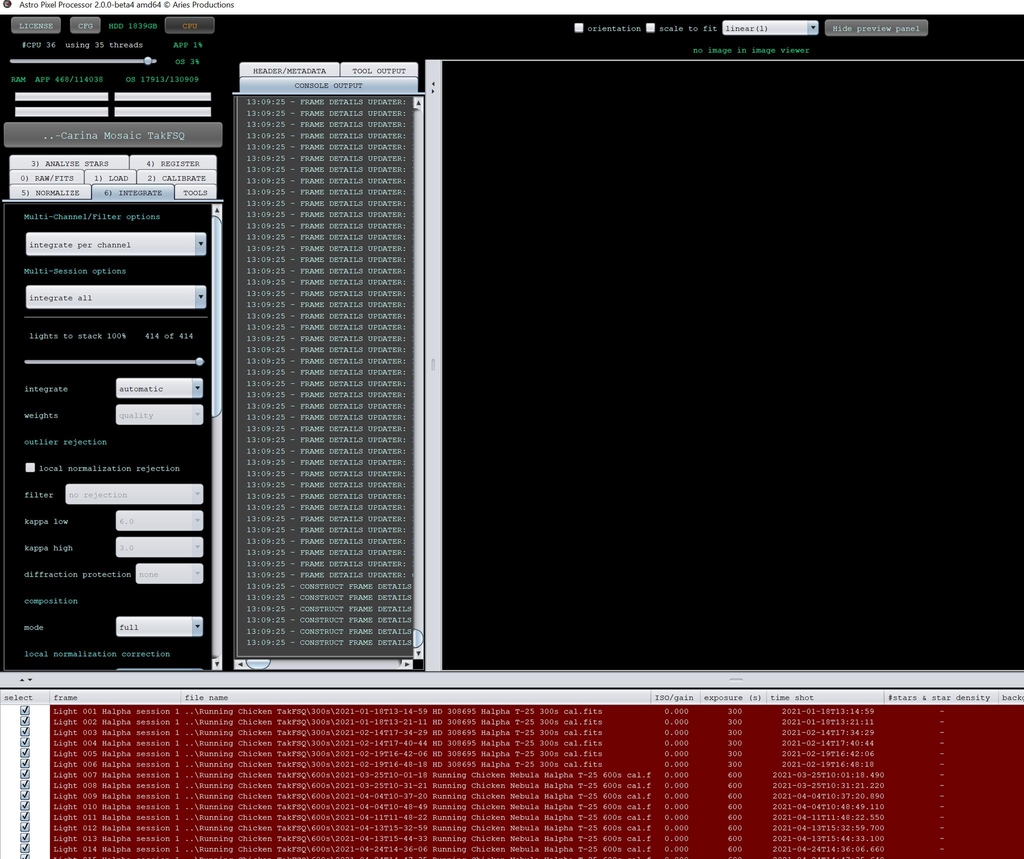
I will also break them down into panels, and if there are different sets of exposure length, into sessions. I also do anything shot with SPA-1, SPA-3, and AUS-2 as a 2x drizzle integration This is from my Running Chicken panel, which is panel 2 due to alphabetical order in the folder. Panel numbers do not matter, they only serve to help with the mosaic integration setup later on. So, do this as a normal registration and drizzle integration. You want it integrated per channel and to integrate all.
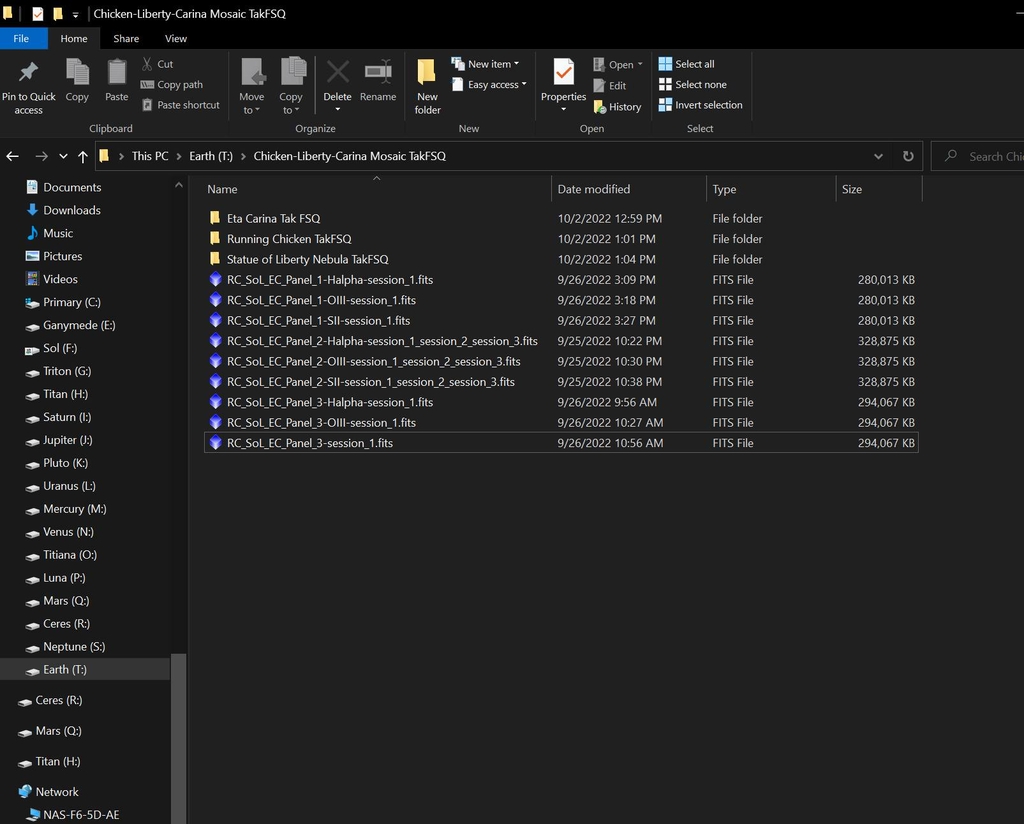
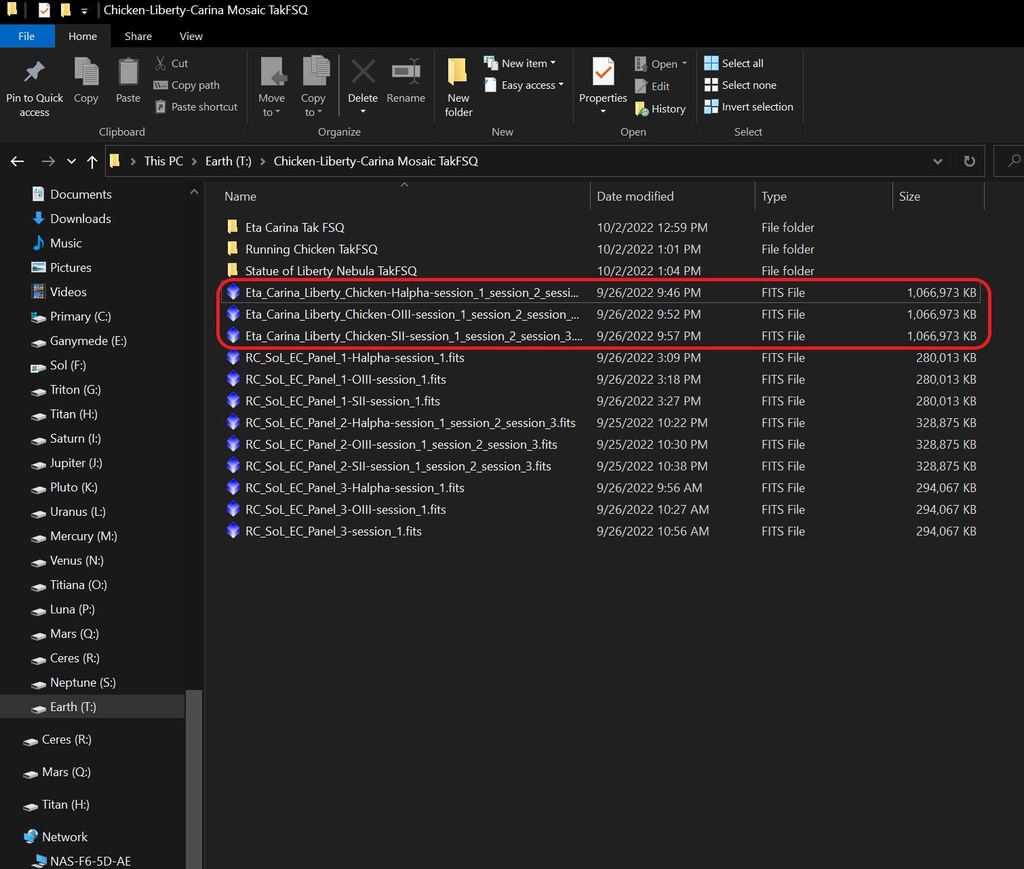
Once you are done with this you should have your directory with all of it looking something like this now, with each panel named. This is what you will need to have so you can do a mosaic. Remember, all you want are the masters for each channel, so you can delete the one that shows all three in one integration.
Now go clear APP as you have done between each individual integration. Load each panel set one at a time, and load them as an individual session. This is a 3 panel set, so you will need to run it as 3 sessions.

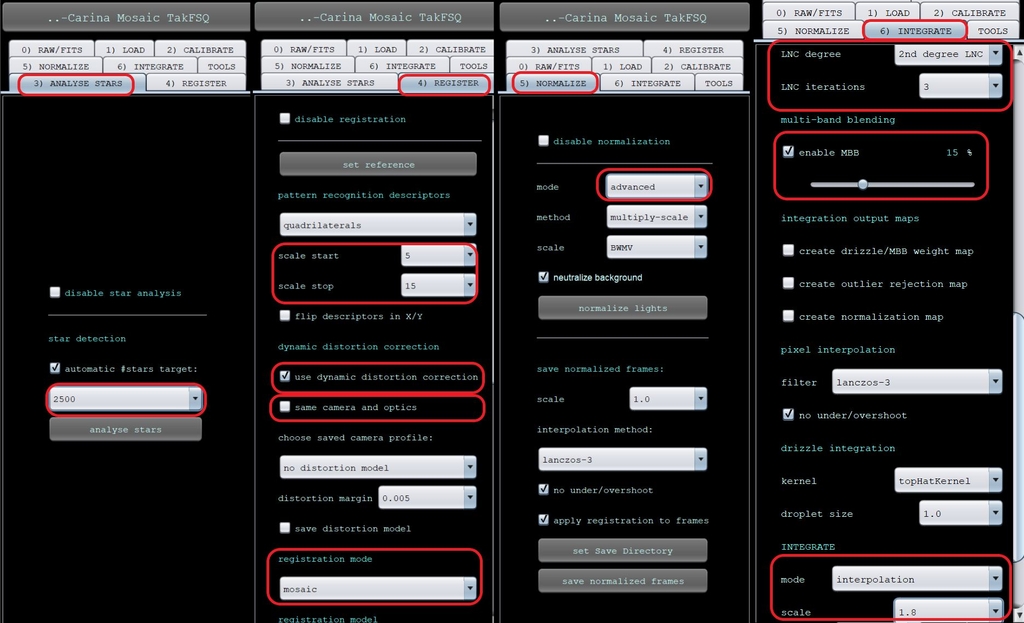
Next you will need to make some adjustments on your star analysis, registration, normalization, and integration tabs.
You want your star detection at 2500 on tab 3 .
You want scale start at 5 and scale stop at 15, use dynamic distortion checked, same camera and optics unchecked, and registration mode set as mosaic on tab 4.
You want mode set as advanced on tab 5.
On tab 6 you want LNC degree set to 2nd degree, LNC iterations set to 3, enable MBB checked and set to 15%, and mode set to interpolation with a scale of 1.0. You do not want to do drizzle at this point since you have already done a drizzle integration and since it will slow things down on a mosaic integration.
Now that you have these set go ahead and integrate. This may take some time depending on your computer. Once this is done you will have your master mosaic files all ready to go. They will be fairly large.
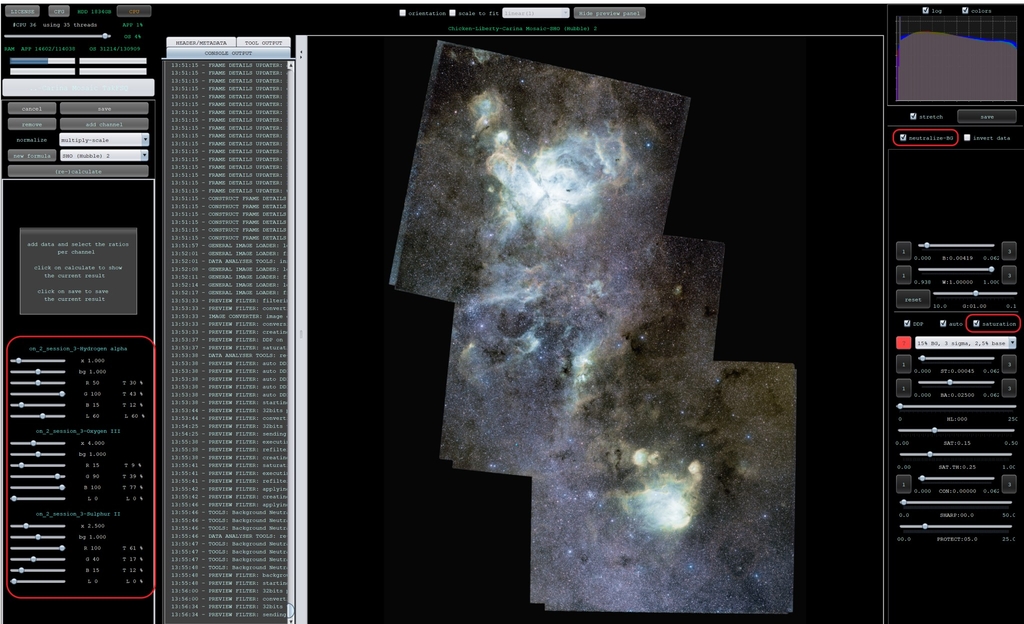
Next go to the tools tab, select combine RGB, and then select whatever you want. For this one I did SHO Hubble 2 and then made some changes with the sliders to get what I wanted. Also, make sure neutralize background and saturation are checked. I also leave the stretch set to the initial setting since I want to see what I have..
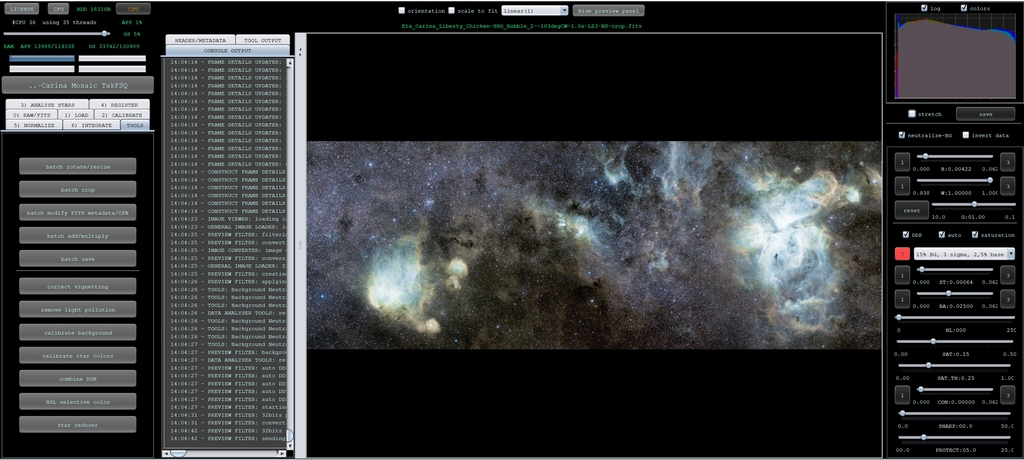
After this I use the tools tab to rotate if needed, then crop if needed, which both were on this image, then I save it with stretch unchecked if there are super bright areas in the integration even as the lowest auto stretch levels. I like to save it as a 16 bit tif at this point and bring it into Photoshop to finish up.
And of course, here is the result of this one.
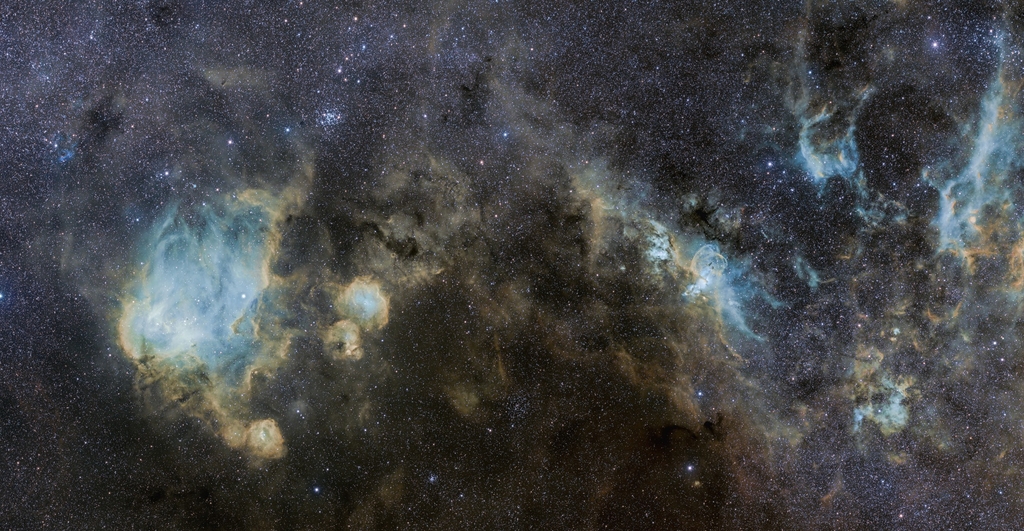
You can get everything used in it here:
Image 1
Image 2
Image 3
Image 4
This blog post was originally published in our Telescope Live Community.
The Community represents Telescope Live's virtual living room, where people exchange ideas and questions around astrophotography and astronomy.
Join the conversation now to find out more about astrophotography and to improve your observation and post-processing skills!
