How to Enable GPU Acceleration in Pixinsight


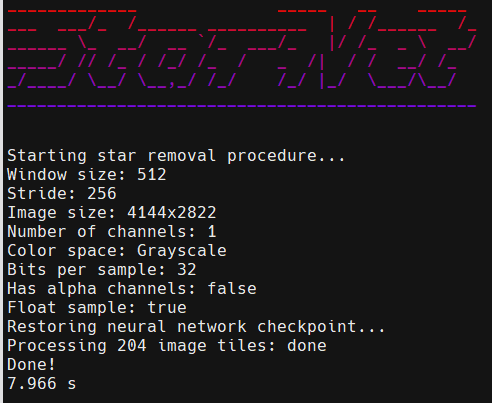
Certain processes in PixInsight, like StarNet2 and the RC-Astro XTerminator tools, benefit greatly if using your GPU rather than CPU. Normally they take minutes to finish when using the GPU, but with an Nvidia CUDA capable GPU they will finish in seconds.
This tutorial was inspired by the guide made by darkarchon, and updated to support newer GPUs by rikutalvio. I have to give a big thanks to them, because without them who knows if we would have this. A special thanks to RT-- on the Pixinsight forums for giving me permission to share his updates here at Telescope Live.
As a warning you should only try this if you are comfortable making changes to some of the files in your system. Use this at your own risk. This unfortunately will not work with AMD cards, Intel Arc cards, or integrated graphics.
To keep things simple, the guide covers the necessary files and steps to make PixInsight use the GPU, and nothing more. The software used here should work on most Nvidia GPUs from the last ten years; from the GTX 900-series to the RTX 4000-series. I can personally confirm it works on the RTX 4090. These instructions cover 64 bit versions of Windows 10 and Windows 11.
Before proceeding, open the following link, and make sure that your GPU has Compute Capability 3.5 or higher. https://developer.nvidia.com/cuda-gpus
Use the 64-bit version of Windows 10 or Windows 11
Update the GPU drivers; the software used here requires driver version 452.39 or higher.
Log in to your developer account on the NVIDIA website. If you don't have one, create one for free at https://developer.nvidia.com/login
Next you need to download the following 4 files:
NVIDIA CUDA Toolkit 11.8.0 <-- Important, you must use this version only. This will not work with other versions, including 12.xx
NVIDIA cuDNN 8.7.0 for CUDA 11.x
TensorFlow 2.9.0
zLib DLL x64 1.2.3 <-- You mus right click and "save as" for this. You will get a warning from Windows asking if you are sure. You have to allow this to download.
If you have previously installed CUDA you will need to uninstall it unless you are using it for something else.
First you will need to replace Tensorflow. Go to 'C:\Program Files\PixInsight\bin'
Rename tensorflow.dll to tensorflow-old.dll in case you want to use it later and don't want to re-install it. Open libtensorflow-gpu-windows-x86_64-2.9.0.zip then extract tensorflow.dll from 'lib' to 'C:\Program Files\PixInsight\bin'

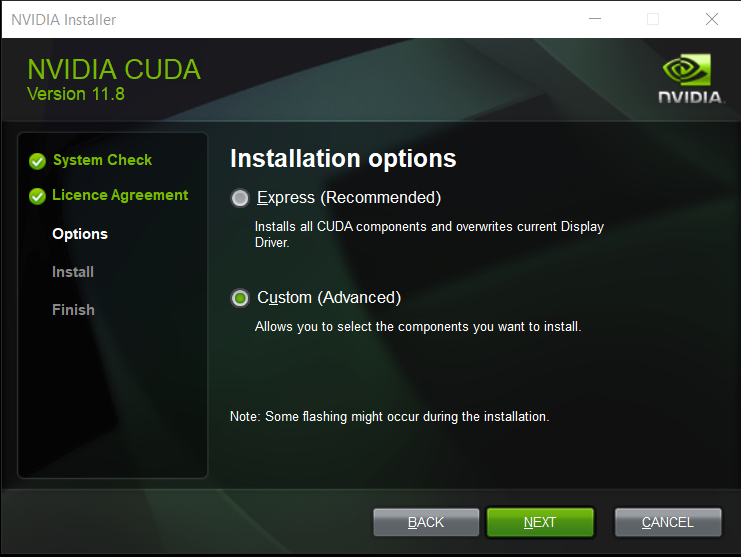
Next you will install CUDA Run cuda_11.8.0_windows_network.exe and select 'Custom (Advanced)'
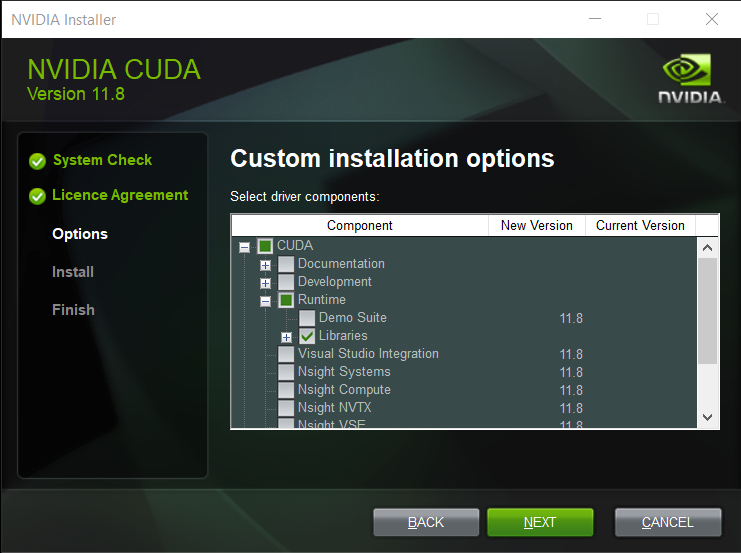
Deselect everything, then select 'Libraries' in CUDA > Runtime. Once you have done that click next, and proceed with the install. This is quite a large install, somewhere around 80gb if I recall, so it might take a while.
The following is what you will see on these previous steps.
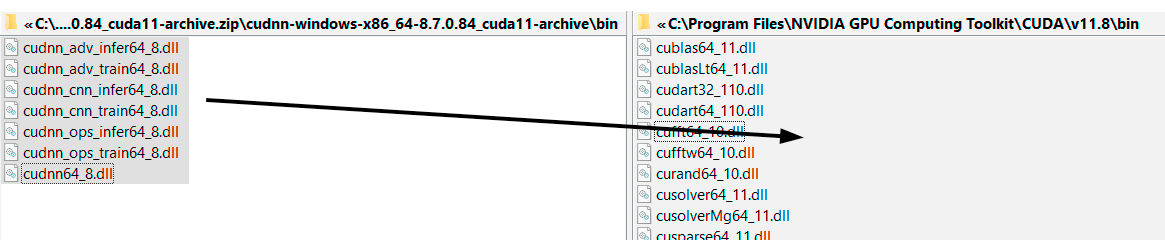
Next you will install cuDNN.
Open cudnn-windows-x86_64-8.7.0.84_cuda11-archive.zip and extract the contents of the folder 'bin' to 'C:\Program Files\NVIDIA GPU Computing Toolkit\CUDA\v11.8\bin'
Overwrite existing files if you are updating from another version.
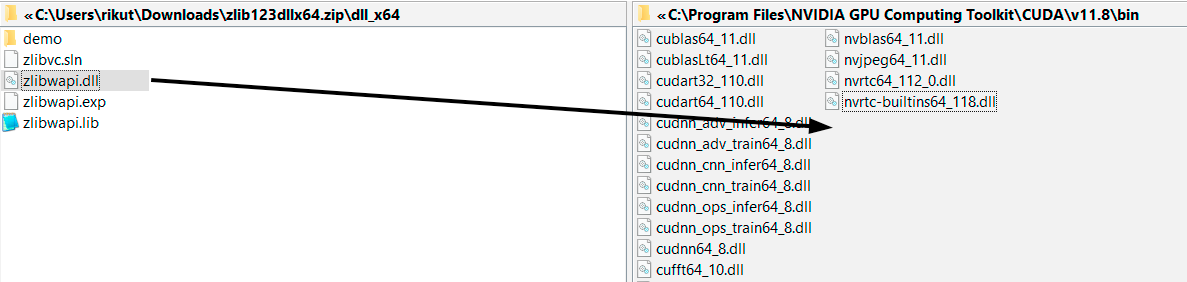
Next you will install zLib.
Open zlib123dllx64.zip and extract zlibwapi.dll from 'dll_x64' to 'C:\Program Files\NVIDIA GPU Computing Toolkit\CUDA\v11.8\bin'
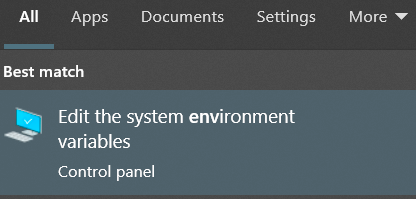
The next step is to edit the environmental variables. Open the start menu, search for 'environment', and click 'Edit the system environment variables'
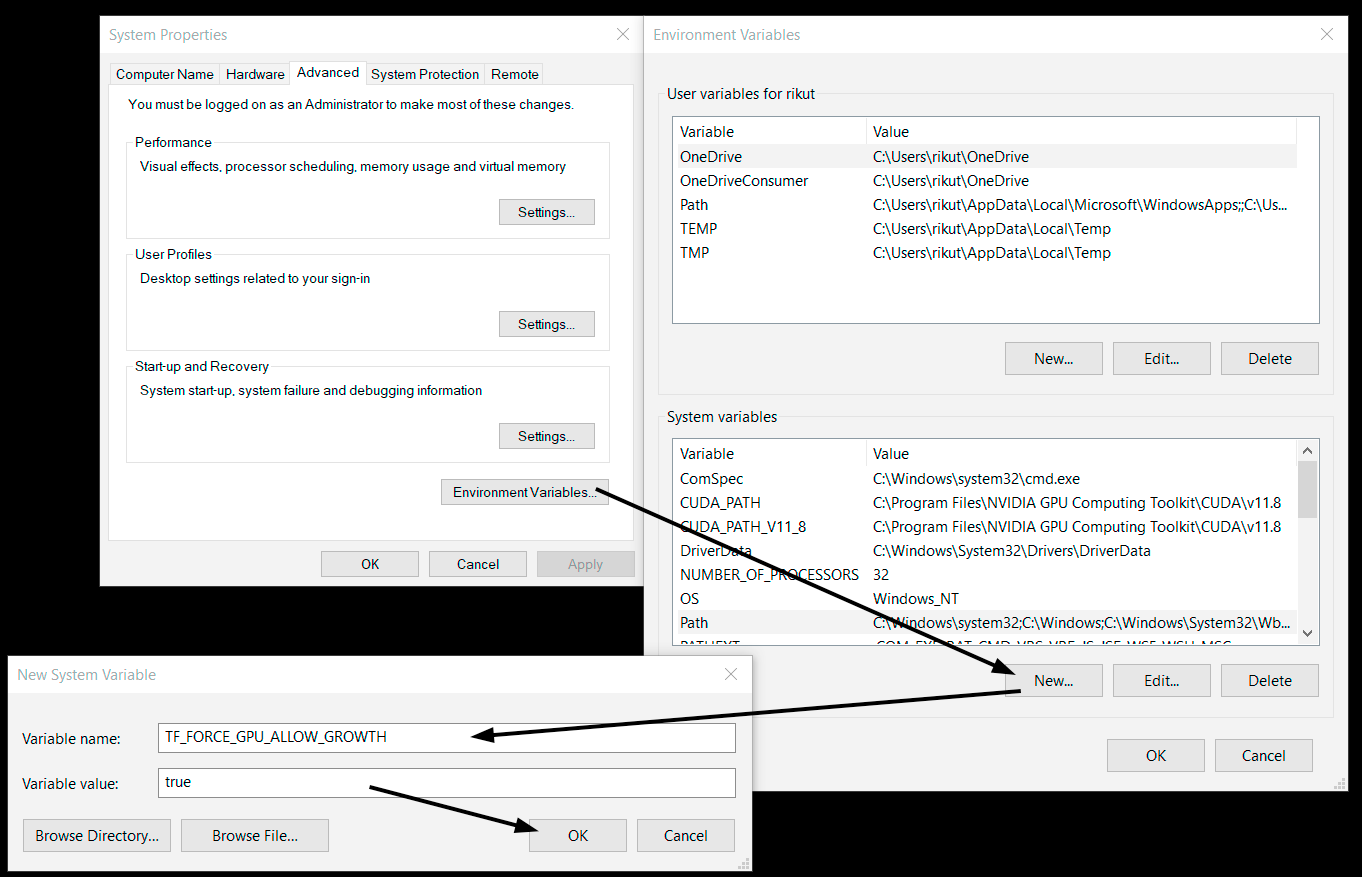
Click 'Environment Variables', then under 'System variables' click 'New' and enter "TF_FORCE_GPU_ALLOW_GROWTH" as name and "true" as value, then click 'OK.
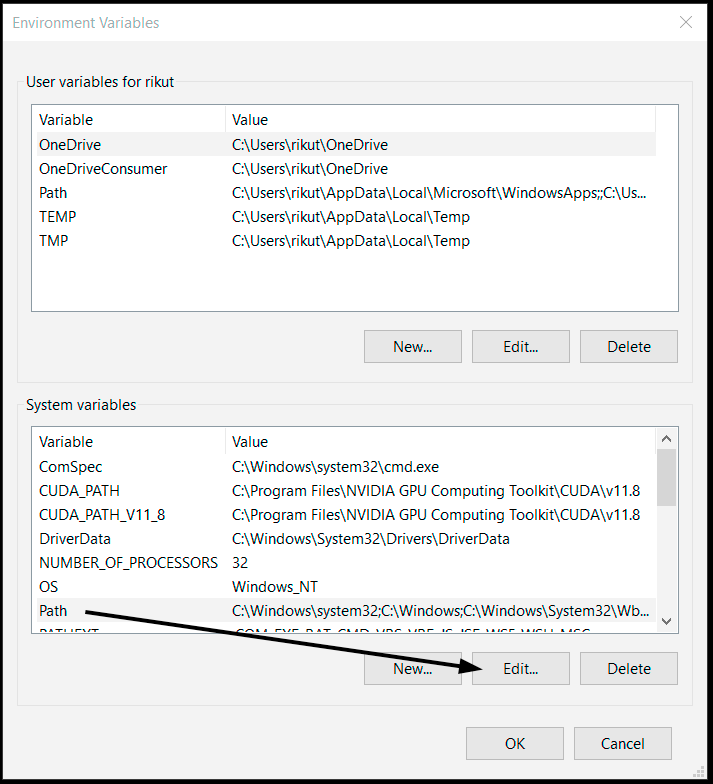
Select the variable called 'Path' under 'System variables' then click 'Edit'
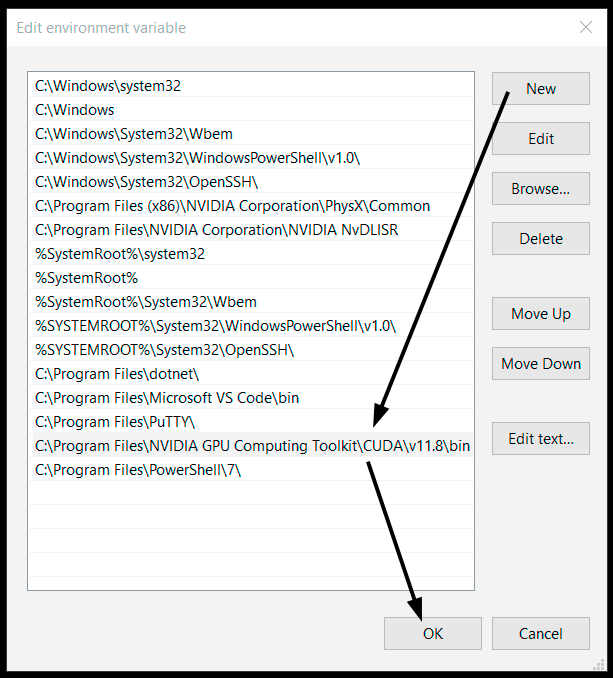
Click 'New' and add "C:\Program Files\NVIDIA GPU Computing Toolkit\CUDA\v11.8\bin"
If you had previously installed a different version of the CUDA Toolkit there might be a path pointing to that version so remove it if you don't need it, otherwise move it down below 11.8 on the list then click 'OK' to save and exit.
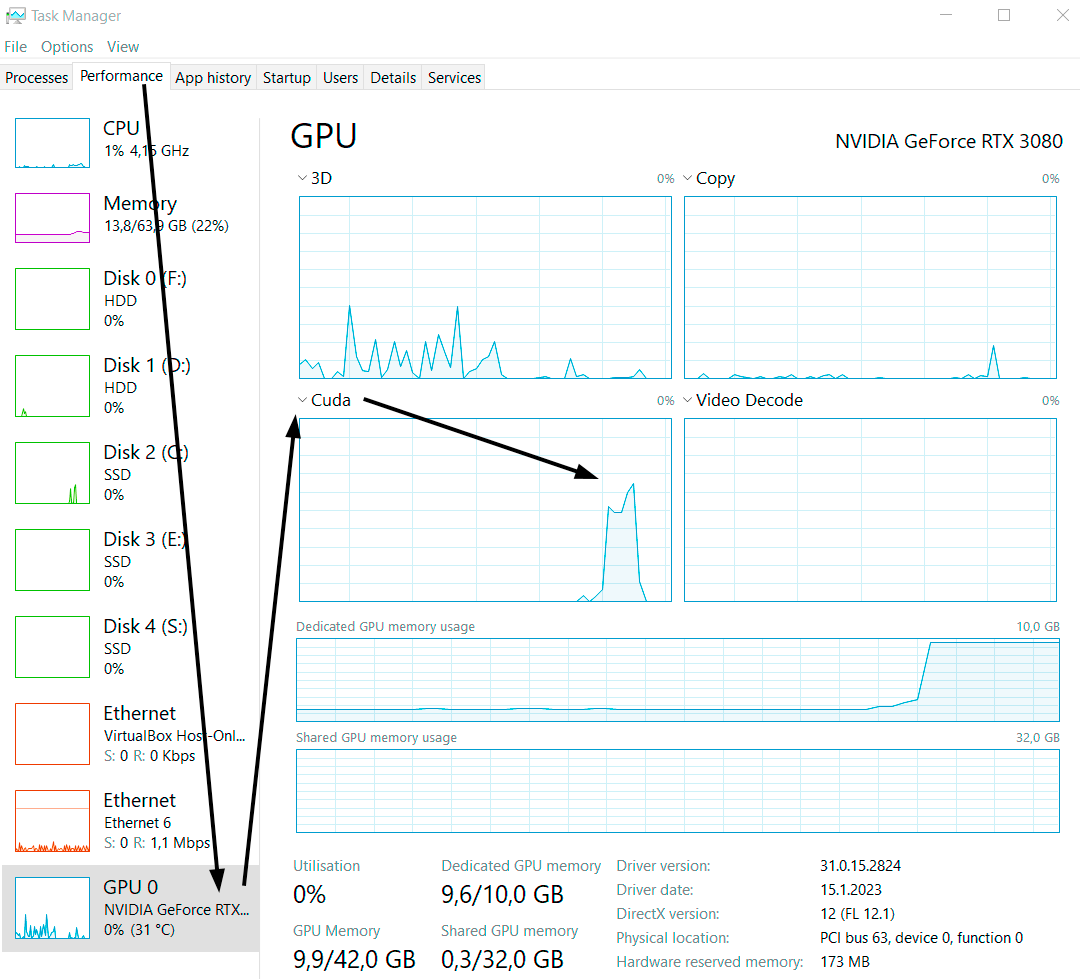
The next step is to test it out. Open an image in PixInsight and run StarNet2 or any RC-Astro Xterminator tools. You will know that it is working if it is a whole lot faster than before. A successful install will also show up on the GPU performance monitor when processing and depending on your setup it can be either in the 3D graph or the Cuda graph.
The Cuda graph is not visible by default You can select it from the dropdown by clicking 'Video encode'.
On some systems the Cuda graph is not available at all. It might be caused by hardware-accelerated gpu scheduling. Try disabling it by searching the Start Menu for "Graphics settings"
There you should find a toggle to turn off Hardware-accelerated GPU scheduling. Reboot, and see if you get more graphs to choose from.
Troubleshooting steps:
If CPU usage increases instead of the GPU, then re-do steps 1, 3 and 5. If PixInsight crashes, re-do step 4. If it is still not working re-do everything
PixInsight re-installs and major updates will overwrite the tensorflow.dll, so step 1 must be re-done occasionally.