How to kill glow around bright stars?


I would like to talk to you about a technique I use for killing glow around bright stars when you accidentally image during a night that has more moisture in the air than you would think. I did that for almost 80x 300s subs trying out a new camera.
If you're like me you get annoyed and then go through all your subs to find the offending ones and then slap them into another folder just in case you need them (I label min "fog") and then most likely ignore them. But what if all of them are like that for an OSC, or you have data from another night that was say, your blue channel? What then?
After you do your stacking, stretching etc. in whatever program you like (I stacked in APP, stretched etc. in PI) you would want to bring your image into Photoshop to do it how I did.
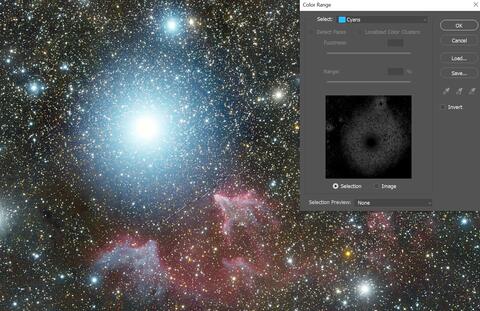
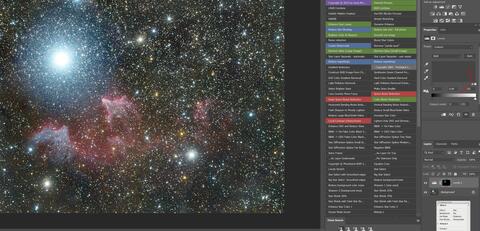
Then you need to use the lasso tool and go around the offending star so it makes it and anything else a selection, and don't be afraid to get way out from it because you're only going to be suppressing one or two colors. Notice the "marching ants" in the first screenshot.

Next, you're going to do Select > Color Range and pick in this case cyan since that is the strongest of the glow in there. Notice in the next screenshot that it is zoomed into where the offending glow is because that's what I selected with the lasso tool.
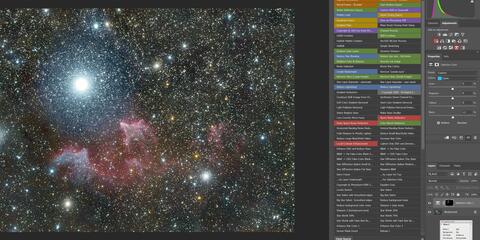
You will then hit OK to make the selection, then go over to the levels and select it. Notice that you should have a layer that shows your selection. Grab the middle triangle in the levels selection and slam that thing all the way over to the light side. I left it out so you can see what I did. Also notice you will start seeing that glow go.
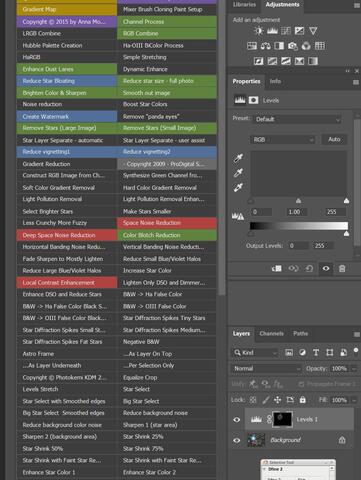
Repeat the previous steps a couple times, but don't go so far that you ruin your star. Also, you will see an message about less than 50% of the pixels were selected. Ignore it. You may have to do an iteration or two of the second strongest color in the glow, which in this case was blue.
Remember to flatten then image each time. And then go to Selection > Reselect to get the area you want. You will see no indication that you actually selected the part that the Lasso tool got before until you make a new levels layer.
You can also use this with the hue and saturation or the selective color adjustments to get what you desire and to maybe push some of the coloring back in to even things out or bring your star colors back up in the area.
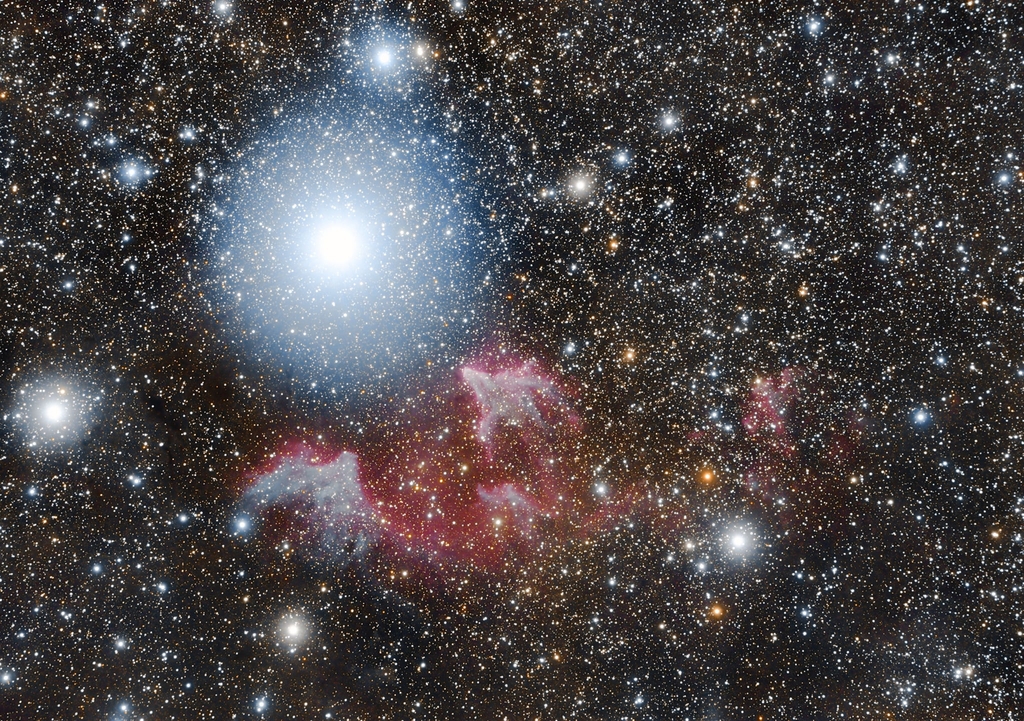
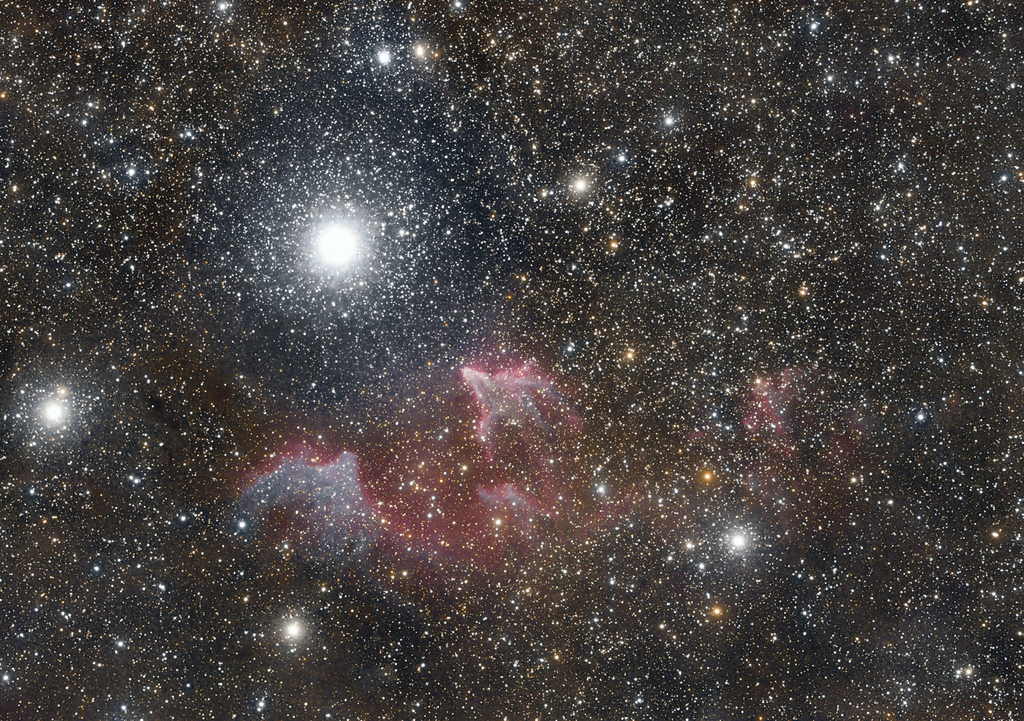
So there you have it! Now instead of tossing something with a huge amount of glow from a star due to moisture in the area you can recover enough of it to make the difference between an image you would post and one you wouldn't. Why don't you give it a try and then post the before and after here? You can see how much of a difference this makes with my before and after shots!
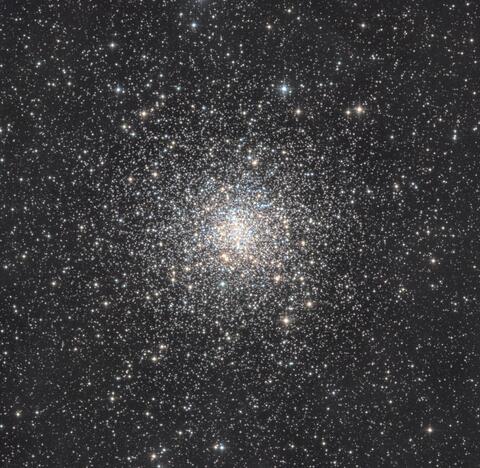
Of course it wouldn't be right to make this post without tossing in a nice image I've gotten through Telescope Live, so here you go, M4 with a bunch of One-Click Observations during the summer.
This blog post was originally published in our Telescope Live Community.
The Community represents Telescope Live's virtual living room, where people exchange ideas and questions around astrophotography and astronomy.
Join the conversation now to find out more about astrophotography and to improve your observation and post-processing skills!