The most used tool in my post-processing workflow

What is your most used tool/technique/tip/trick that you utilize almost always?
It can be a little thing that you don't even realize is there with you ever since you created your workflow.
I thought about this question lately. What would be that technique which stuck with me throughout my journey?
Today I'd like to tell you what I consider the most used tool in my post-processing workflow and why I think it is so powerful.
For me, this "tool" is Blend-if in photoshop.
For those how are not familiar with it, Blend-If is a tool in Photoshop where you can fine-tune how a layer blends with others.

On the first image you can see how you can find it.
Just double click on the right hand side of any layer.

As you can see on the second image, there is a lot that you can control on this page.
You can find the general opacity and fill as well as the Blend if at the bottom.
In Blend-if you can choose cut-off brightness values both for the current and the underlying layer and both for dark and light values. In its default position, all the previously set blending is applied to the layers.
The current layer will be applied to those brightness values which remains between the 2 points.
This is the same for the underlaying layer. You can take away the current layer from the underlaying layer by changing the cut-off points.
Those sliders can be split by alt+clicking on them which will change the cut into a range for smoother transition.

Now here are some of the benefits how you can utilize this tool for.

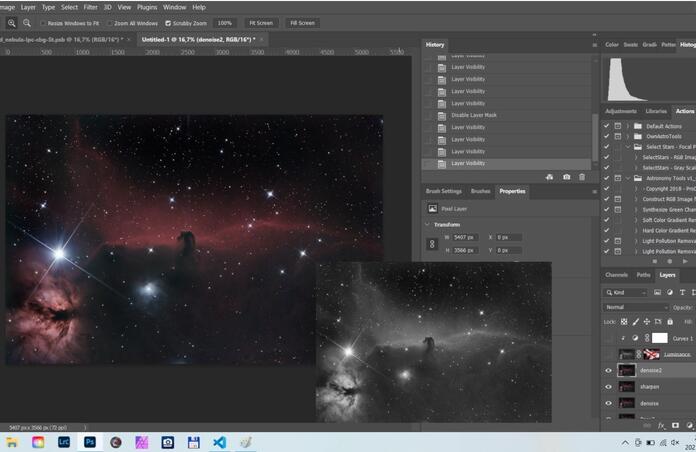
On the 4th image you can see my picture of the Horsehead nebula and a luminance mask created from it's red channel and modified with curves to be more contrasty.
To add some punch to the image lets apply this layer with the blending mode: Color dodge. (this is the dodge part of dodging and burning) It is equivalent of a very precise dodging.

Now this is very harsh as you can see on the 5th image so lets take it's effects away from the underlaying layer where it is too much.
On the 6th image you can see that the cut-off point makes a harsh cut.

On the 7th image though there is the fine-tuned blended result where we maintained the dodging on the parts we wanted. (Before and after).

There are a lot of possible ways you can use this tool so I'd like to show another case.

Check out on the 8th image when a sharpening looks "good" on the nebulae but looks terrible on the stars. Usually we do star masking or removal but this case we can use Blend if. On the next image you can see how can this tool protect the stars while keeping the sharpening the same on the nebulae.

The last image is just a show off of my finished image at the end.

So that was my most used tool.
I'm looking forward to hear what is your most used one and how frequently do you use it.
This blog post was originally published in our Telescope Live Community.
The Community represents Telescope Live's virtual living room, where people exchange ideas and questions around astrophotography and astronomy.
Join the conversation now to find out more about astrophotography and to improve your observation and post-processing skills!