Photoshop Processing of Nebulae using RC Astro Plugins


Here is my Photoshop Processing from beginning to end for both nebulae and for dust. It will also work for other things you do not want the stars to be too much on. You will need to have Russel Croman’s StarXTerminator, StarShrink, and NoiseXTerminator for this workflow, though for noise you can also use Topaz Denoise or Nik Collection Dfine.
First you will need to start with a lightly stretched image. For this workflow we are going to assume a lightly stretched image, preferably a 16 bit tif file. You can use APP, Pixinsight, Affinity, or any other program to get yourself there. Notice, I said lightly stretched. You only want it stretched to the point that all of your stars are fully visible and where you can see a little of the dust or nebula.
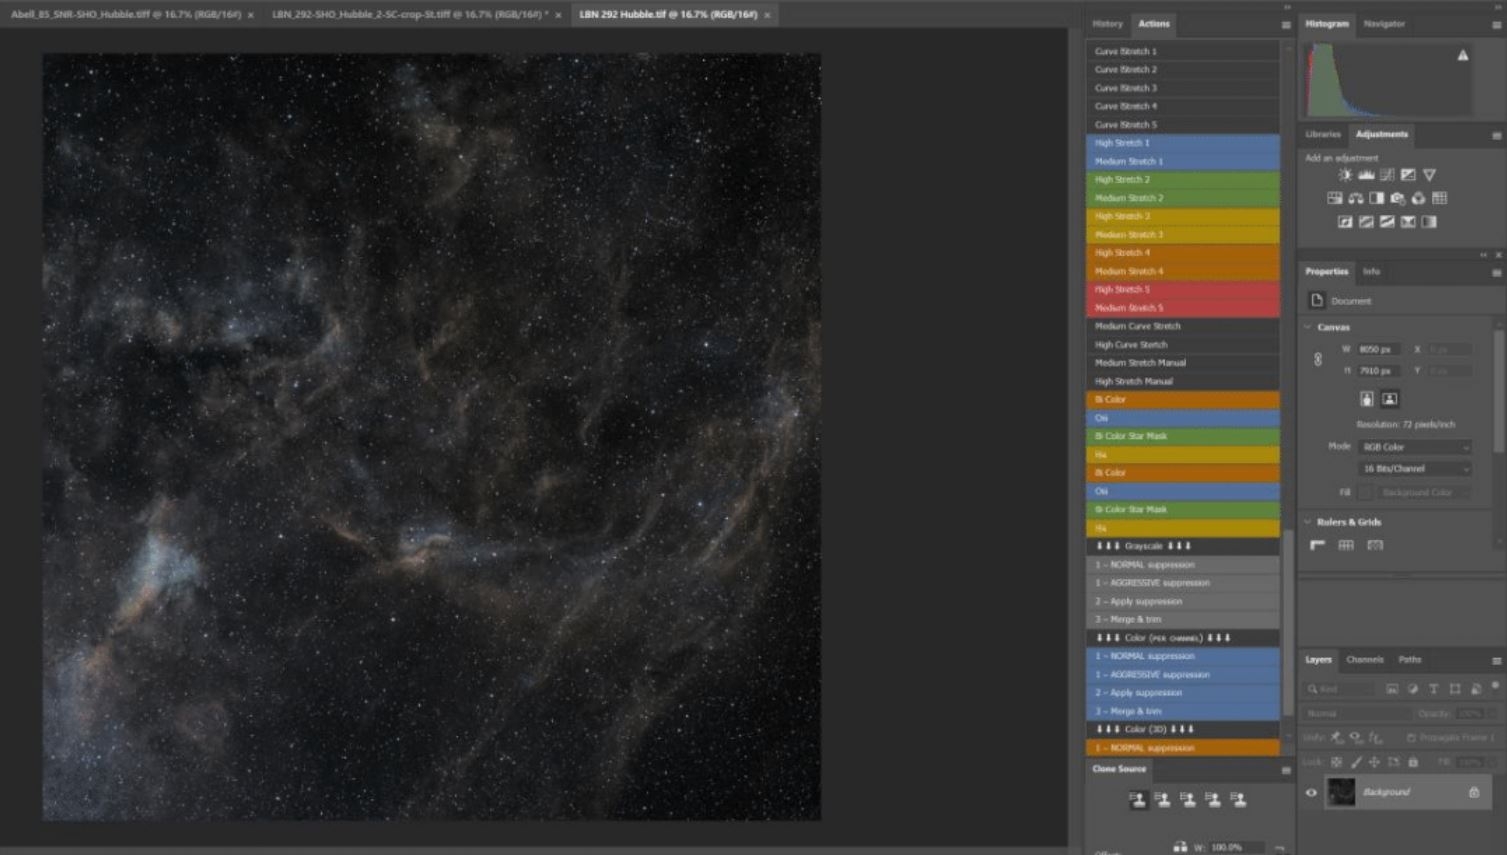
For this I am going to start with the output from APP with some extra saturation put in the redchannel, with the Note the position of the histogram and the colors on the image. Also ensure you are in RGB mode and in 16 Bits/Channel mode. 32 bits would be nice, but unfortunately most of Photoshop doesn’t work for 32 bits. 8 bits will simply hurt your processing flowdue to less information.You will only change to an 8 bit per channel image when it comes time to save it as a jpeg.
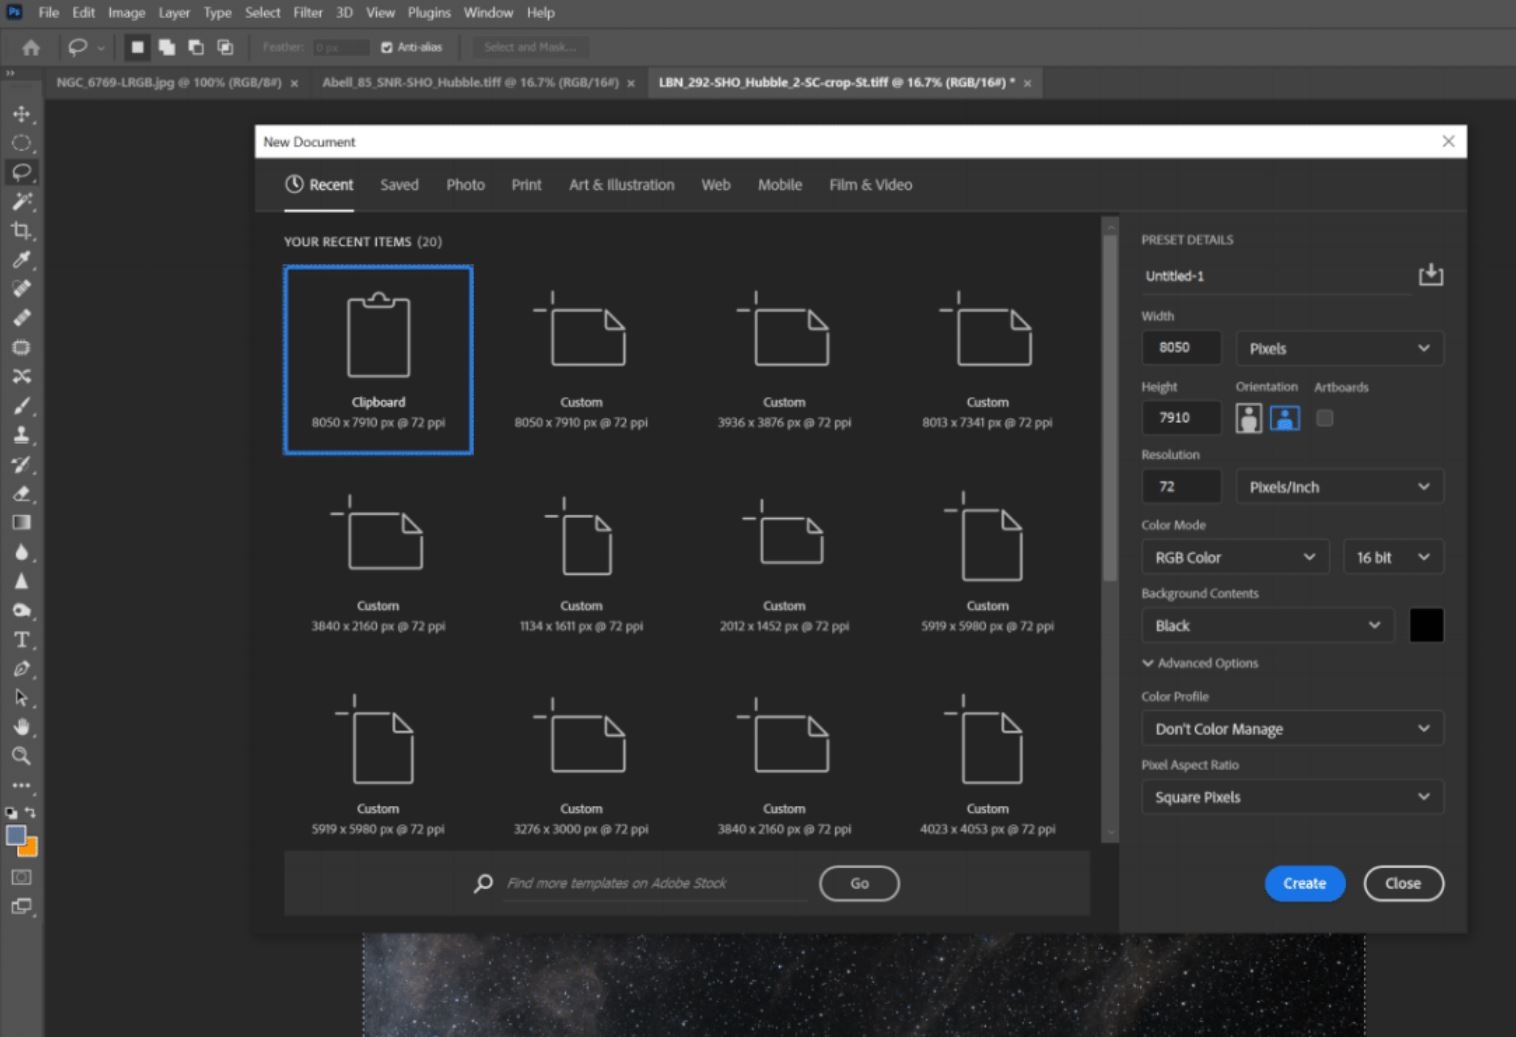
The first thing you will do is click on the image, hit ctrl + a, ctrl +c, and then File > New, and use clipboard, making sure that the information to the right in the dialog box matches what you are working with, then click create.
You will then hit ctrl +v to paste the copied image into the new one. After this do Layer > Flatten Image. Go ahead and do file > save as, and name it what your final image will be. Make sure you save it on your computer and as a 16 bit tif because Photoshop will try to save it to creative cloud and will try to save it as a .psd. Also, stay with the defaults in the dialog box you will get when saving it. Once done you will have this. Notice the name on this tab.
After you have done this do a curve stretch to bring up everything in the image, including the stars, but make sure to not blow anything out. Here is my example:
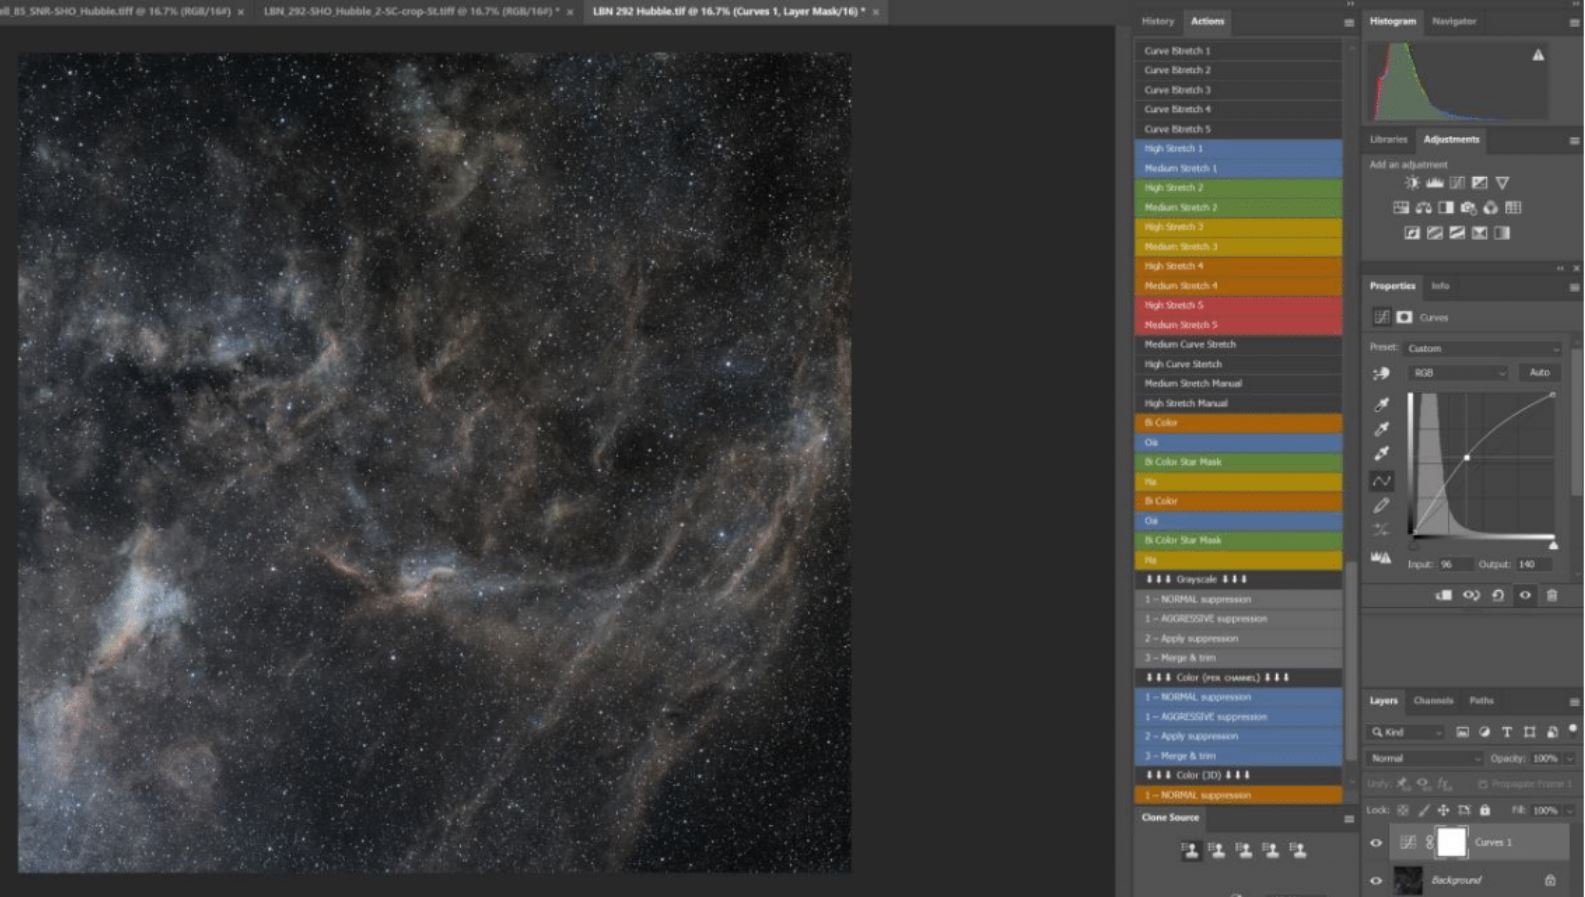
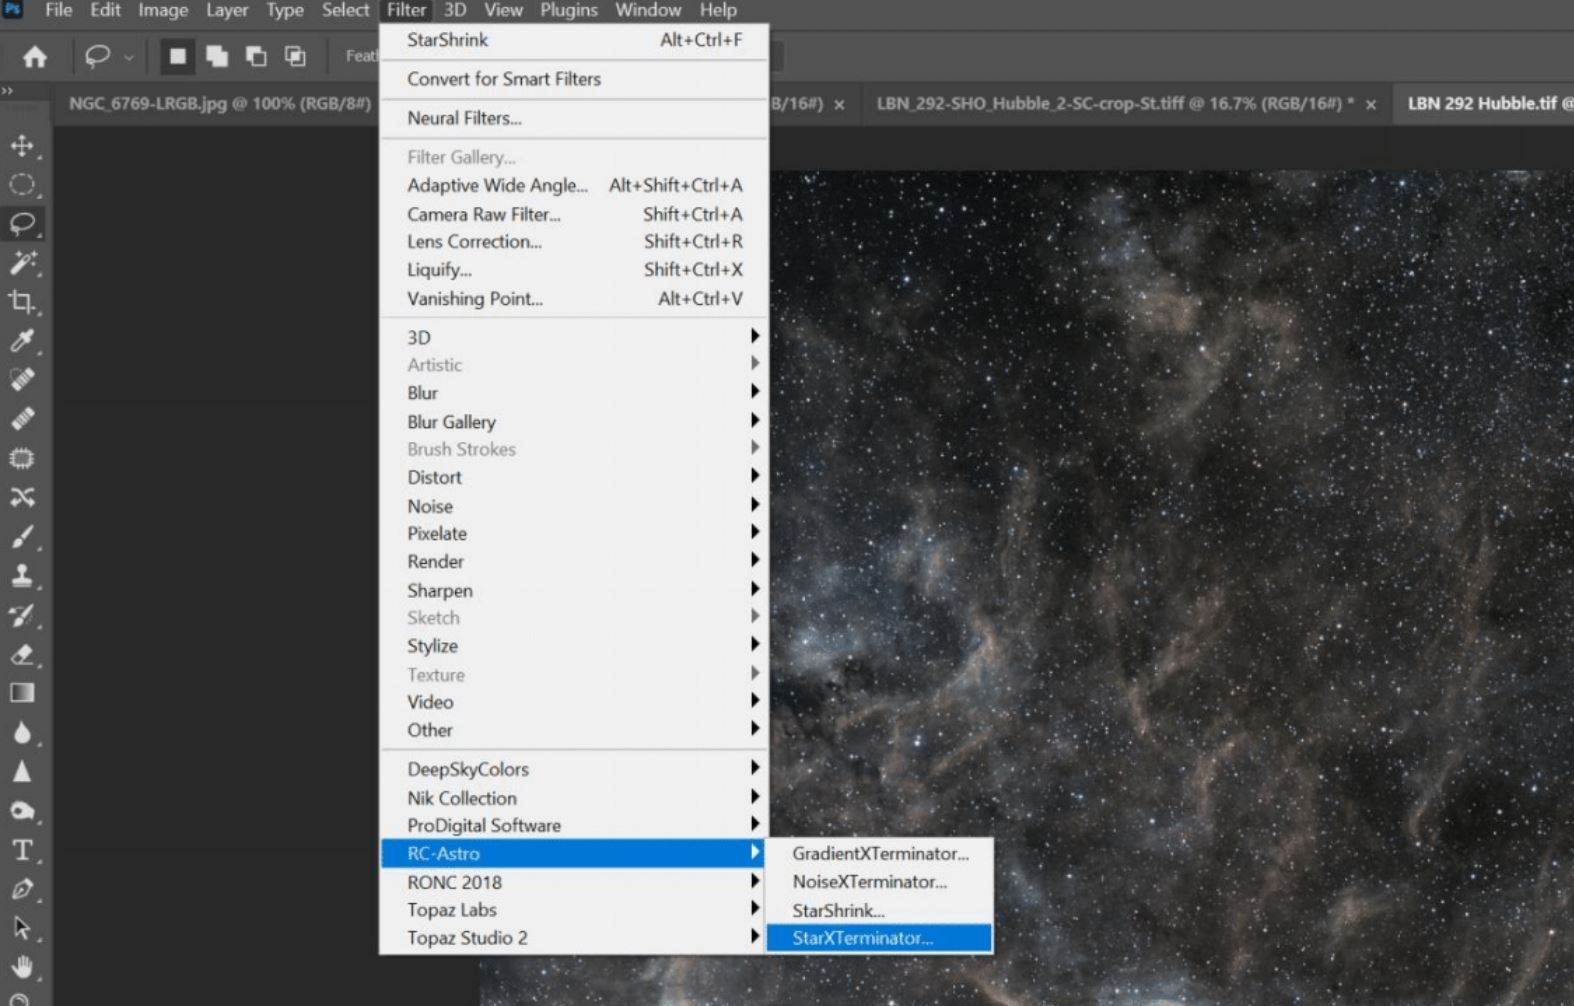
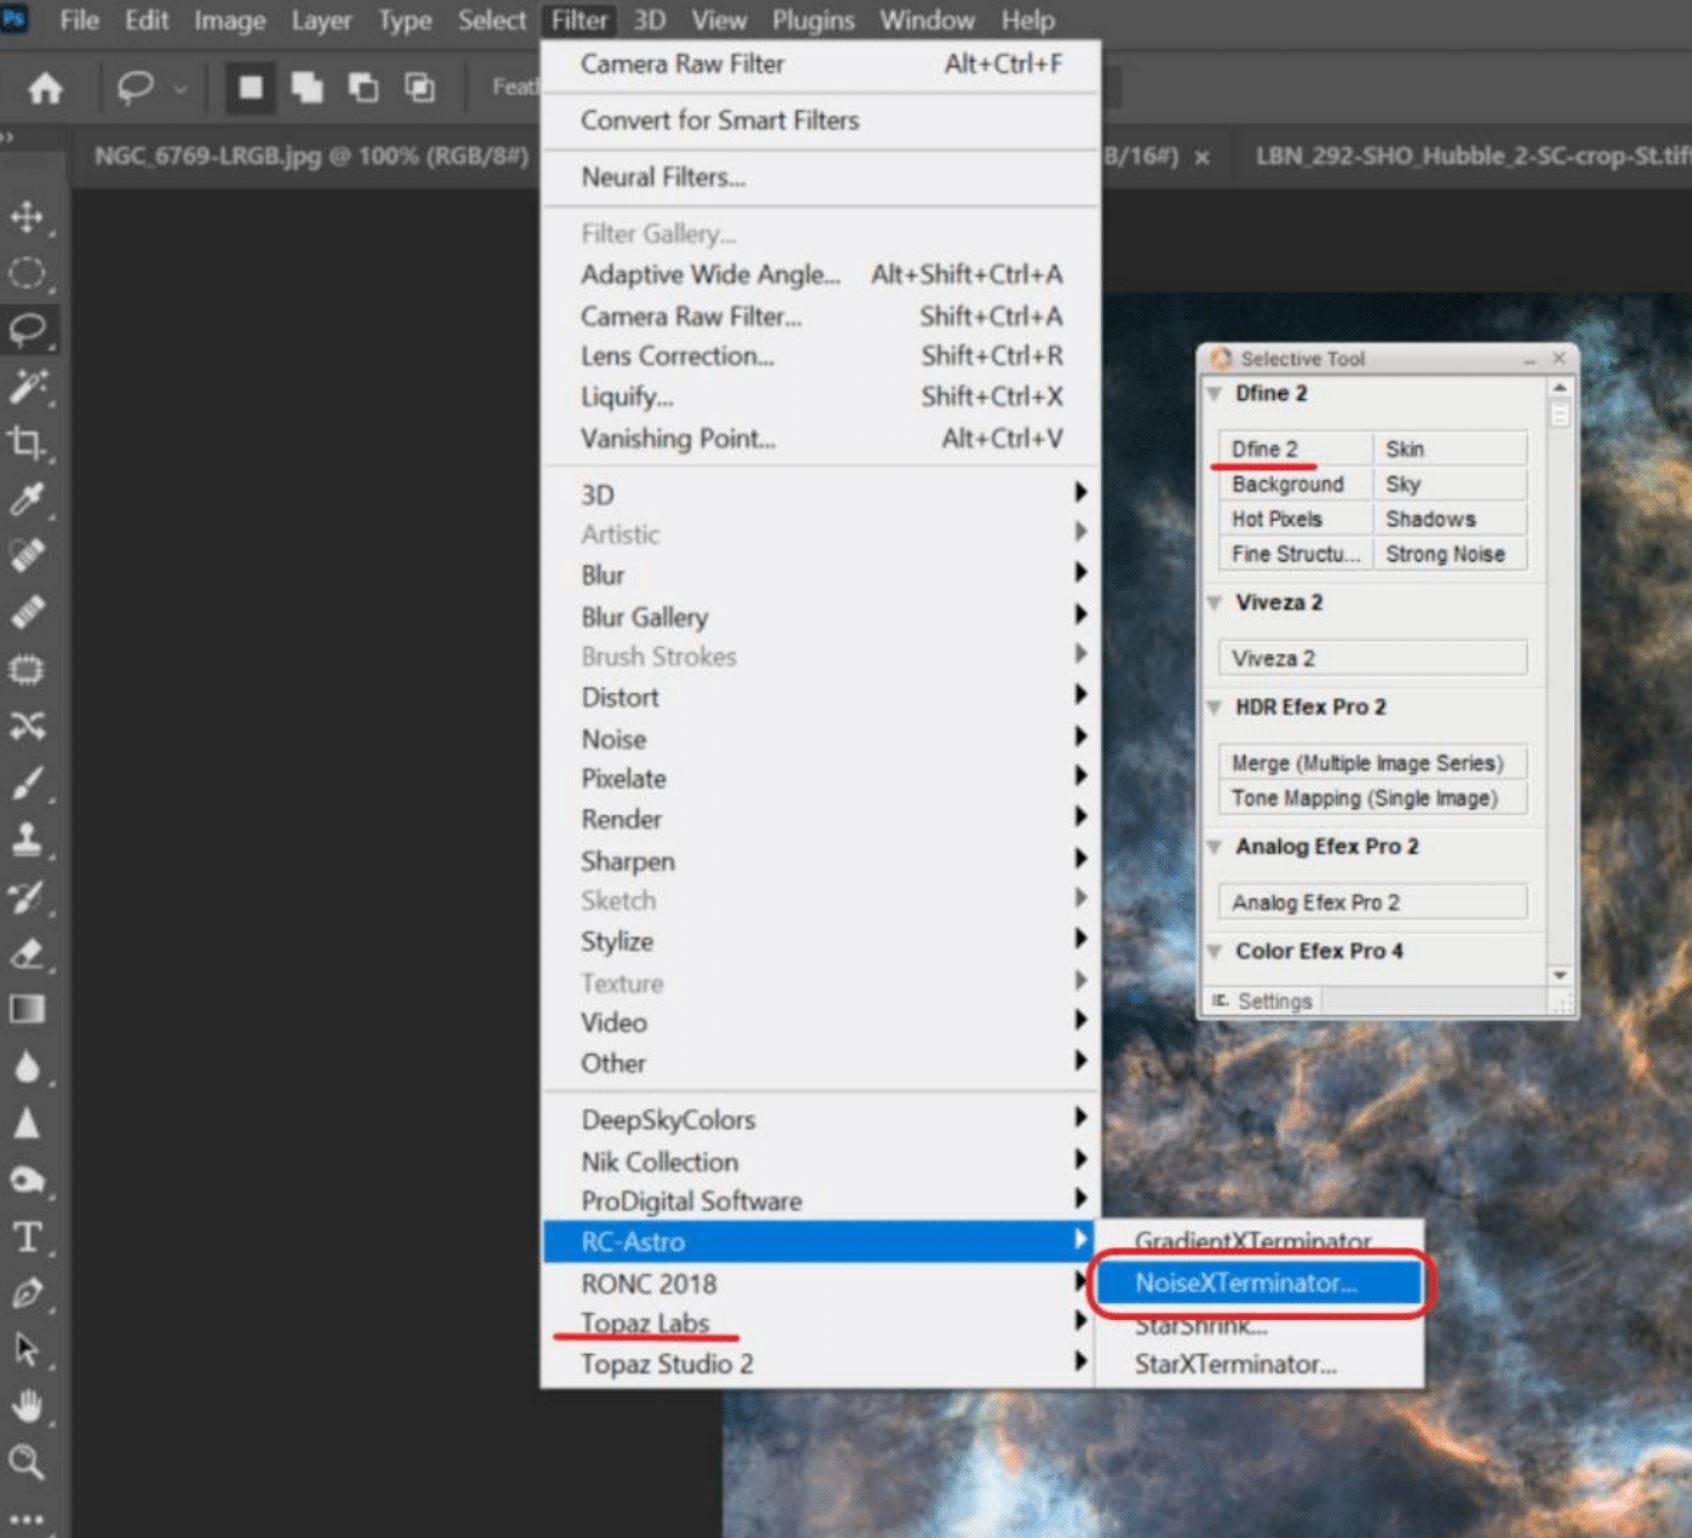
Go ahead and do Layer> Flatten image. Now here is where we will use StarXTerminator. Hit OK in the dialog box that pops up after you do Filter > RC-Astro > StarXTerminator.
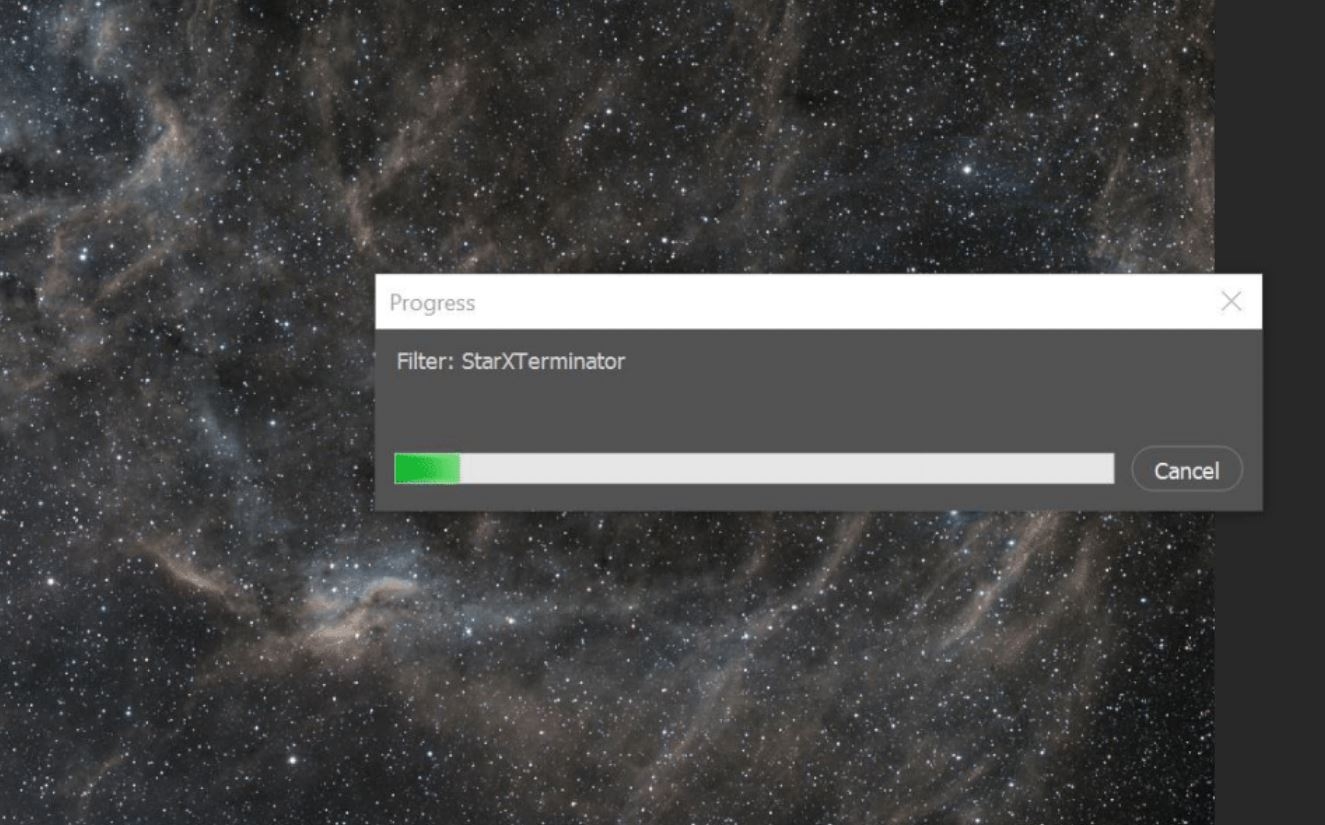
This will take a little bit of time, especially if you have done a drizzle integration, so go grab a cup of coffee, check Facebook, whatever over the next few minutes. Here is what you will see so you know it is working.
Once that process is done you will have a nice starless image to work with, but inspect it closely for any missed areas and clean them up with clone stamp.Your image should look like this when that is done:
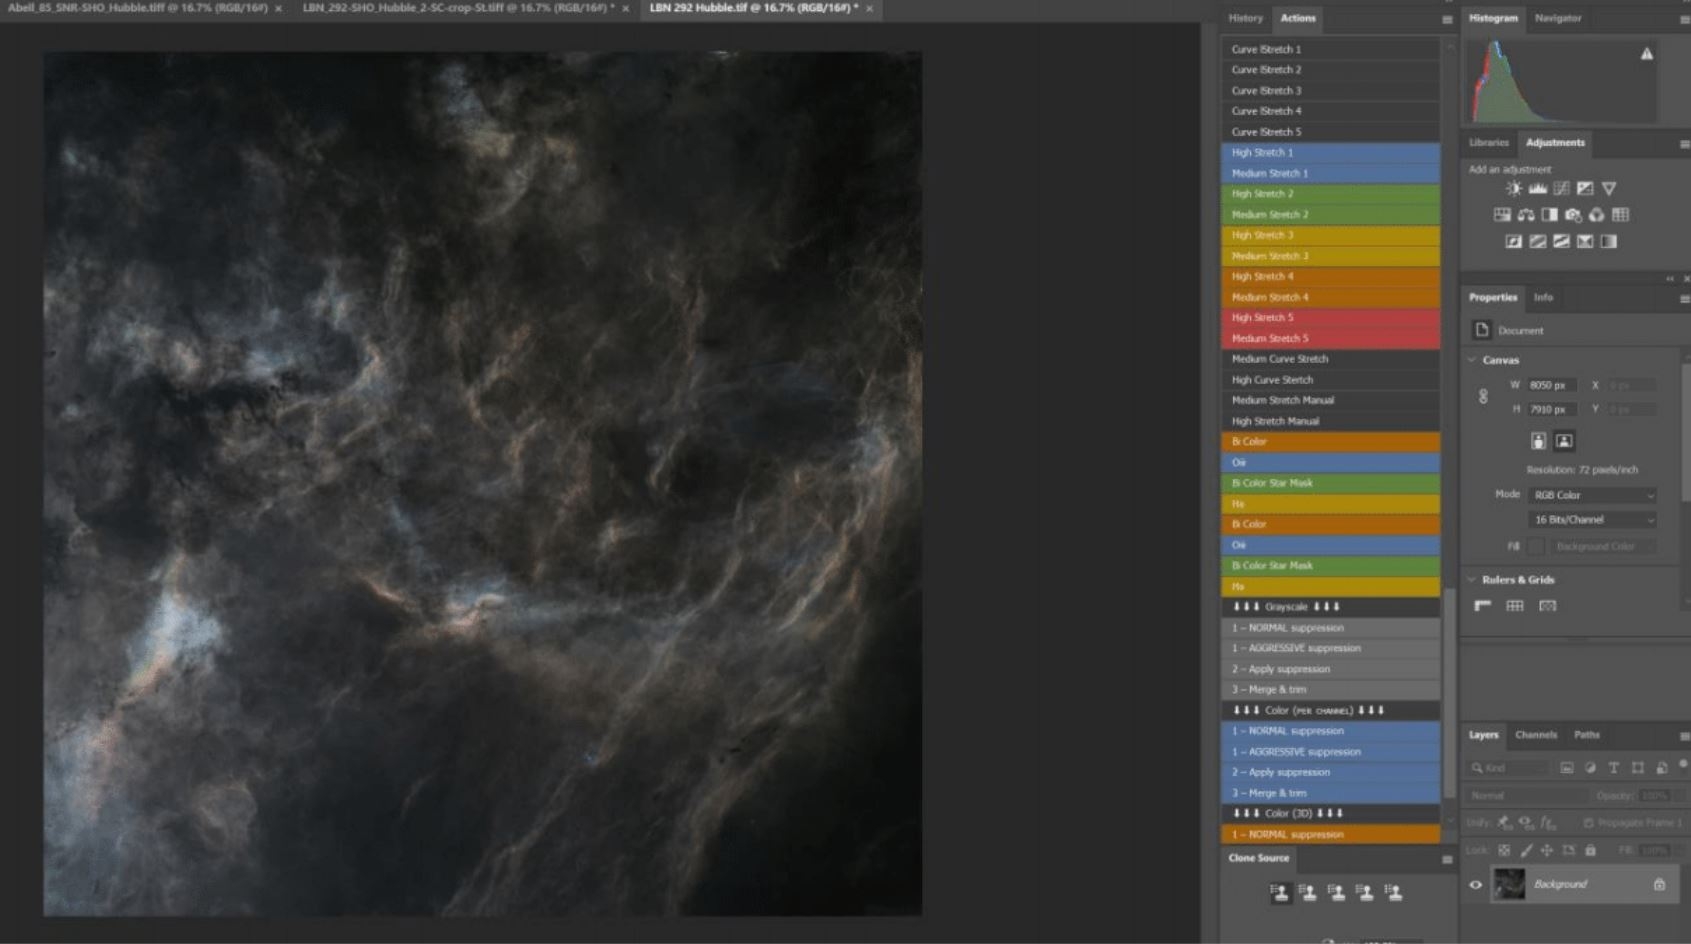
From here you will want to do any of the stretching, saturation,contrast, green removal, color balancing, and noise removal on this image to enhance as much of the nebula as you can. You may also notice places where the stars were not fully removed once you start this process, so you will want to either take them out via clone stamp or soften with blur and desaturate them by selecting the area with the lasso tool and pulling back the vibrance and saturation on them.
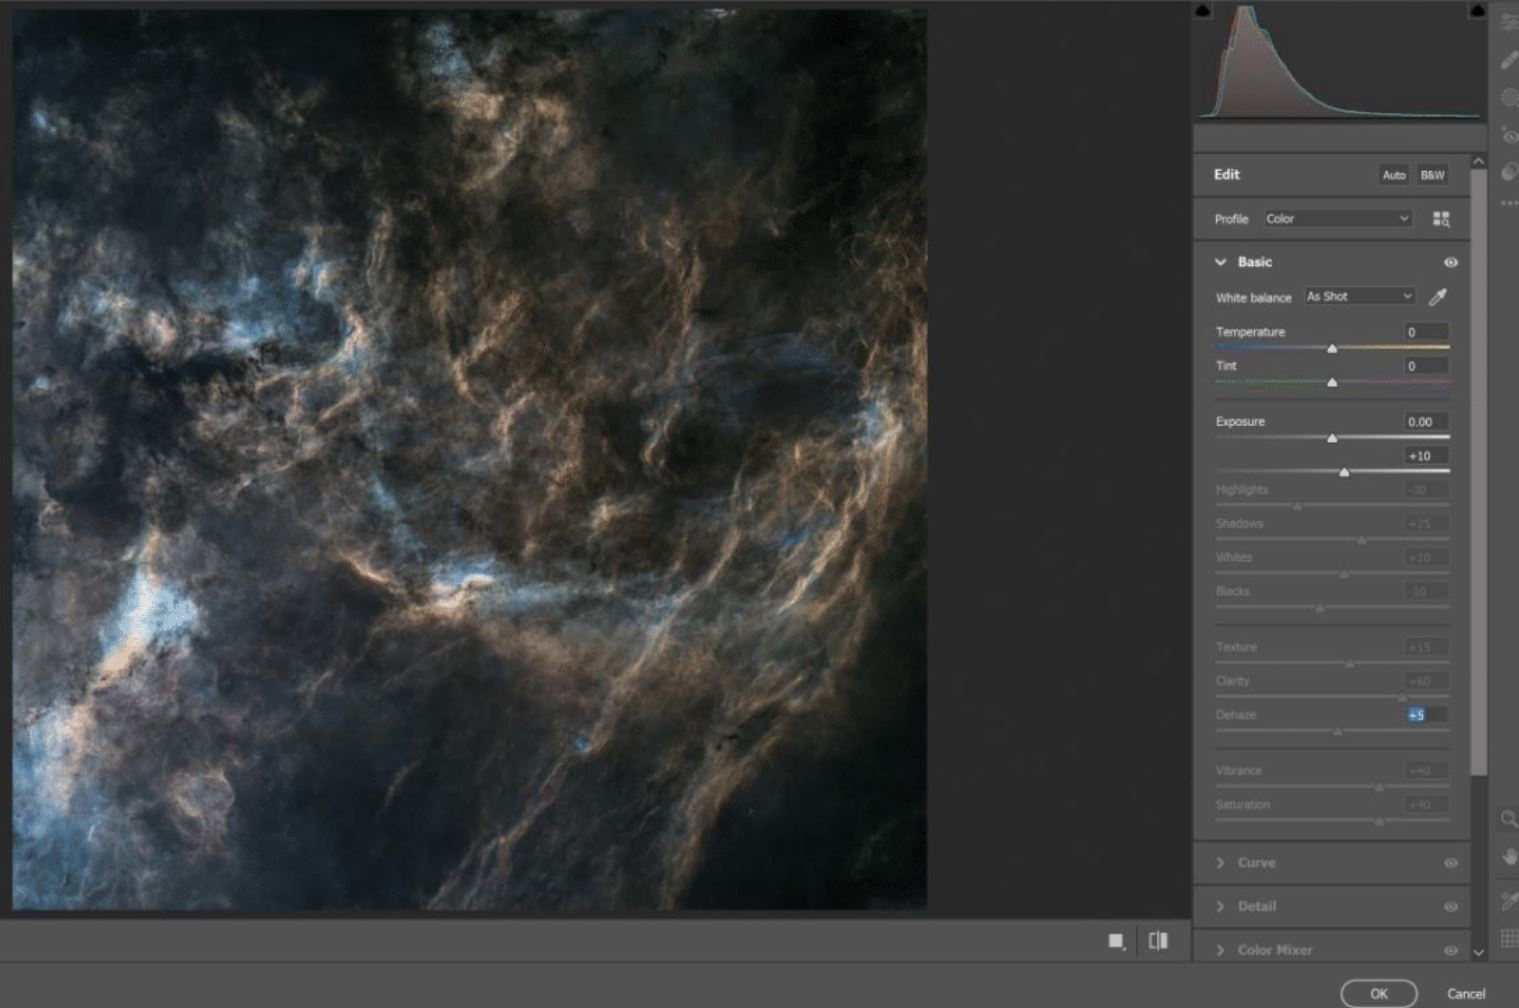
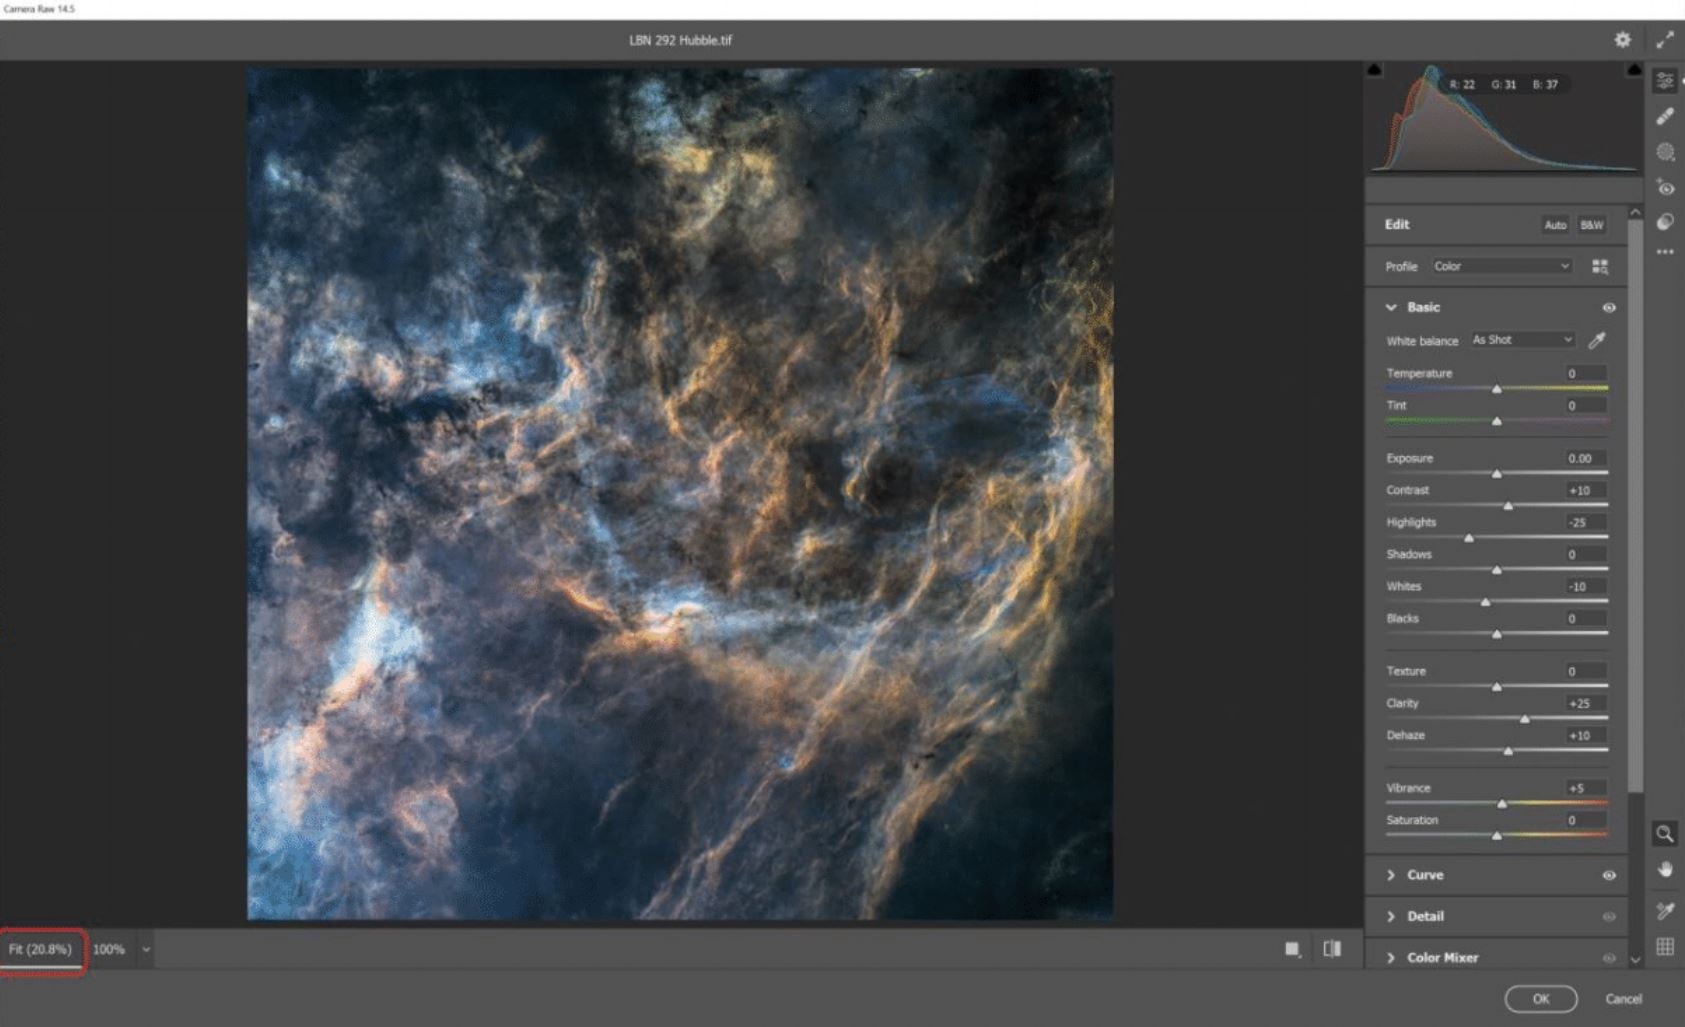
The first thing I do is go into Filters > Camera Raw and immediately go to the curves portion to try to start brightening up things. I will generally pull the lights and darks up to bring out all the hidden parts of the nebula or dust, then I pull the shadows down a little and the highlights down a little more so I don’t end up clipping anything.
Next I will go into the Basic section and do my various adjustments there. Don’t be afraid to experiment with each control, and make sure you also do the 100% zoom so you don’t introduce so much noise that it is hard to pull it out. Once everything is adjusted to taste hit OK.
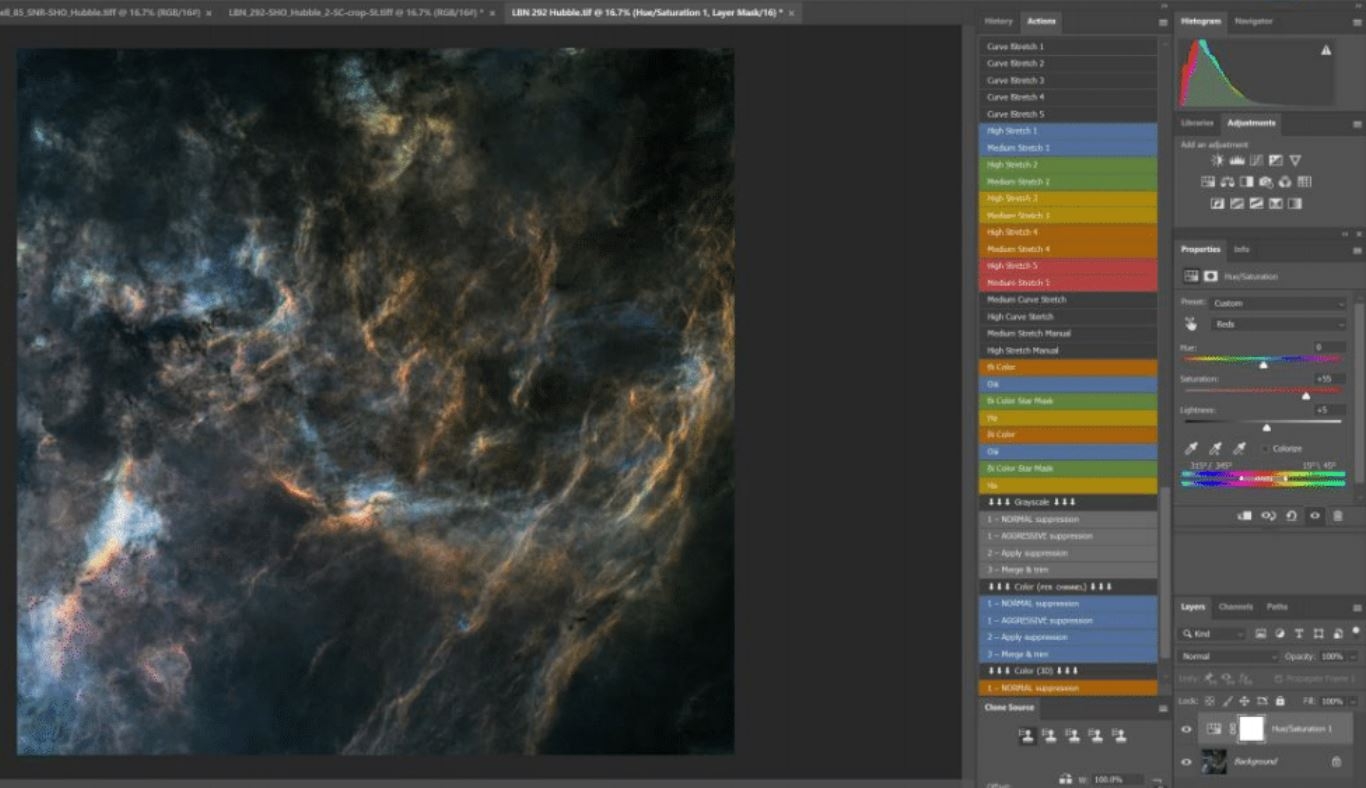
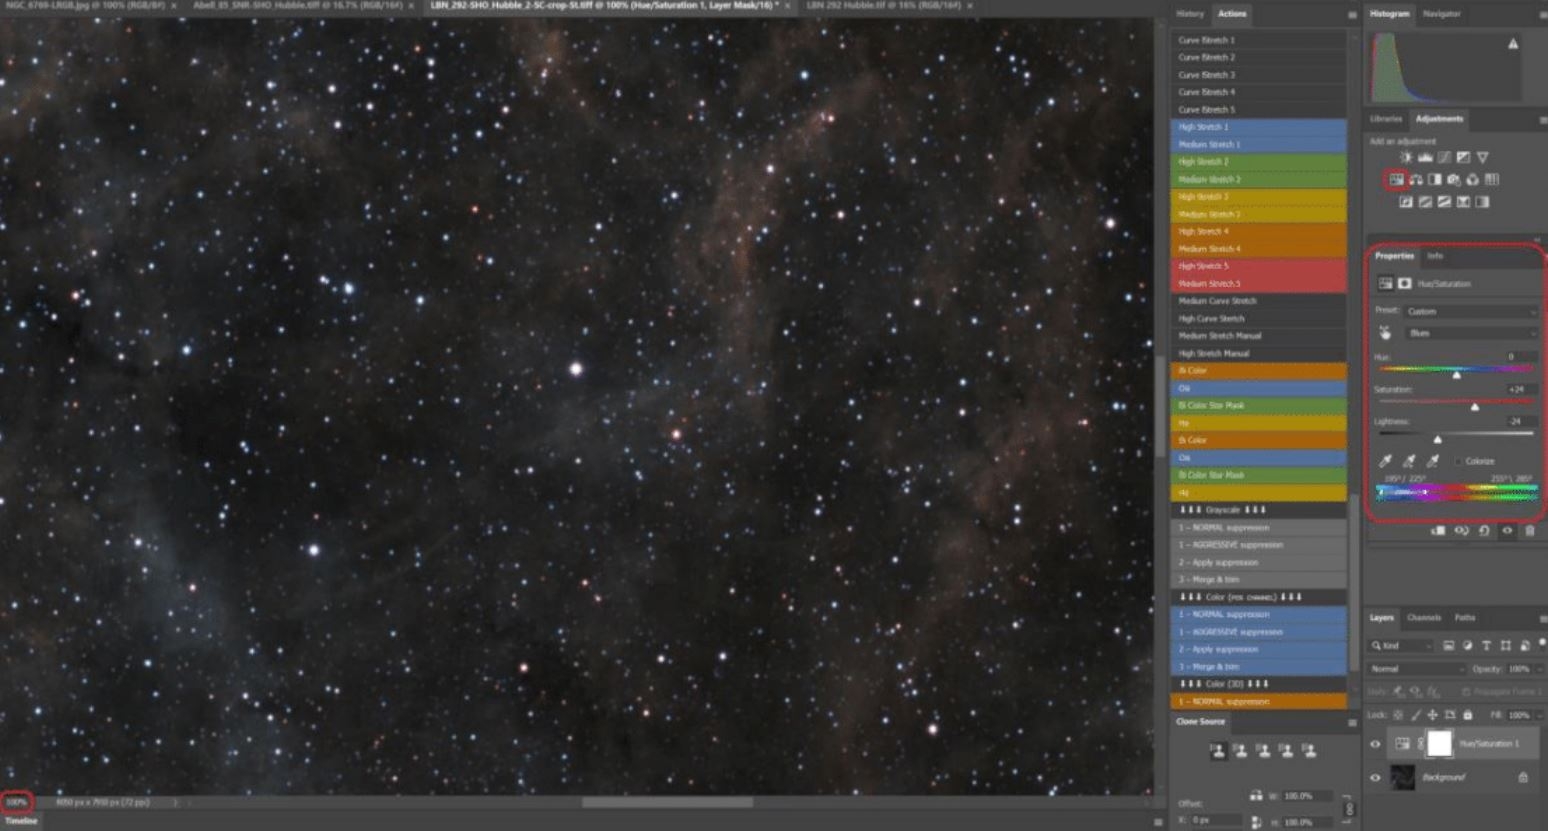
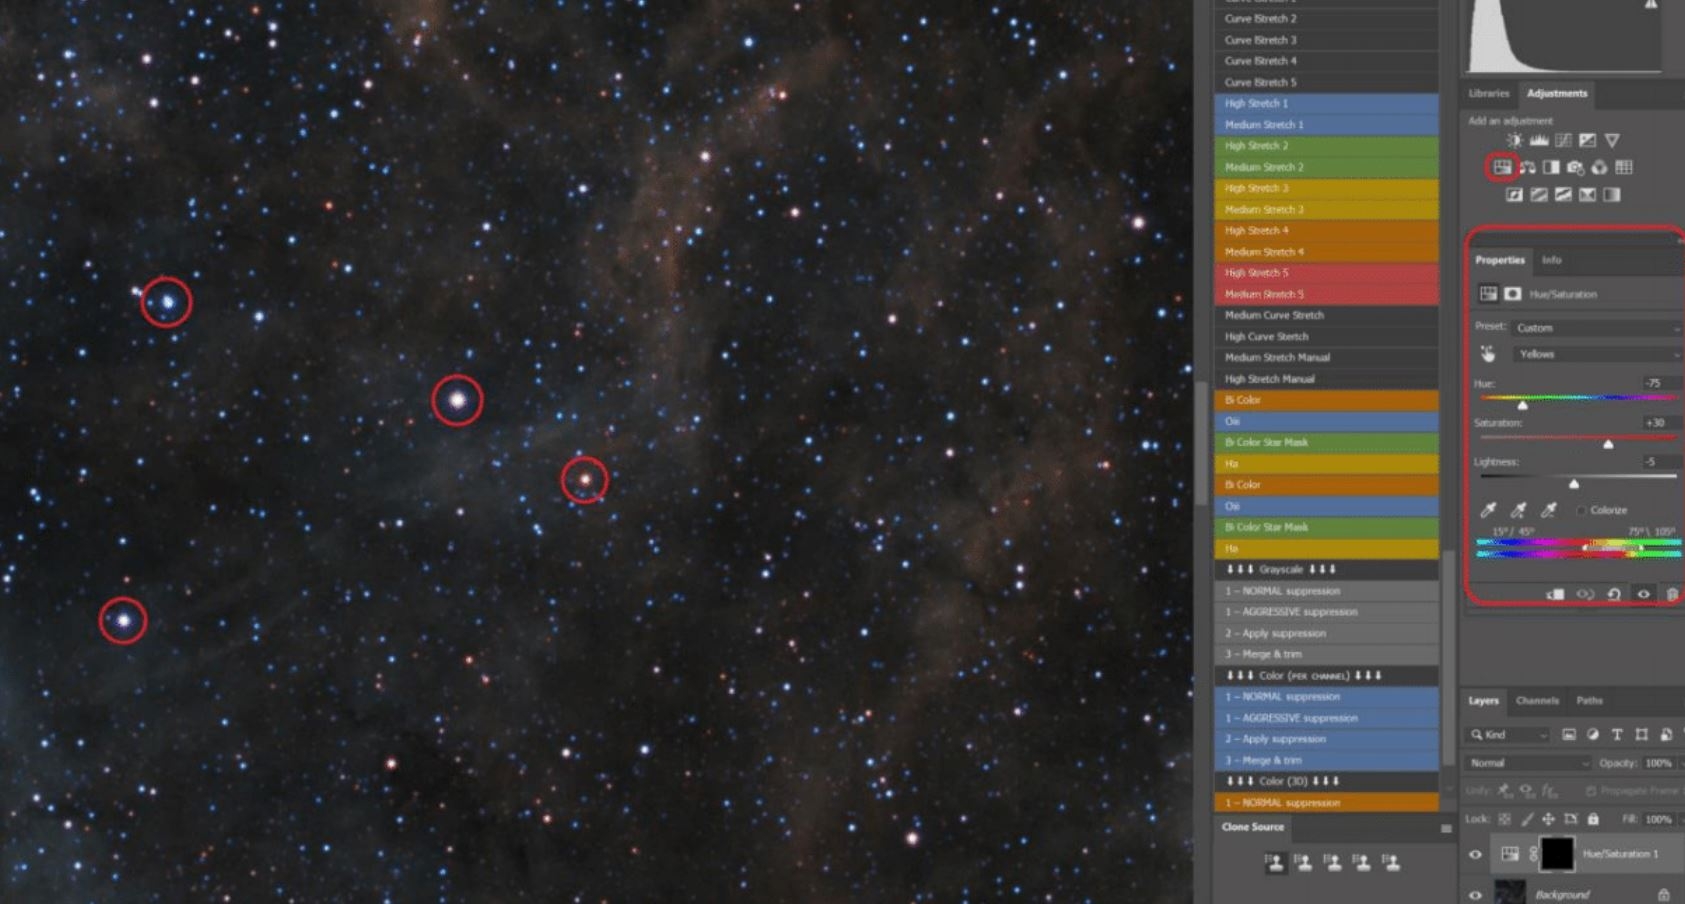
At this point I will go into the Hue/Saturation adjustment and start working them one by one on colors. I like to bring the red, yellow, cyan, and blue saturation up to some degree on a nebula like this. This is also where you can pull back on saturation and lightness on the green and magenta if you want to. To access the various colors click where you see Reds in this image. Starting out it will say Master. You can also shift the hue to your taste too, allowing you to keep the greens, but make them more blue or yellow if need be. Layer>Flatten Image is how you apply the changes.
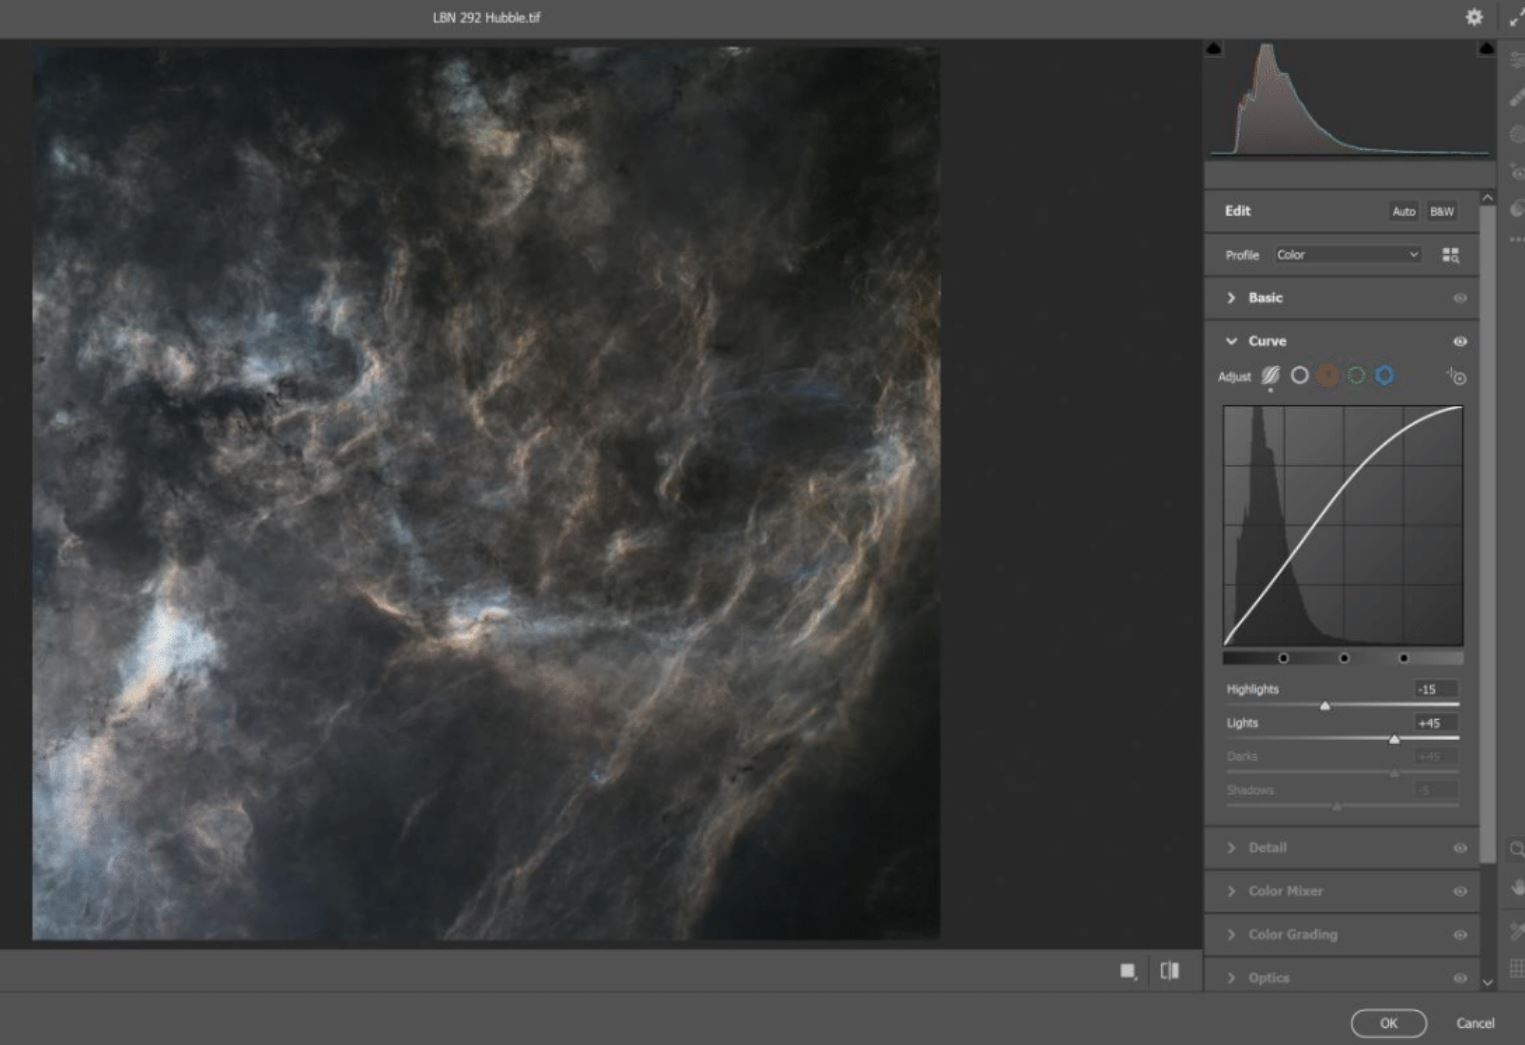
Now I start making my final adjustments as far as the stretching goes on the nebula portions. I will generally do curves at this point, grabbing in the middle and pulling upward, making sure to not completely clip various areas.
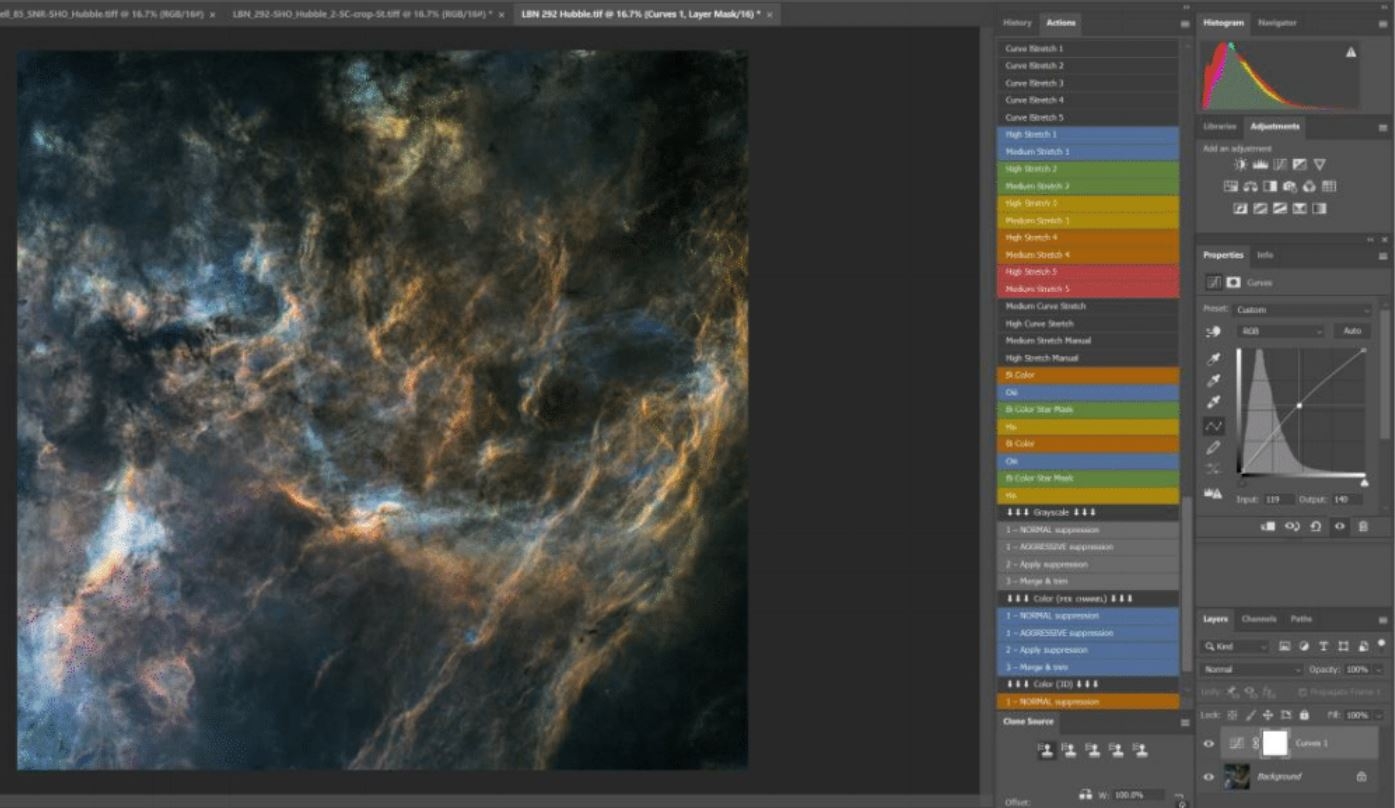
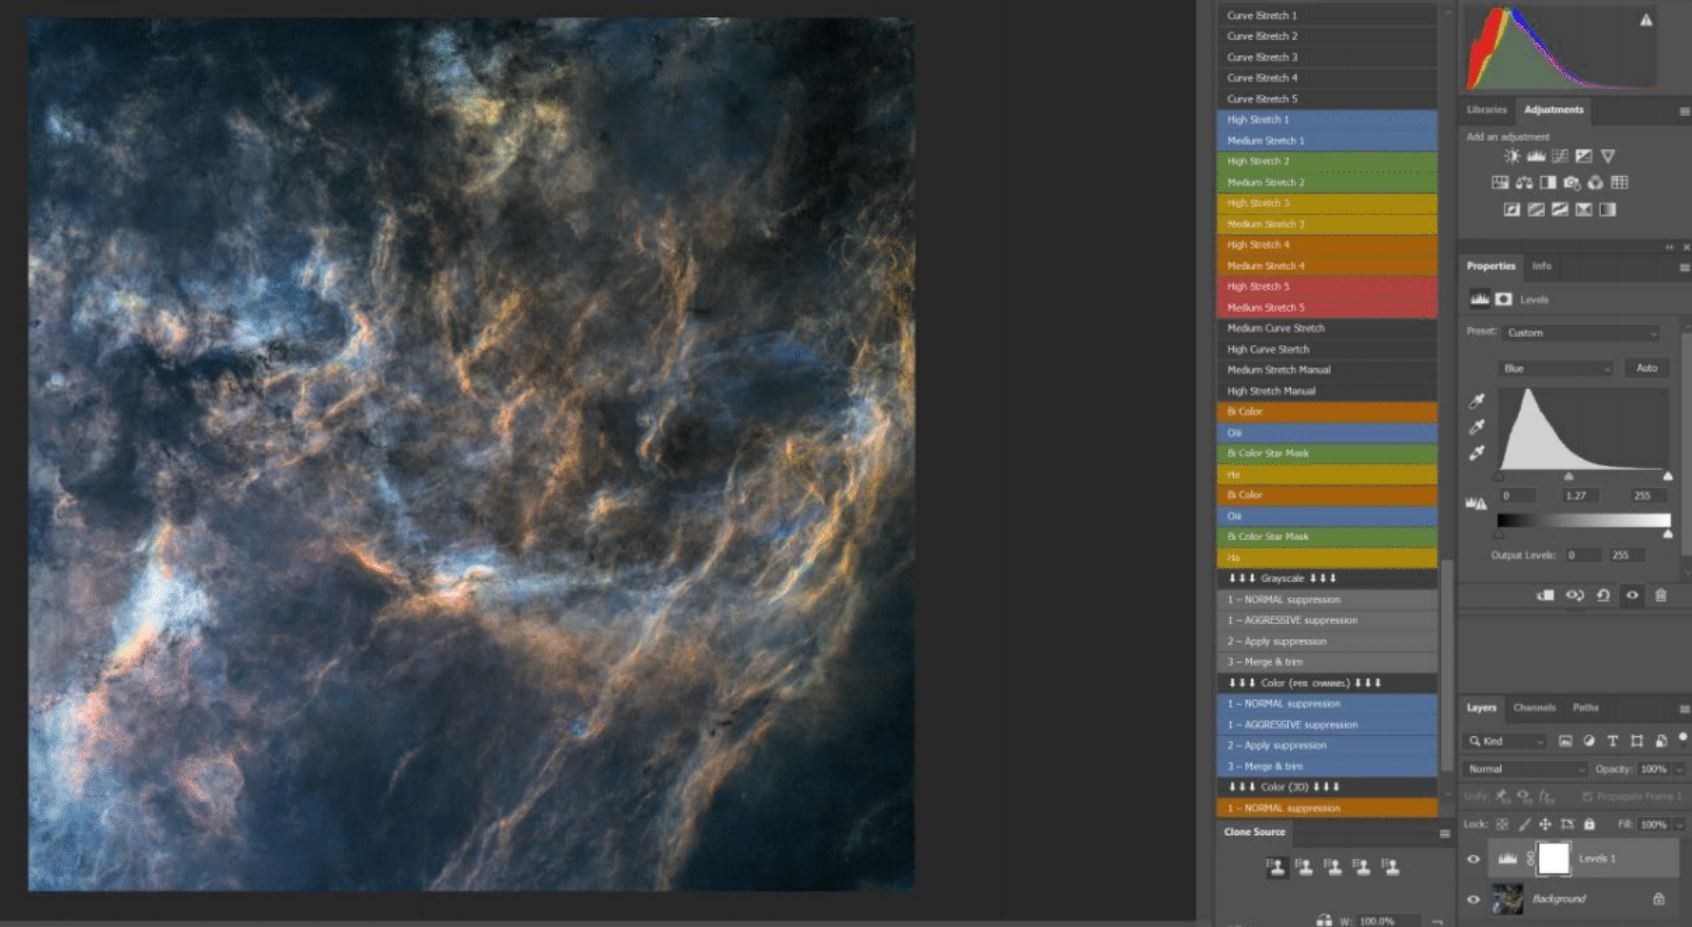
I also like to do a little bit with levels at this point as well. I adjust each of the red, green, and blue channels individually while doing levels to try to keep as close of a match as I can. Remember, each time you do an adjustment level you will want to do Layer > Flatten Image to apply your changes.
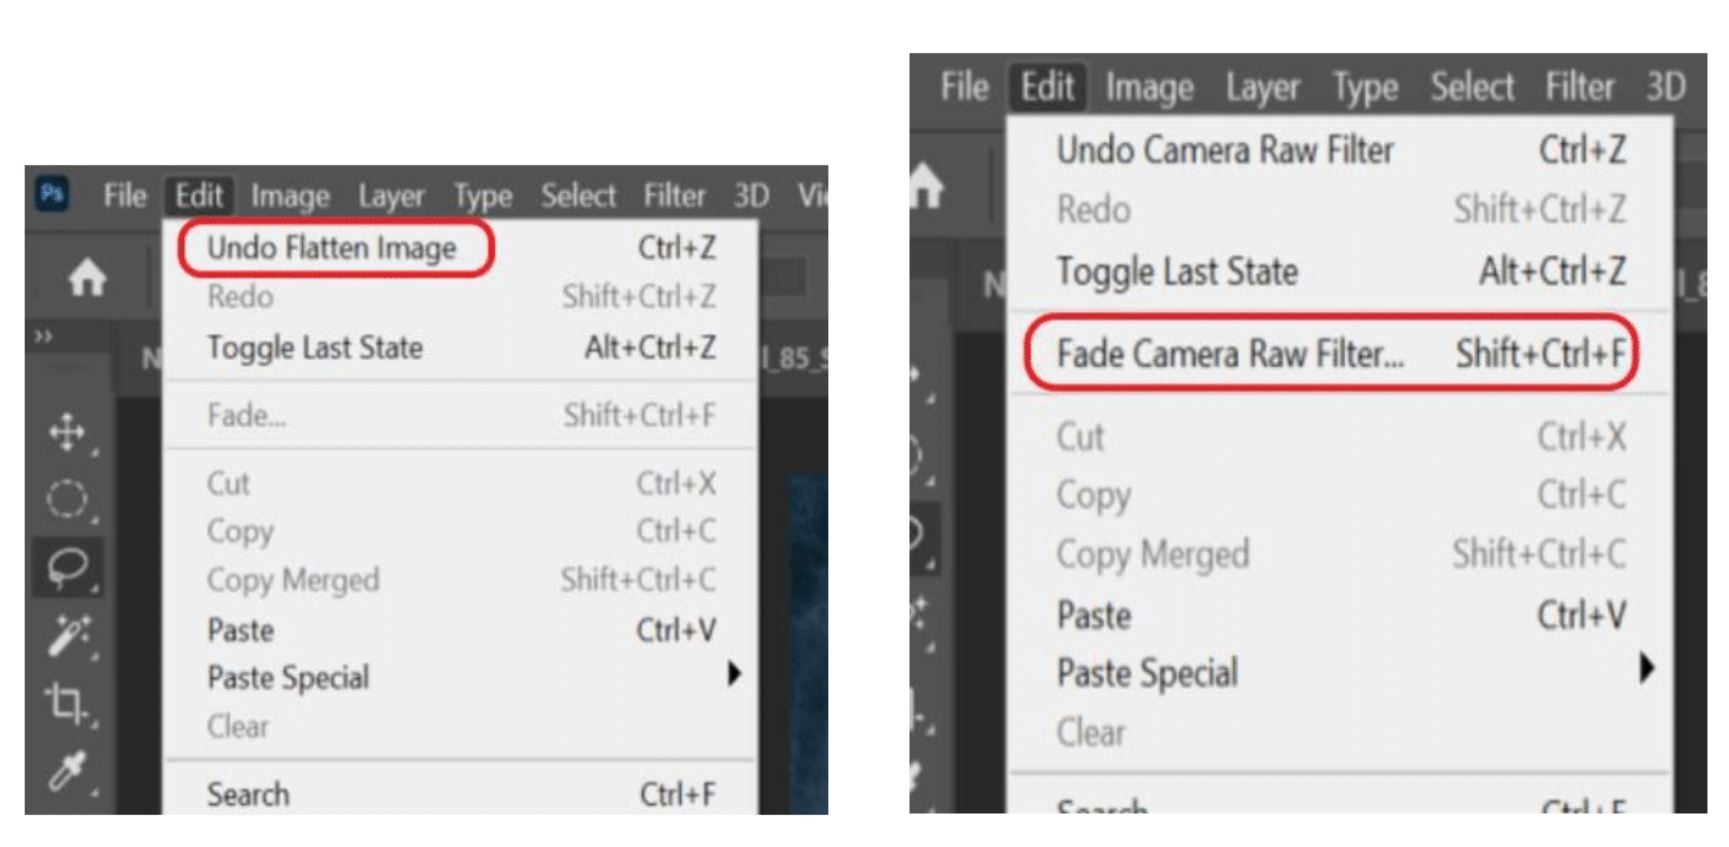
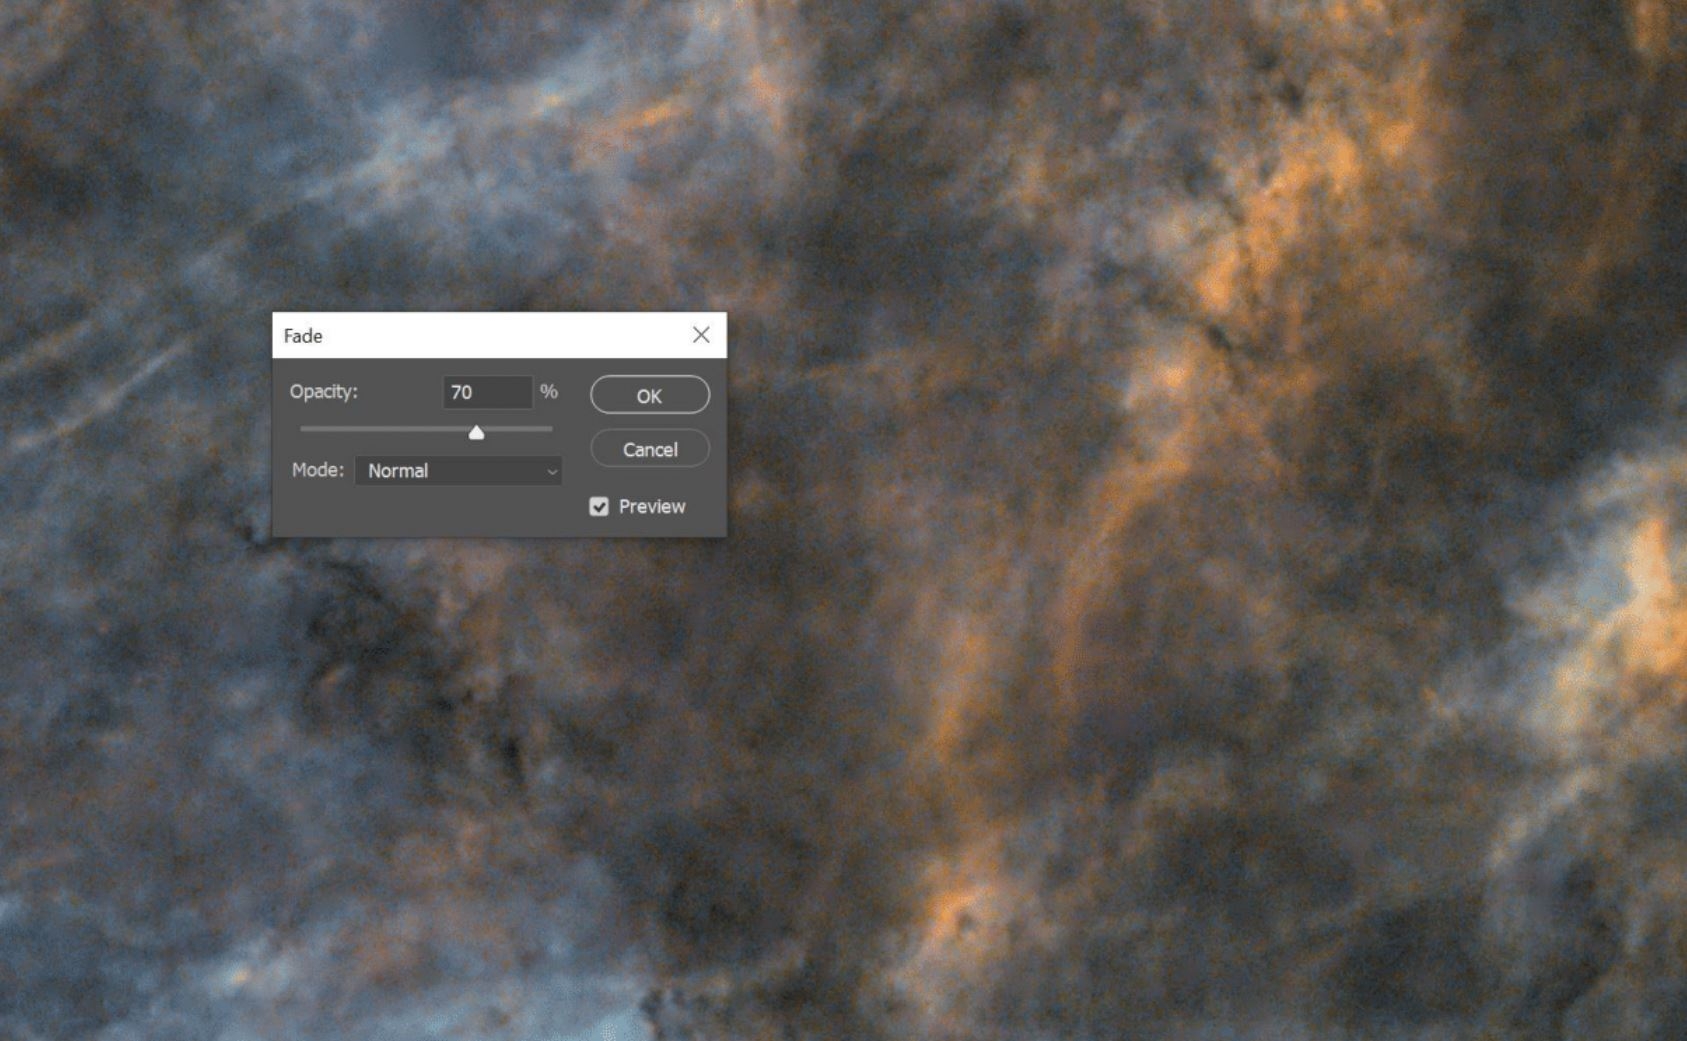
If you made changes that you want to undo you can do Edit > Undo xxxxx and if a filter went more aggressive than you wanted or you went a little heavy on one of the tools on the left sidebar you can do Fade xxxx which will bring up a box with a slider allowing you to adjust things.
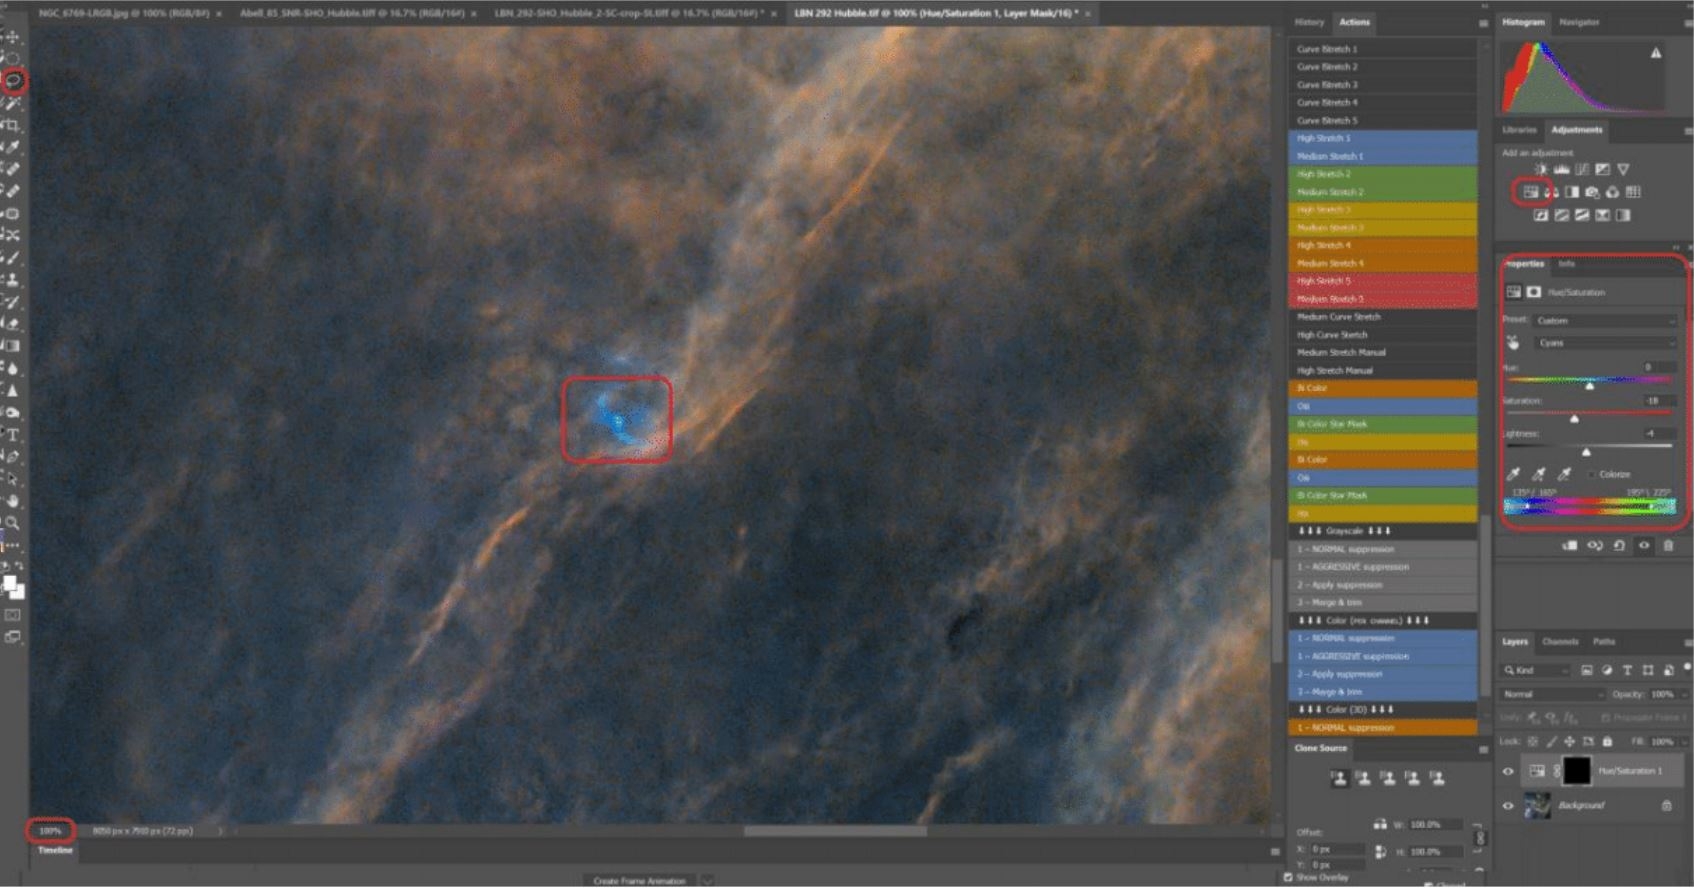
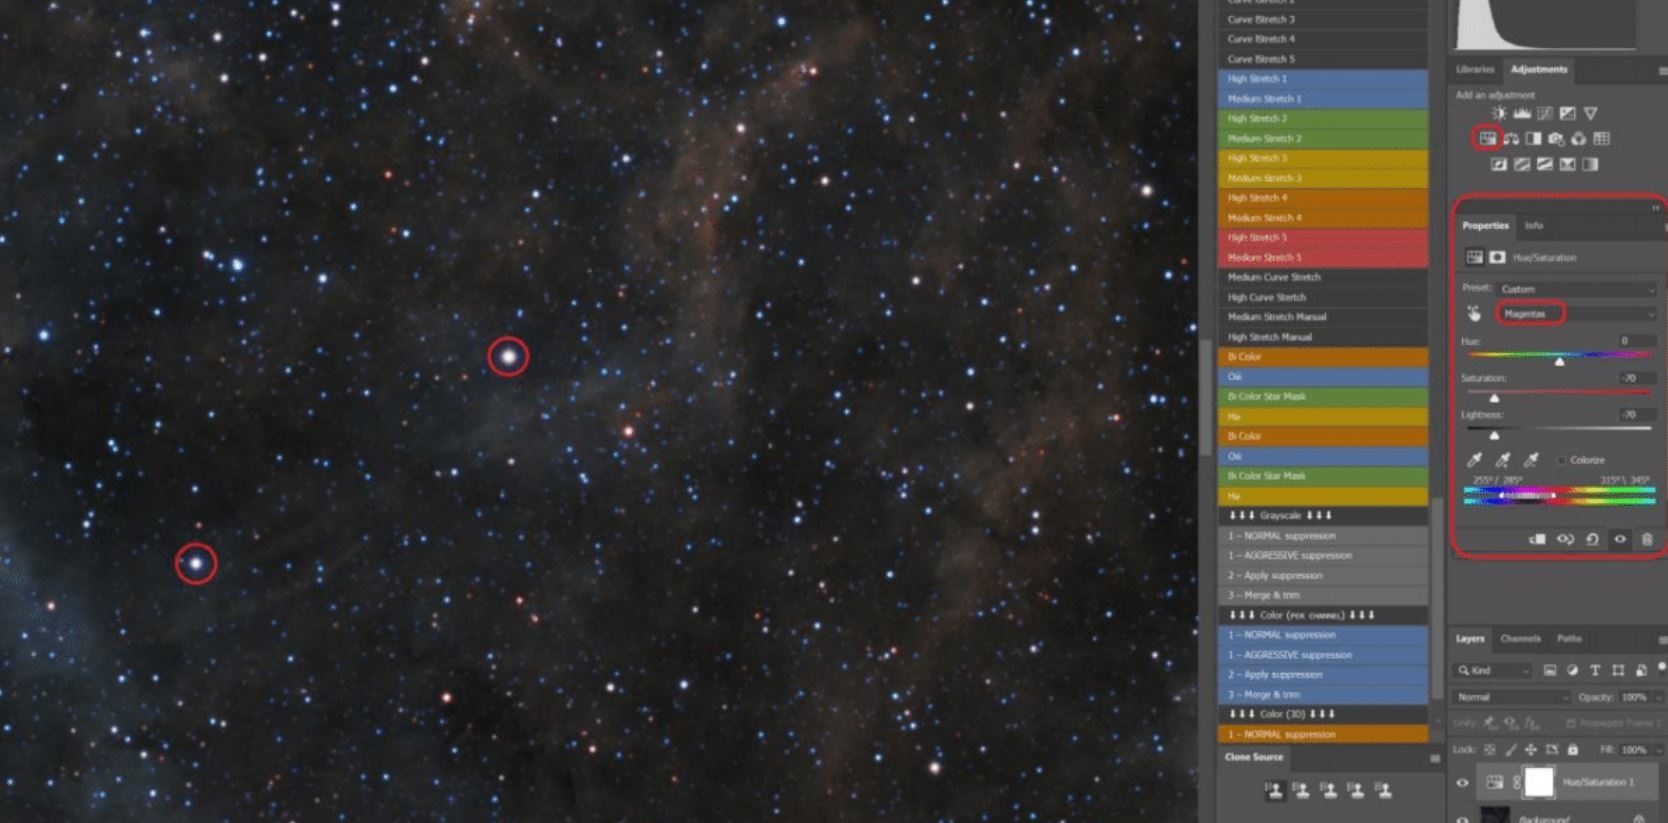
At this point you will want to scan the image for any overly saturated areas, then zoom in to 100%, use the lasso tool to draw a selection around the worst part of it, and then pull back that saturation either as a whole with the vibrance tool, or on the individual color with the hue/saturation tool. In this case I used the hue/saturation tool.
This is also where you inspect the image to see if your noise levels are acceptable to leave where they are, or if you want to run a noise reduction on them. Remember, a light hand on noise reduction is better than a heavy hand because noise reduction is a destructive process. Also, if at this point your background goes splotchy you need to use the undo tool to take steps back to when things were less stretched so you do not end up with a bad background. On this one I will be doing some noise reduction.
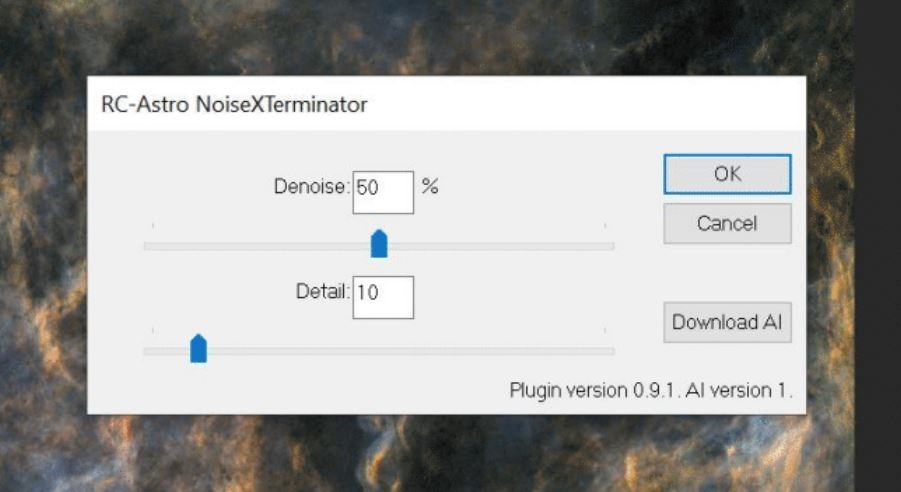
While I will be using NoiseXTerminator for this, Nik Collection Dfine2 or Topaz DeNoise AI will both do well. In my experience NoiseXTerminator is a better choice in most, but not all, Astrophotos. Again, remember a light hand is best, but if you go overboard you can use the fade tool mentioned previously. Here is the general setting I like to use. After this tool runs blow the image back up to 100% to check your work! I have put the dialog box before the menu so you can see the settings used on this image.
Again, depending on your hardware and image size this can take a bit, so be patient. You will again get a progress box showing where it is.

After this finishes and you bring the image back to 100% you will know if you need to fade it or not. In this case I will fade it because when I am done I will be bringing the image back to it’s original resolution. Remember, Drizzle will bring in more noise, but reducing image size will also reduce noise. Also, don’t go too heavy on the noise reduction because you don’t want your image to look like you fed it through some kind of beauty filter by making it too smooth. You want the noise reduced, but you also want to retain detail! If you hit okay on this and ended up not liking it you will have to use the undo because once fade is used it is no longer available, so you will need to undo the noise reduction, redo the noise reduction, possibly with different parameters, and then do your check to see if you may need to use fade.
At this point we can make any final adjustments in camera raw if needed on this one. Make sure when doing them you are zoomed in at 100% in the fit box, and make sure you check it by zooming out to where it fits the screen too. You want to make sure that both a close inspection zoomed in and the overall image looks decent. Zoom in on different areas in the image to make sure you did not introduce too much noise back to the image and that things still look nice. Also go easier on your sliders because this is your final adjustment on the background nebula or dust as an individual component of your image. Hit OK if in camera raw to apply your changes.We are now going to move from this tab, but keep it open. If you want to do a save at this time it is a good idea to do so, that way you do not lose any work in case something happens to crash Photoshop.
Next we are going to work on the star portion of the image that we started with. This is why you needed to keep it in another tab. This is also where we will tweak our star colors and sizes as needed.

Get all the way in to 100% zoom and see if the star shapes, colors, etc.are pleasing to you. Remember, this is something that is subjective so your adjustments may differ from what I do. We will do our adjustments with the Hue/Saturation tool, and one channel at a time. Now we want to attempt getting the stars as close to natural colors as we can.
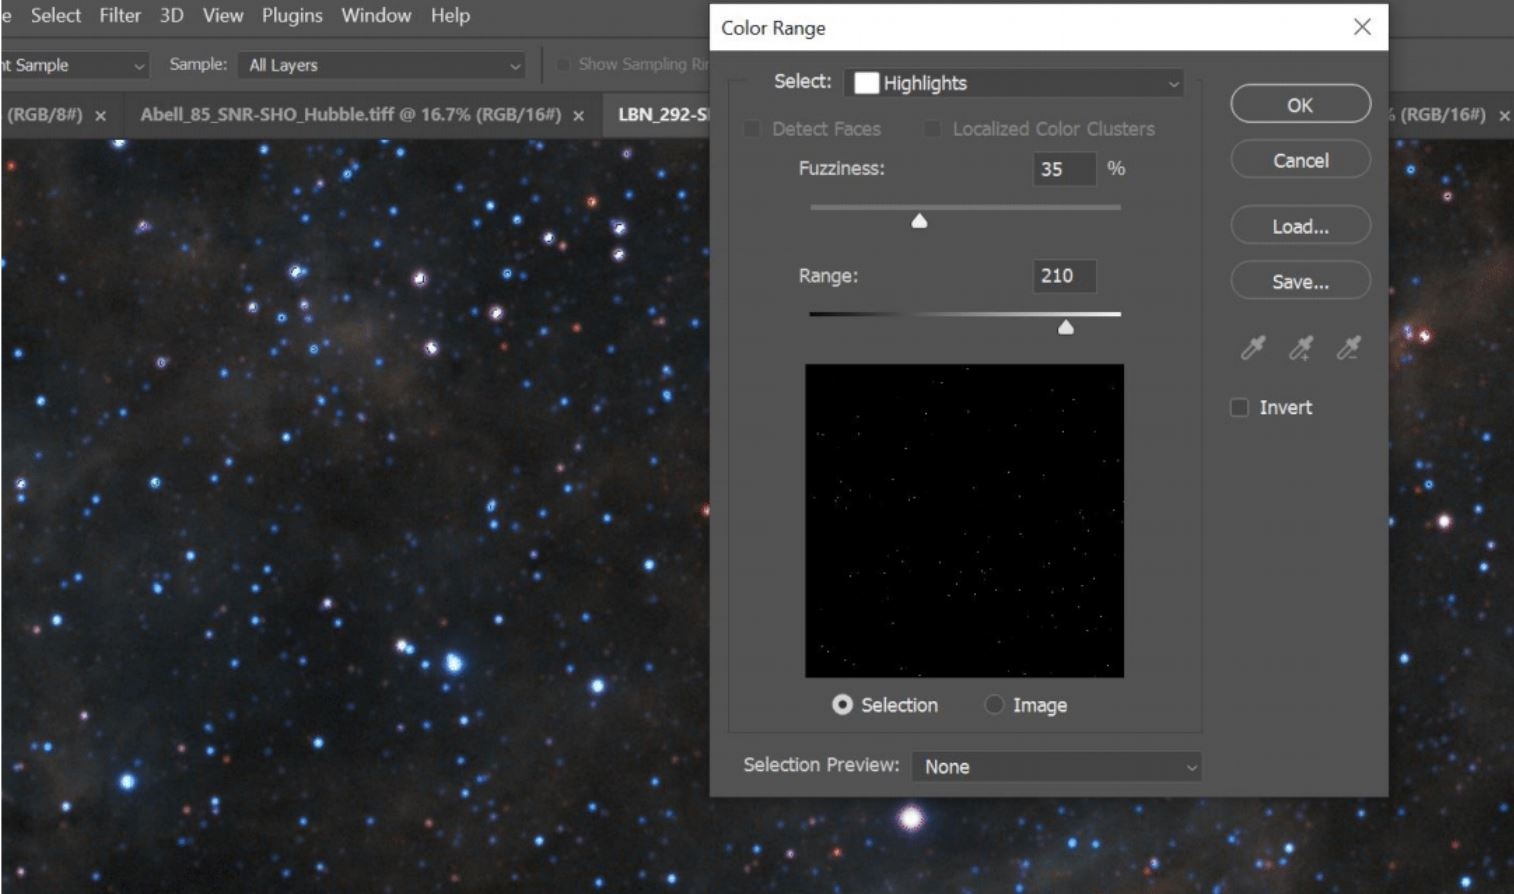
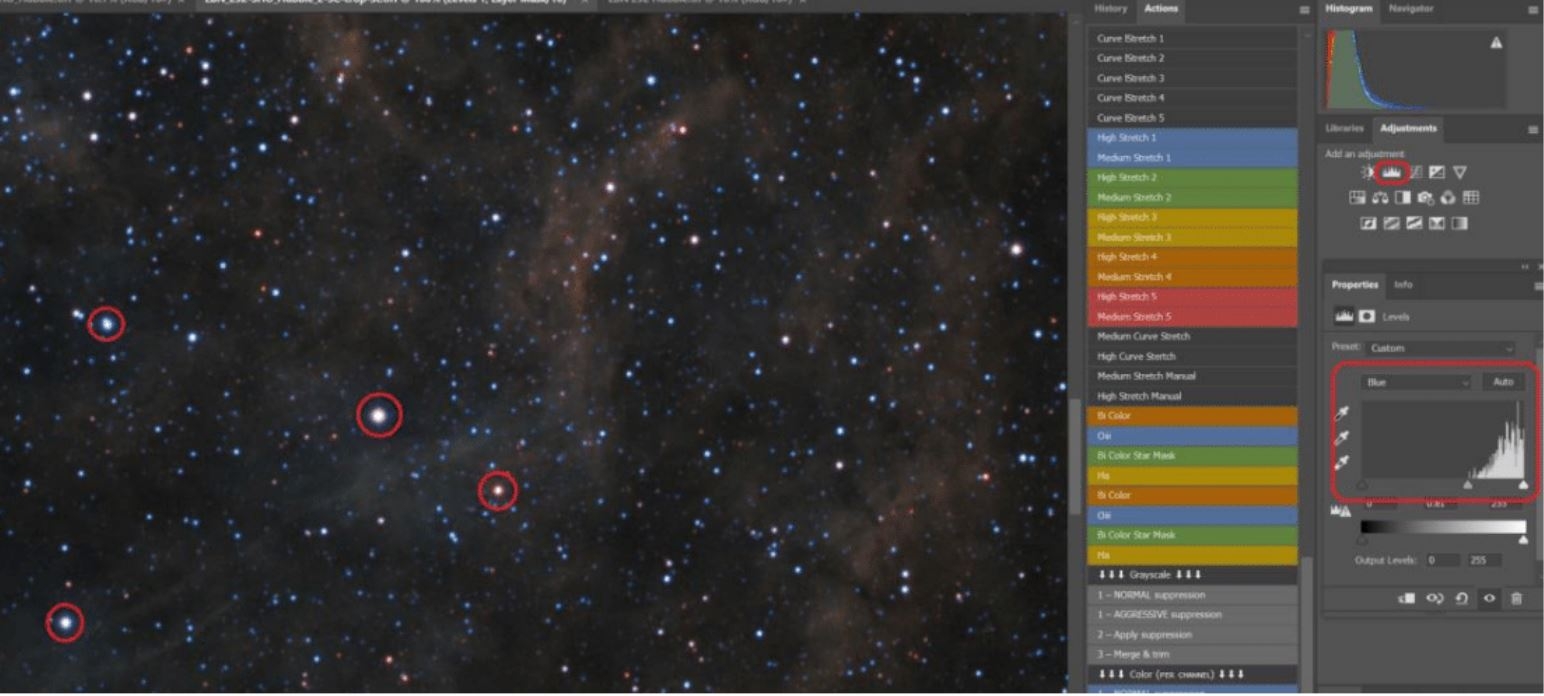
Here is where I like to do a Select > Color Range, and then grab my stars all the way to the edge so I can do a quick color balance. I select highlights, 35% fuzziness, and range is 210 so it selects everything above that.You will see the “marching ants”at the edges of your stars.
Once you do that you will want to go to your levels, then you will see that your red, green, and blue are not lined up at all. We want to adjust them to where they are all bracketed in between the mid and high arrows, one channel at a time. Pay attention to some of your brighter stars while doing this. The color change will happen, but it will be very subtle.
Now you are getting stars that are more balanced than you normally have with a narrowband image, but they may not quite be there when you finish this. Go ahead and do Layer > Flatten Image. Now go to select > Reselect and it will select the stars again.
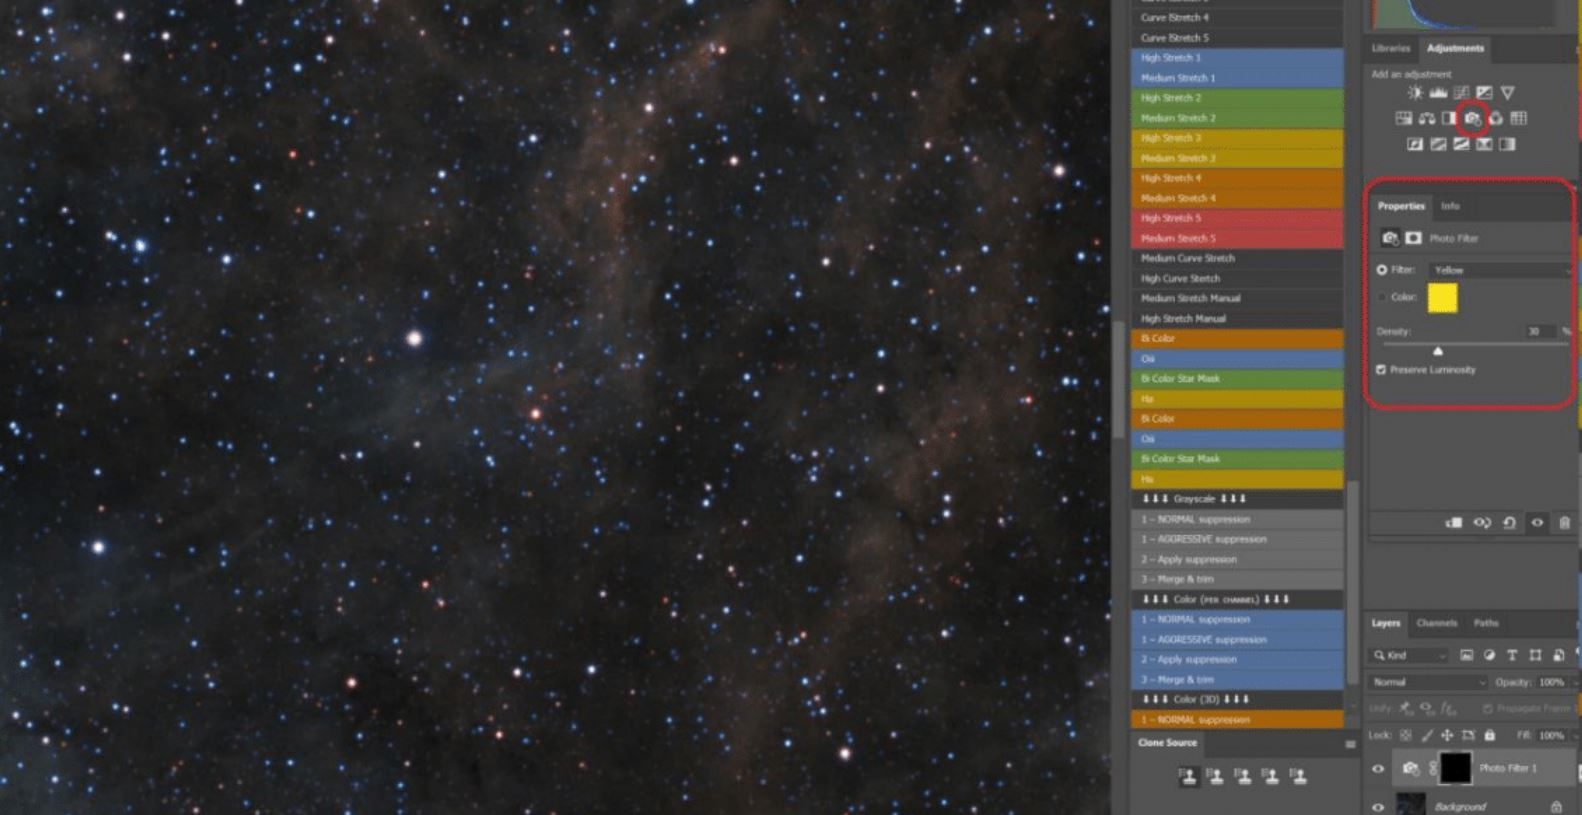
At this point I like to use the photo filter and see what I can get as far as color balance again. I am trying to get the stars closer to natural again. Mess with different filter colors, try both preserve luminosity and not, and use the slider. Again, this is to your taste. Make sure you are at 100% zoom so you can see what is happening. You will see subtle differences again.
After you do those adjustments to taste we will again flatten the image, then do another Select > Reselect to do final tweaking of star colors. This time hit the hue slider where needed to bring the star colors where you want them and again, work individual color channels on this.
After you have done this you will probably notice there is still a slight magenta tint to some of your star cores and to the color immediately around your stars. To fix this we are going to use the Hue/Saturation initially. We will stay at 100% zoom, but we are going to use this tool on the entire image. Notice that the magenta cast is now gone.
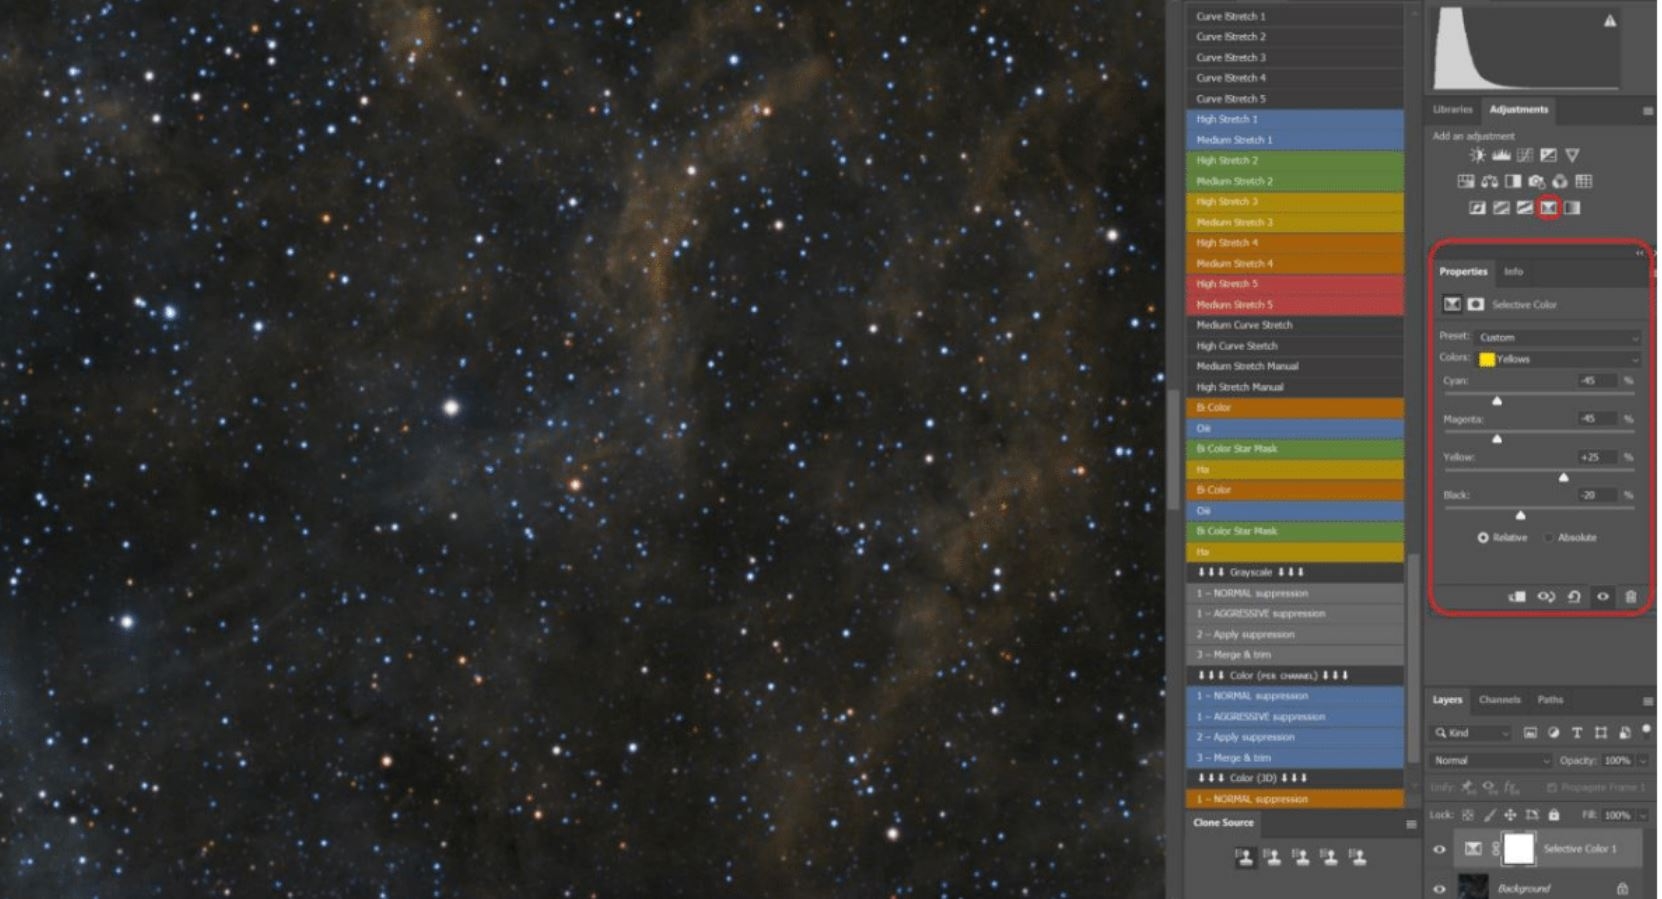
Now for our last adjustment on the stars we are going to do selective color on the entire image. Do each channel one at a time and watch your stars. This is another place where it is subtle, but you will notice stars getting closer to what you expect as far as color. This is another place where you will do this to taste because it is again a subjective thing. Do Layer > Flatten Image when done.
Now it is time to look at the whole image here and decide if you like the star sizes, or if you want to make them a little smaller.
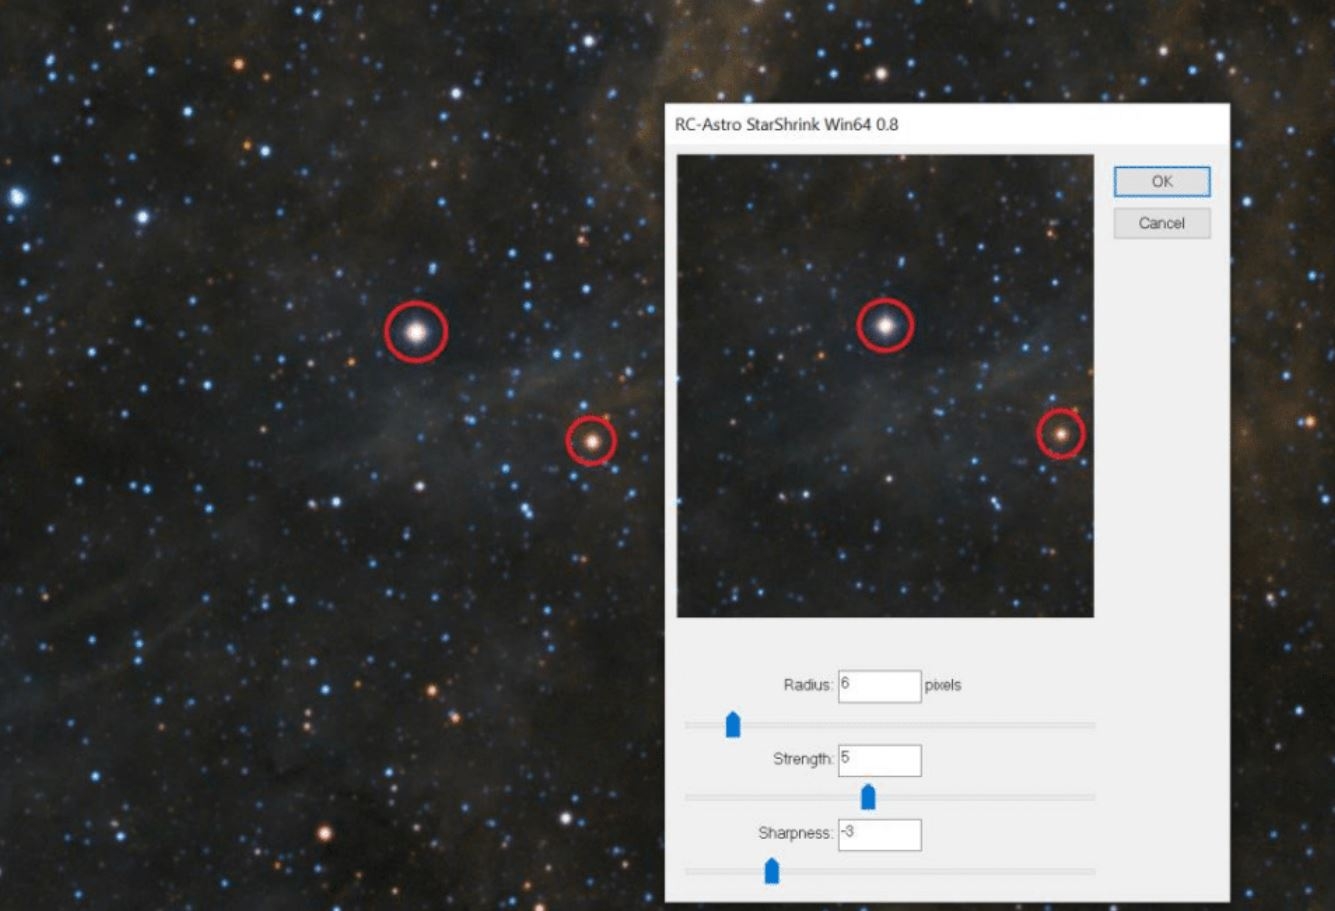
I like nice small stars, so I will use StarShrink to make them smaller. That is under Filters > RC-Astro > StarShrink. I have zoomed back in so you can see what the difference is on stars when you use this tool. Notice the ones circled inside the dialog box and outside it. You can move the sliders and get real time feedback inside the dialog box. Make sure you don’t go too far on this one because it can lead to weird artifacts. You can use the fade tool on this one, but if you do make sure to do it at 100% zoom. Hit the OK to apply your changes. This processes much more quickly than the other RC-Astro tools used earlier.
Now it is time to bring your stars and nebula together. Click over to the nebula, hit ctrl + a, then ctrl + c, and finally click over to your nebula image in the next tab and ctrl + v to paste it over the stars one. The type of layer you will use is “lighten” and you can do use the opacity and fill sliders to taste here.
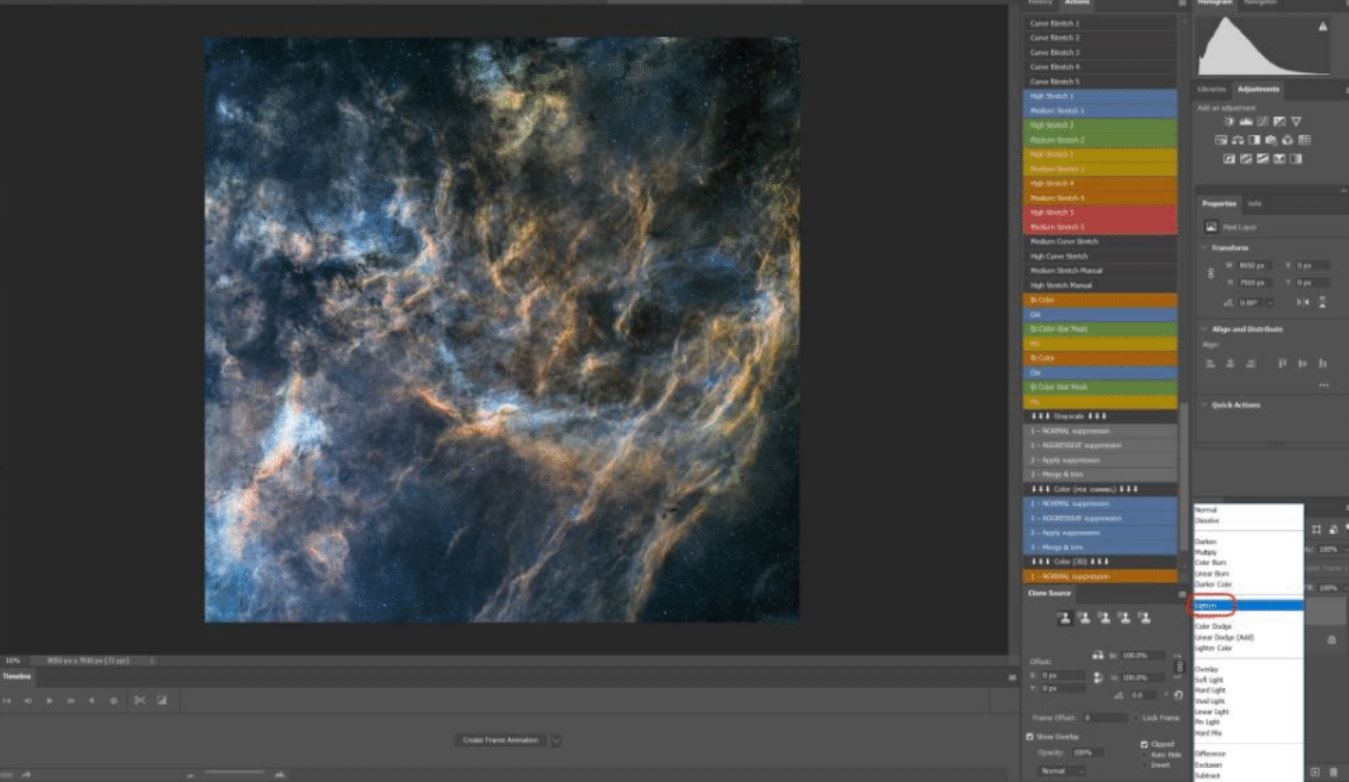
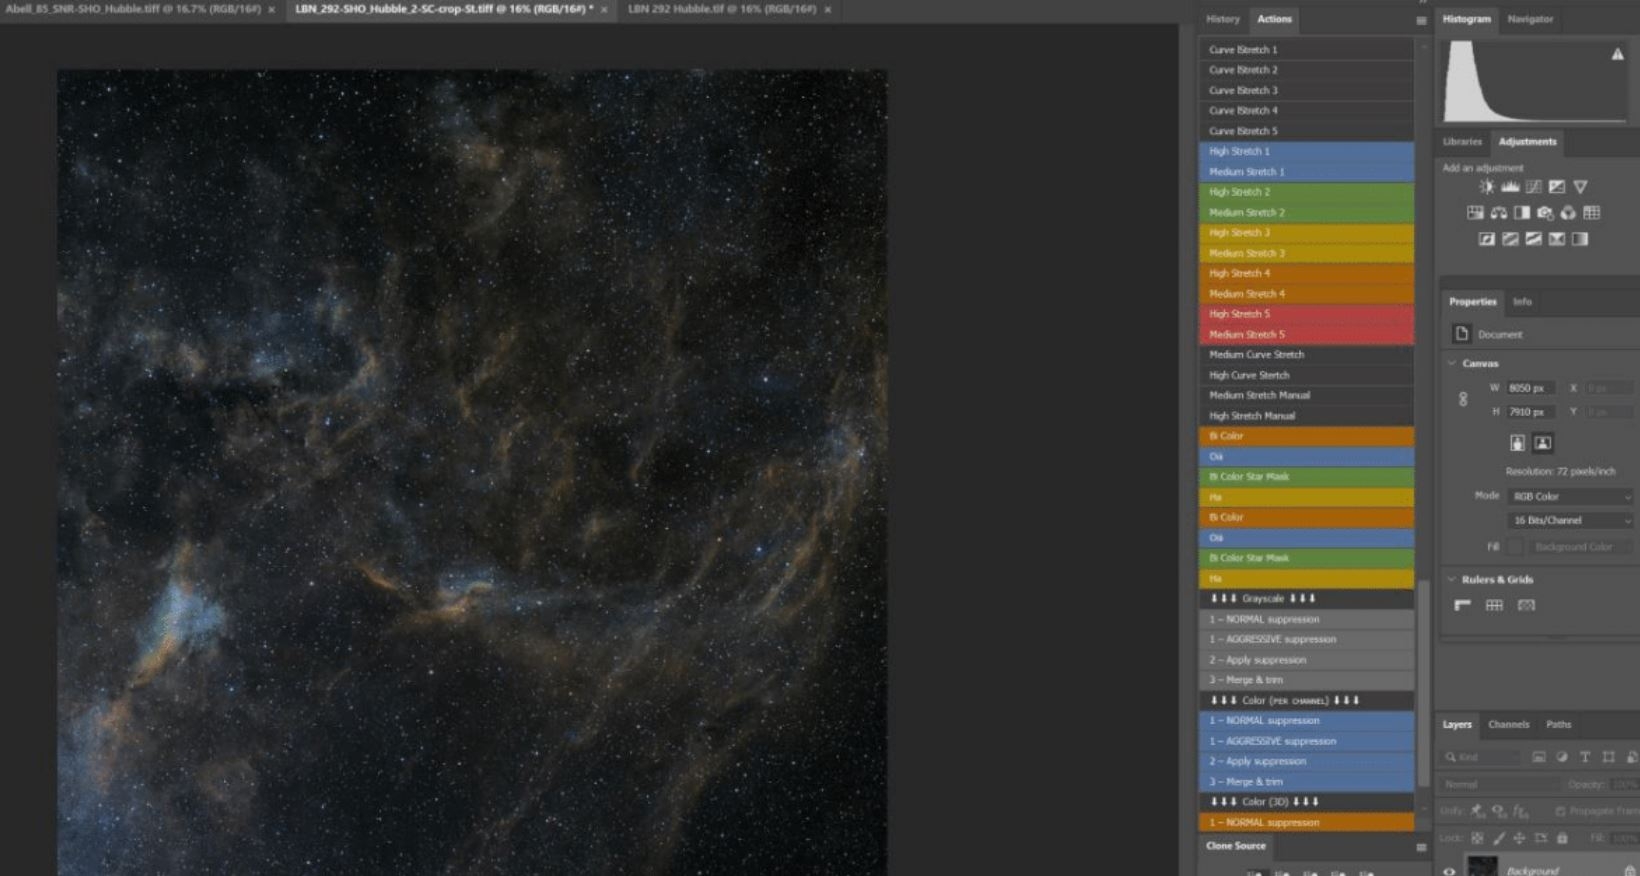
After things have been adjusted to taste, making sure that when using the sliders you are at 50% or greater zoom on the image, you will do Layers > Flatten Image. You should end up with a result like this one.

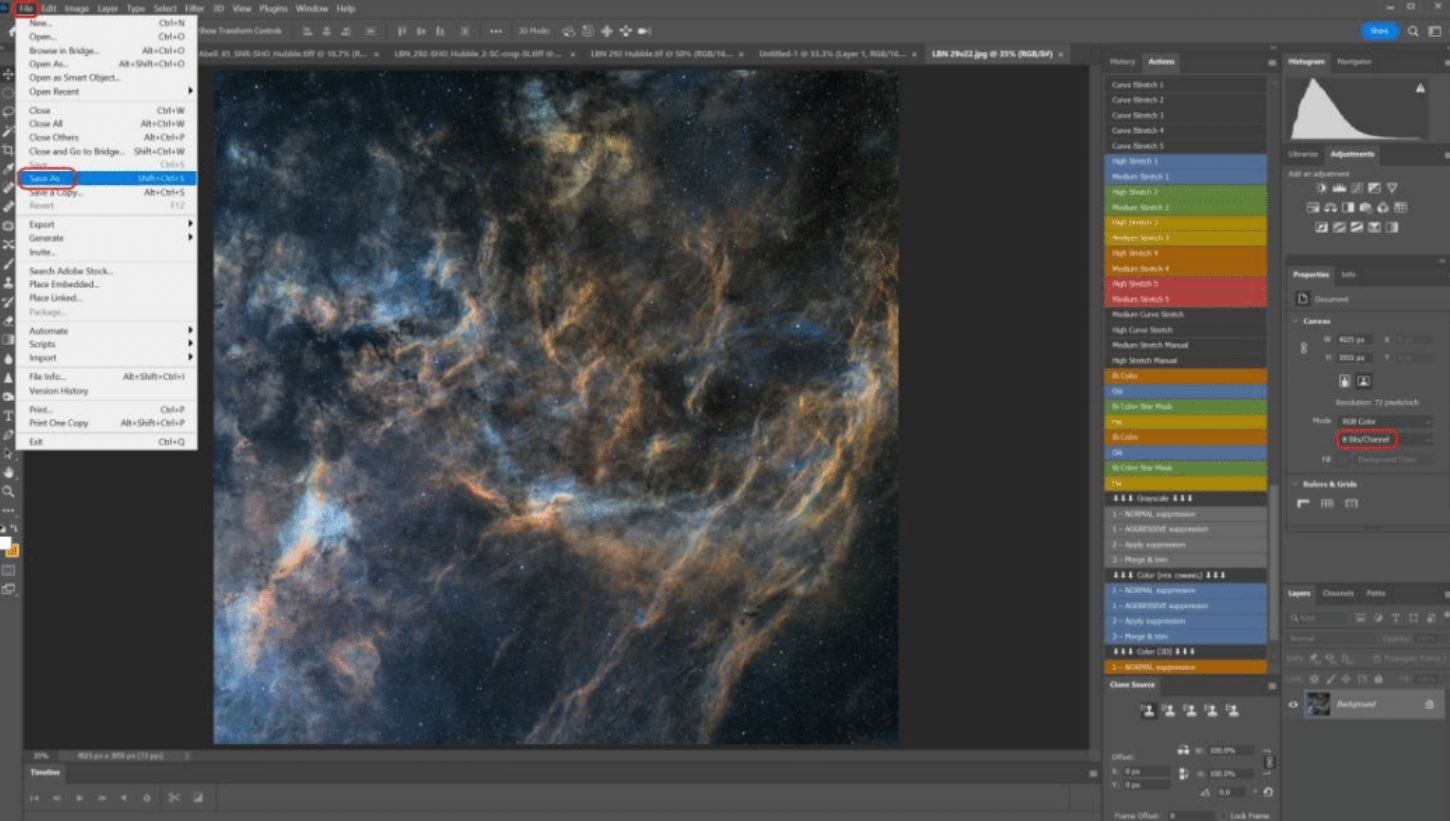
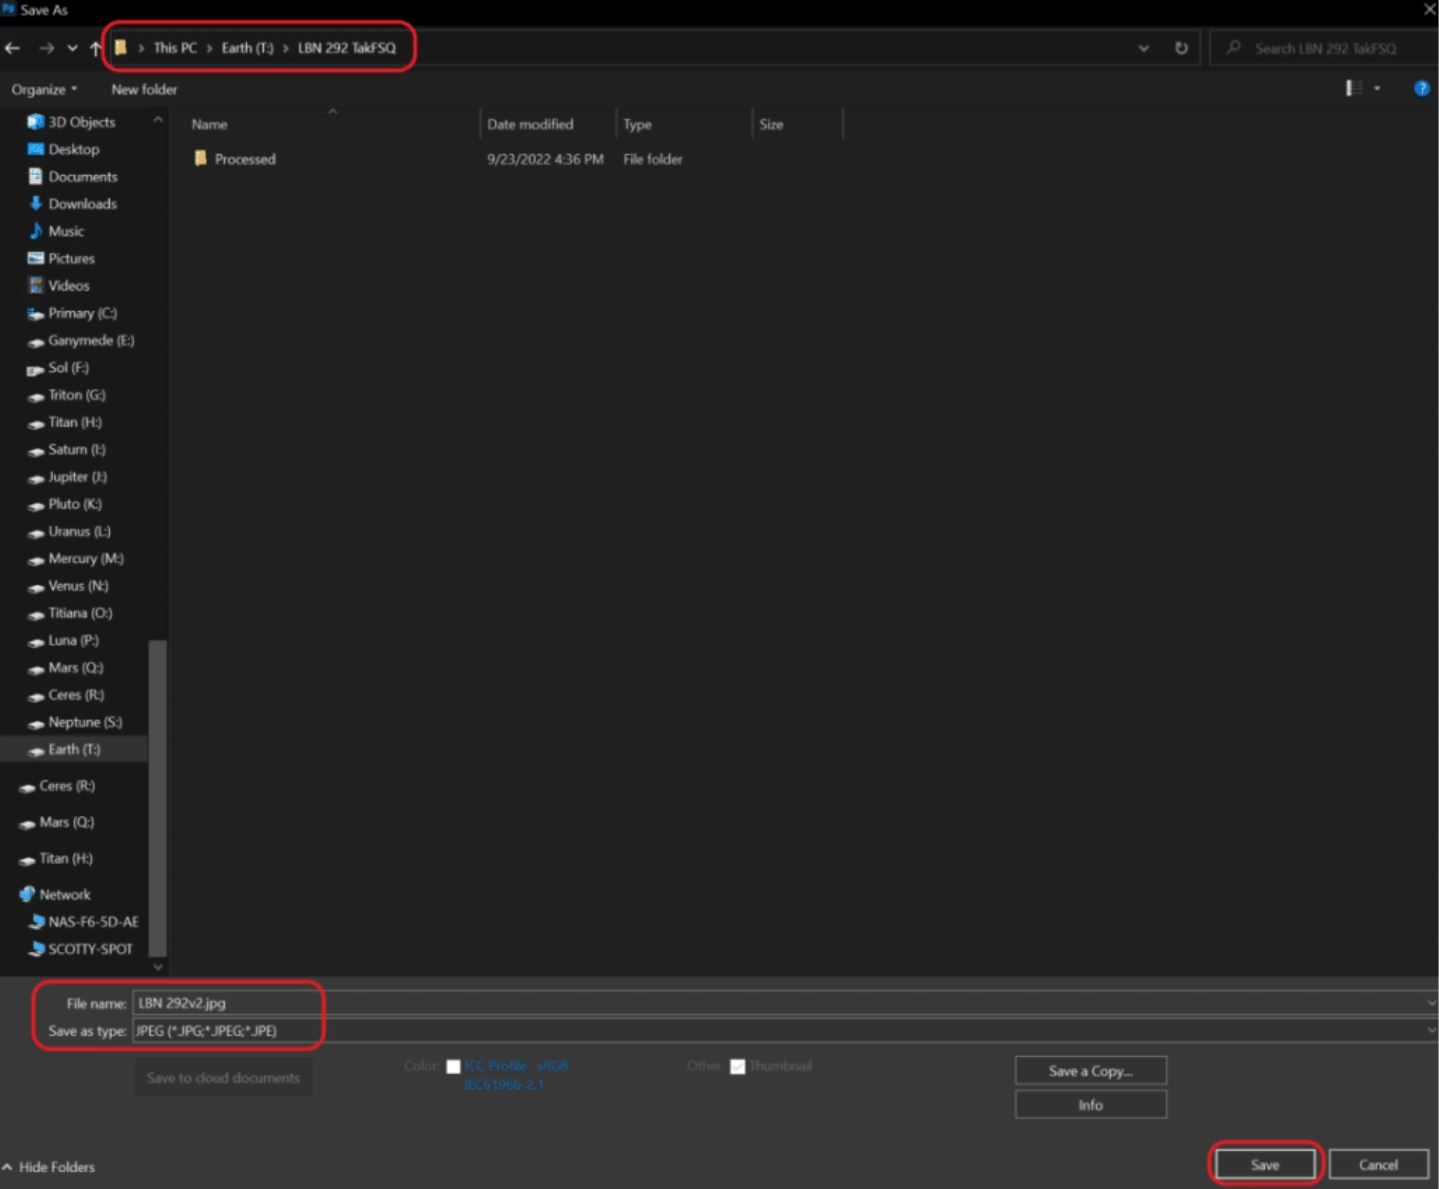
The last step is to now change your image into an 8 bit per channel image, then save it as whatever you want to name it. To do that go to File > Save As, and then in the dialog box that pops upset the location you want to save it to, put whatever name you want, select jpeg, and then save it. Now you are done!