PixInsight SKill Script


Telescope Live image data normally comes with a very high level of quality. However, one problem that can show up in any dataset that will not be easily resolved is when satellites streak across the image capture frame as the data is being acquired. Sometimes these satellite streaks in a sub-exposure can be pretty intense. Fortunately, using the SKill script that can be installed using the repository from Hartmut Bornemann here, you can handle these problems.
One of the green sub exposures for the Barnard 22 dataset has just this kind of problem with a bright satellite trail. You could try to take care of this when you reach the Image Integration stage in your processing or we can handle it now using the SKill script. If you use the script, you will need to use it at the beginning before you begin pre processing your data.
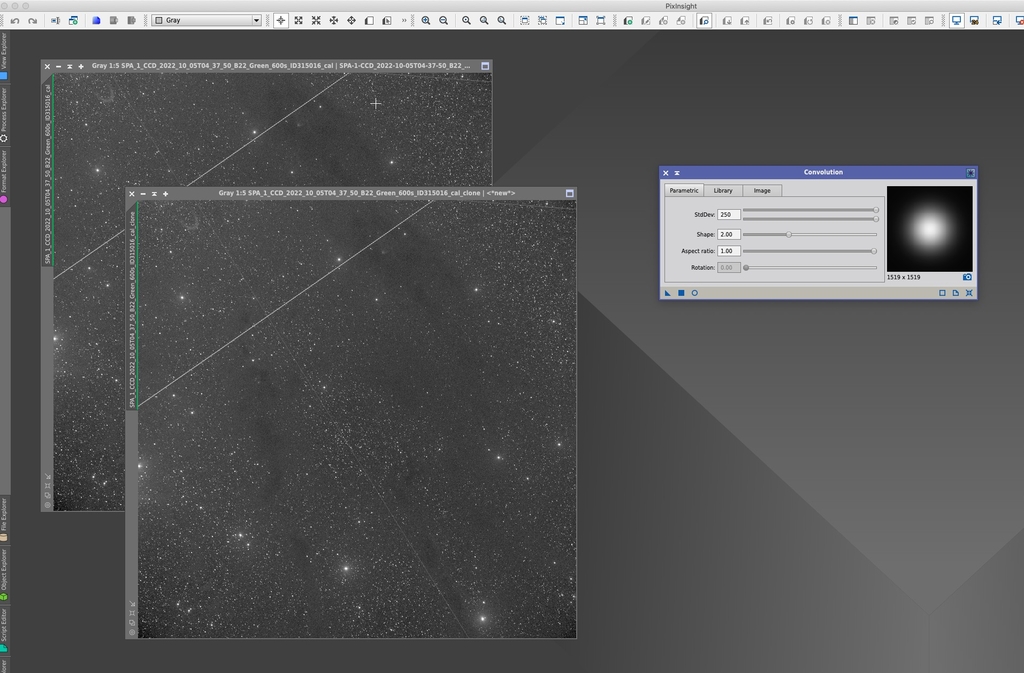
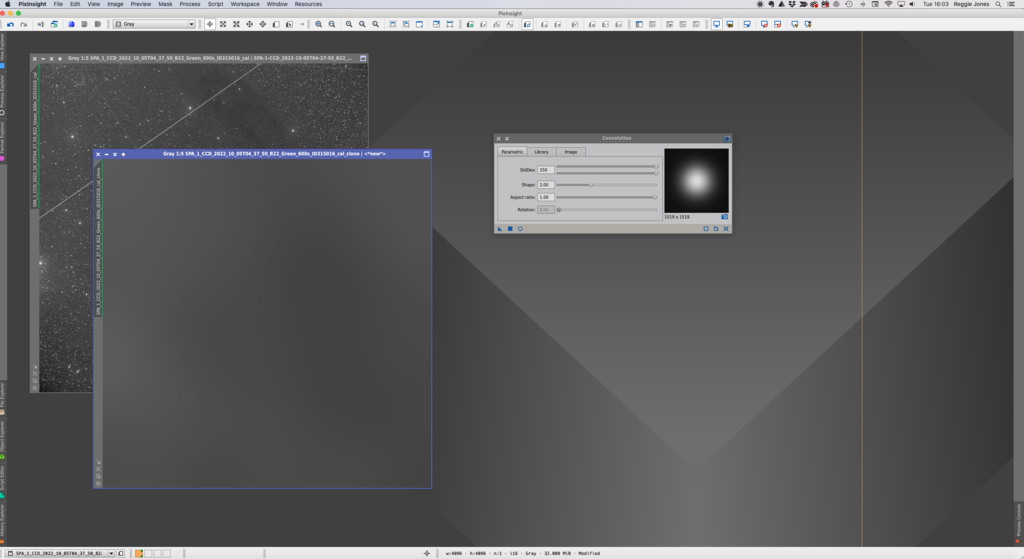
The first step is to make a clone of the sub exposure. You are going to use the Convolution process at the maximum setting to blur the cloned image. We’re going to use the blurred clone information to correct the bright satellite trail and make the trail as invisible as possible in the final correction. Apply the Convolution process at least twice; I usually apply it a minimum of 3 times. You basically want to create as close to a flat frame as possible.
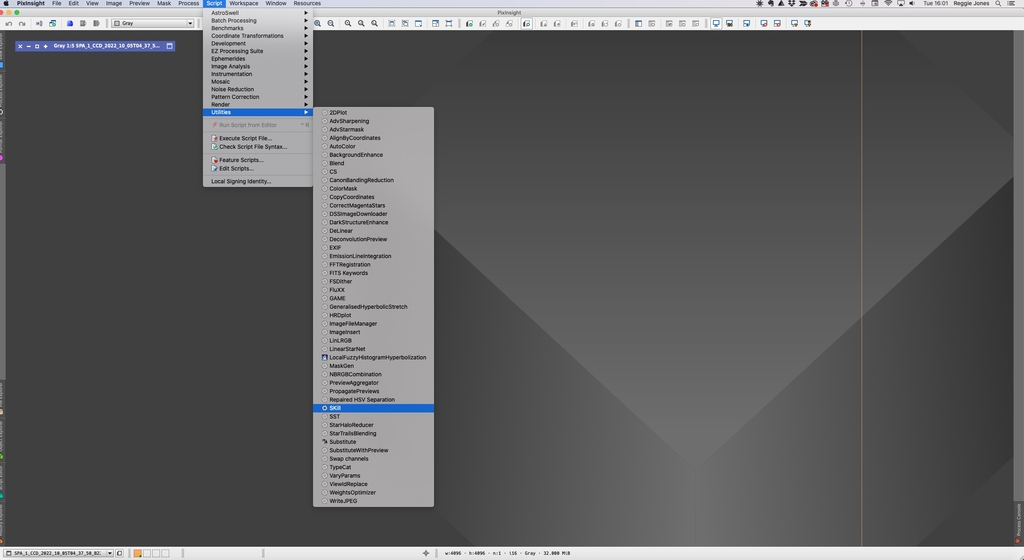
Next, we open the script; Script -> Utilities -> SKill
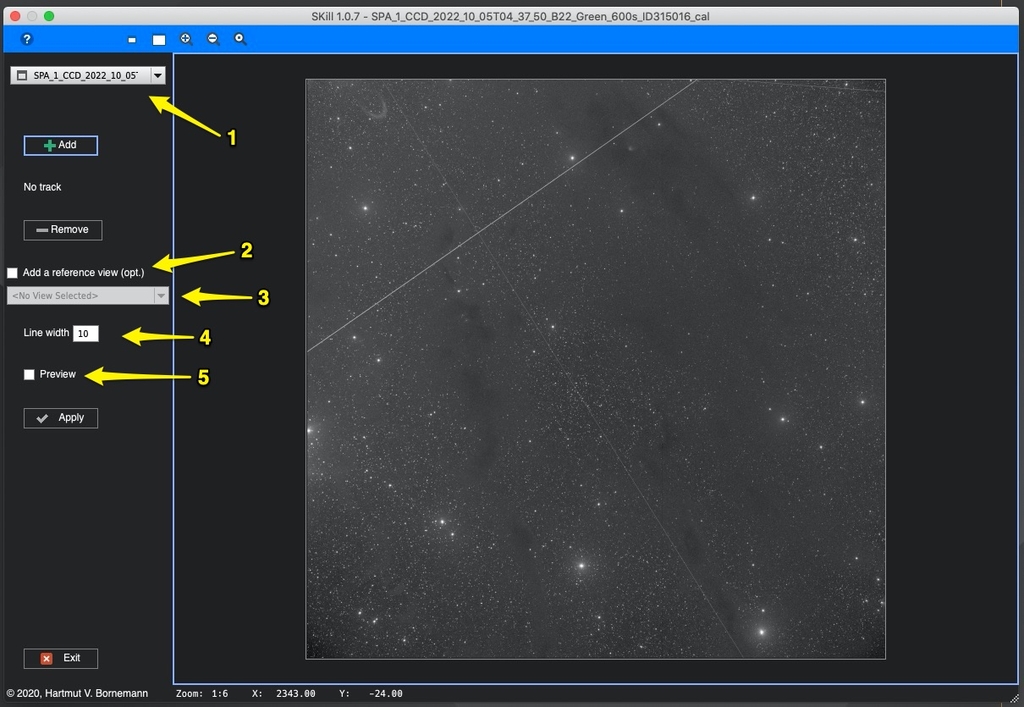
When you open the script dialog, you’ll want to select the image file that you want to correct in the window at the top of the left column (1). Check the box next to “Add a reference view” (2) and in the drop down window, you want to select the clone image you just created a flat image (3). Start with a Line width at 10 (4) and select the Preview box (5).
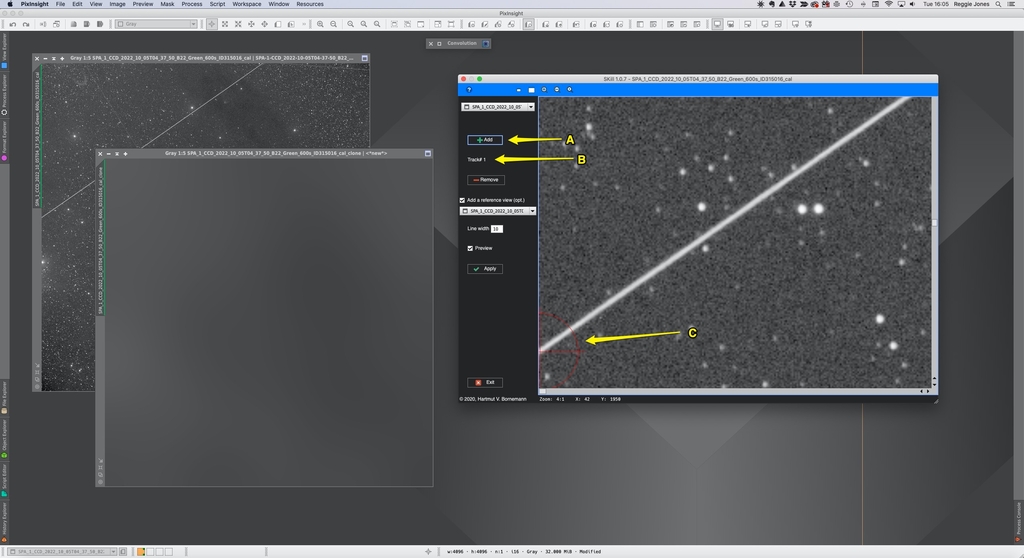
At this point, you’ll want to click the +Add button (A); you’ll see Track #1 labeled under this button (B). Now, magnify the image trail you want to remove in the dialog window and scroll to now end of the trail. When you’re there, click in the middle of the trail (C). You should see a circled crosshair at that point. Do the same thing at the other end of the line. When you’ve done this, you should have a bright red line covering most or all of the trail.
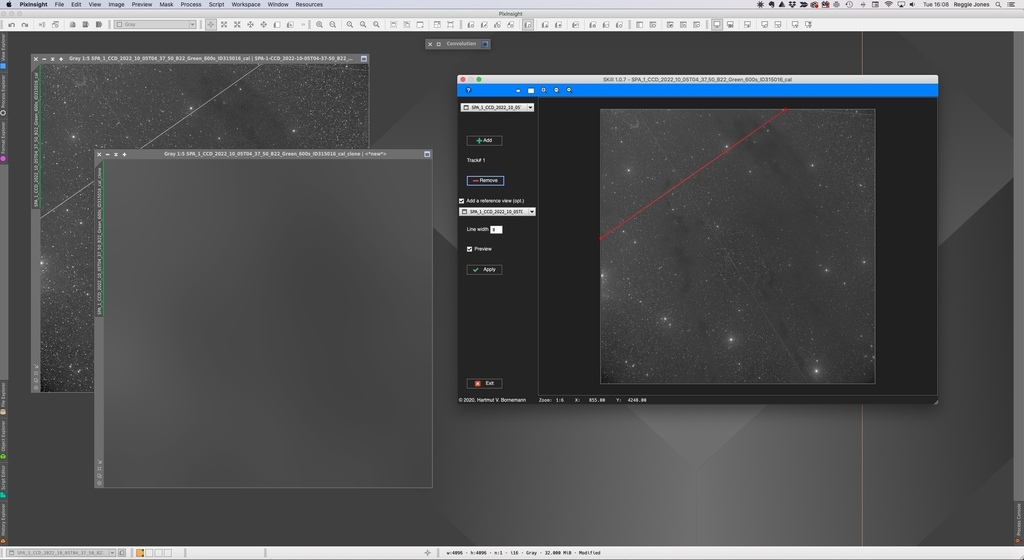
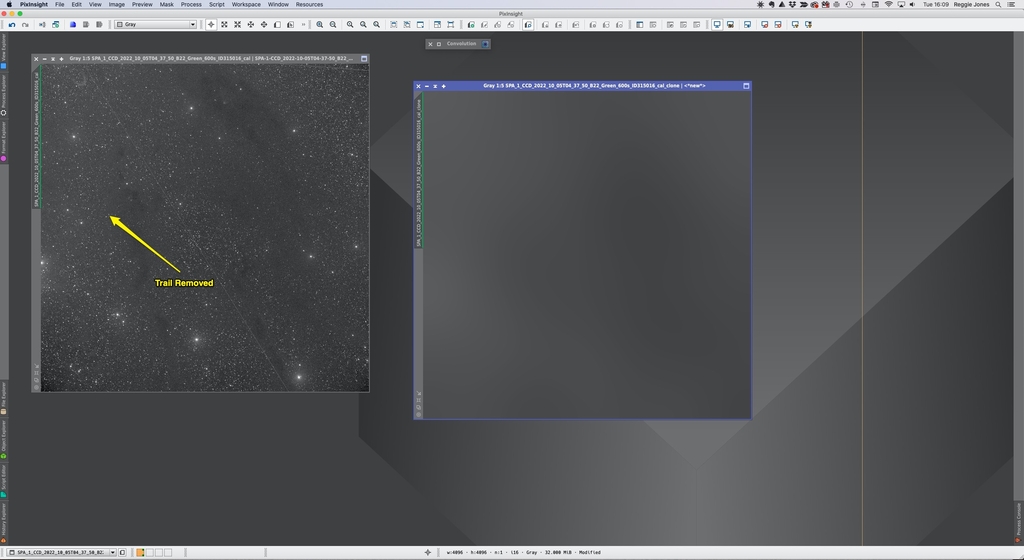
Now scroll in to the line and make sure the trail is covered by the bright red line. Use the Line width adjustment to make the line wider or thinner as needed. When you’re good with everything, click the Apply button to process the script. When it is done, you should see the trail disappear; assuming you created enough of a flat image from the clone, you should not have any noticeable artifiacts.
If you have multiple bright trails that you need to remove, you can create multiple corrections at the same time but this can become unwieldy to execute effectively.
Clear skies….
Astro Image Credits:
Barnard 22 - Telescope Live 1-Click Observation Data, Processed using PixInsight by Reggie Jones