PixInsight Spectrophotometric Color Calibration
A recent update to PixInsight provided major changes to the Photometric Color Calibration process (PCC) and a new process is added called Spectrophotometric Color Calibration (SPCC). The first thing you’ll notice with these new processes is that they do not perform a plate solve for your images as part of these processes to calibrate the broadband color in your images. You will also discover that after you’ve calibrated, aligned and integrated your sub exposures, the integrated image will not have a plate solve solution. In my previous post, I outlined how to use the Image Solver script to get the astrometric solution you need so that PCC or SPCC can be used. Now, we'll look at how to use the new SPCC process.
To get the absolute best detailed explanation I’ve found of how SPCC works, use the links below to take you to Adam Block’s video tutorial on YouTube of the SPCC process. I highly recommend you take the time to review the 2 part tutorial; Adam will provide you a more thorough understanding of how the process was developed and its use than I can provide here. It comes in 2 parts; Part 1 and Part 2.
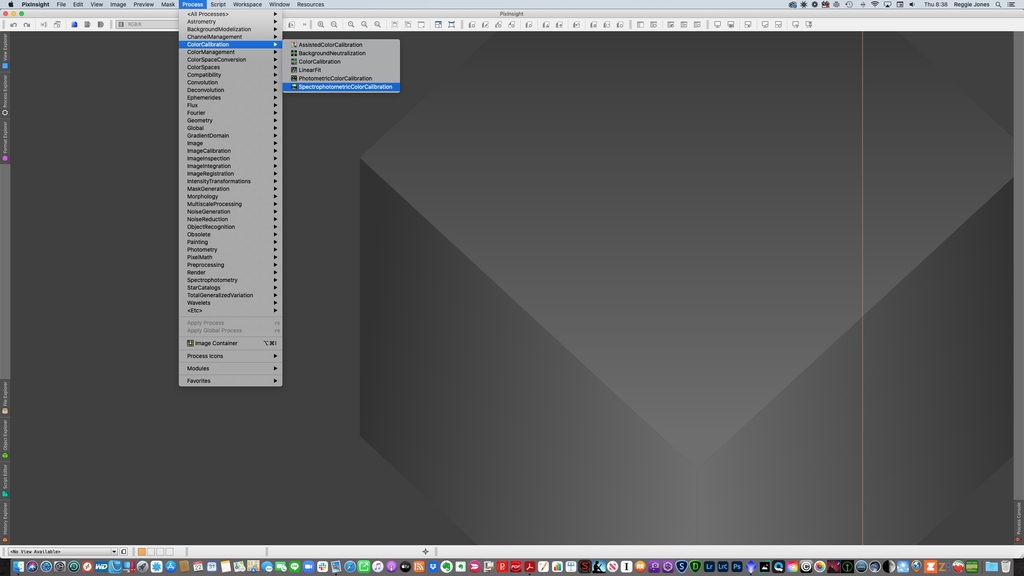
For now, I am only going to review how to use the new Spectrophotometric Color Calibration (SPCC) process. To get SPCC, go to Process > Color Calibration > Spectrophotometric Color Calibration.
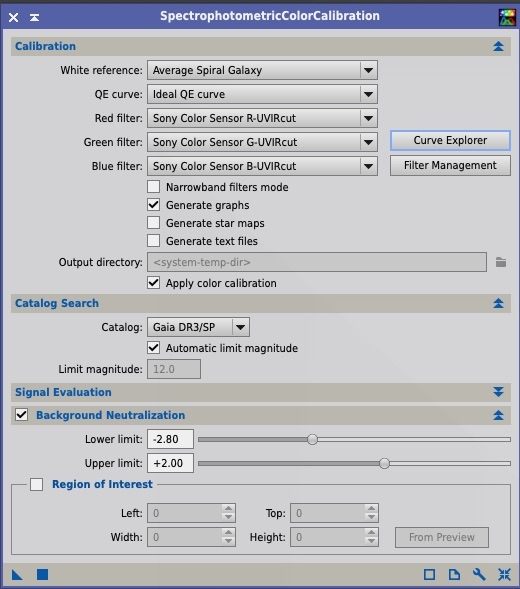
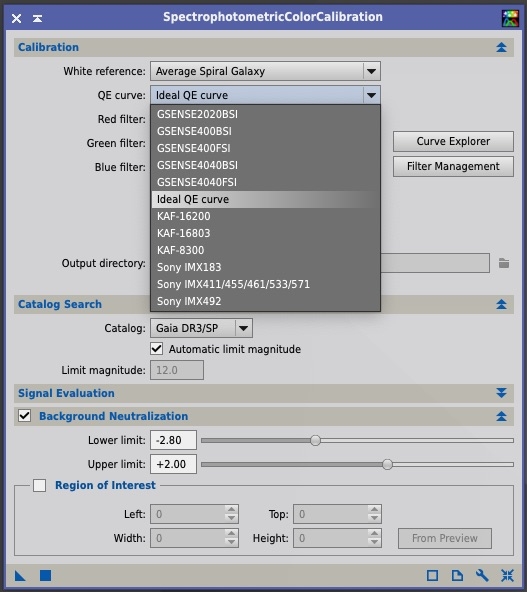
There are 3 sections you’ll need to be concerned with. The first is the Calibration section. Here, you can specify either the specific imaging chip architecture for your camera or a more general Ideal Quantum Efficiency curve. My camera equipment uses the Sony IMX 571 chip; you’ll need to specifically check your equipment to see what selection is best, but if you don’t know, selecting Ideal QE Curve would be best.
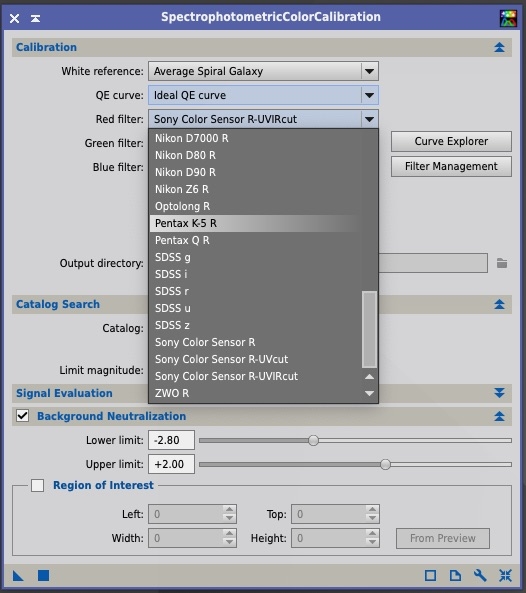
I'll also note that you can select the individual camera filters that are used. There are a lot of DSLR camera selections here, but for my Sony imaging chip, I leave these at the Sony Color Sensor for Red, Green and Blue.
The next section is the Catalog Search section. This should be the latest GAIA catalog you downloaded from the PixInsight website and is currently the GAIA DR3/SP. I leave the Automatic limit magnitude selection checked.
The final section is Background Neutralization. The defaults for the Lower and Upper limits at -2.80 and +2.00 respectively seem to work just fine and I’ve not touched them. However, there is the ability to identify a Region of Interest. What I recommend you do here is check the box for Region of Interest which will make the From Preview button active. Create a preview on your image that selects a background area with no stars and nebulosity. Using the From Preview button, select the preview you just created.
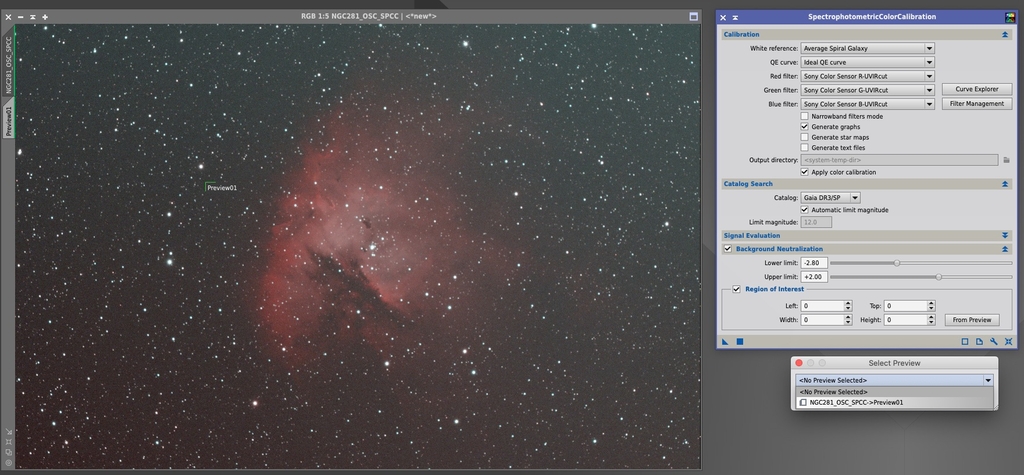
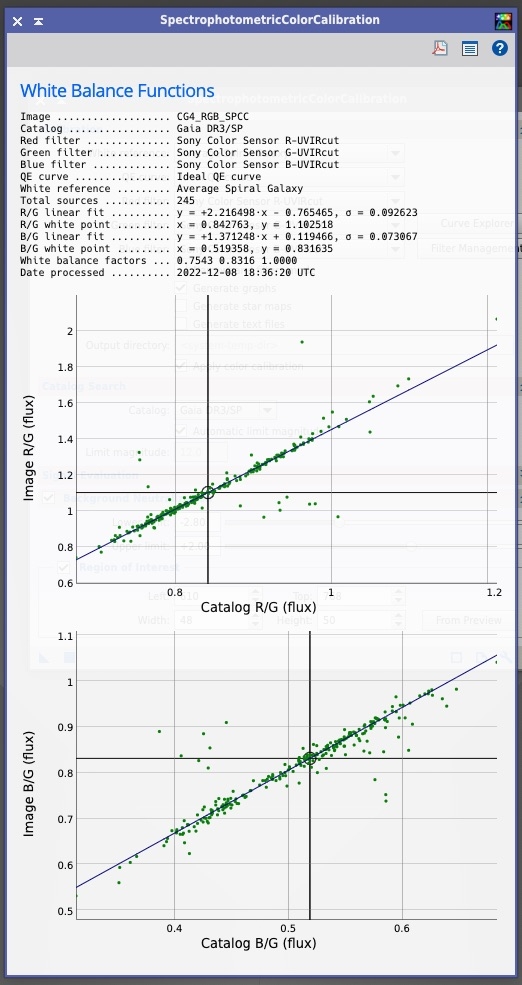
With all this completed, you can now apply the process to your image. When it is completed, you’ll receive the graphs of the linear fit of the stars in your image to the catalog. The broadband color for your image will now be about as accurate as is possible.
Stay safe and Clear skies….
Astro Image Credits:
Cometary Globule 4 - Telescope Live 1-Click Observation Data, Processed using PixInsight by Reggie Jones - https://app.telescope.live/click-grab/all?target=cg4
