Shrinking Excessively Big Stars in Photoshop

Sometimes we get an image that has some stars that have somehow gotten so big that it normal star shrinking actions will not do much for them. Lets say you get a nice set, but for some reason with bright stars they end up getting hugely bloated. Maybe you have grabbed a One Click or a set of them and you see that some of your stars look huge and you don't like that. Well, there is a very easy way to take care of this, but it works best in a field that isn't densely packed with stars.
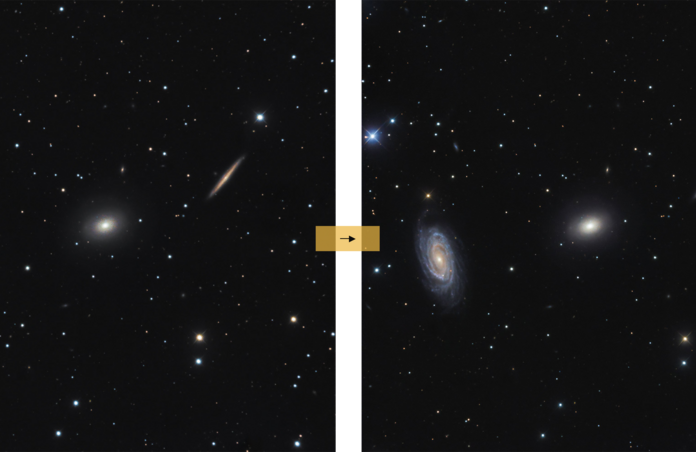
The way I am talking about is using the liquefy filter in Photoshop, and it does an amazing job. I have both a before and an after image of the same thing to show you what can happen with it, the Draco Triplet datasets found here. https://app.telescope.live/click-grab/all?target=NGC%205982
This is an amazing set, but one of the things with it is that there are some stars that seem really big. This is why when I do a set on SPA-2 that has bright stars in the field I will limit my subs to 300s instead of 600s, or at least I used to. Now I will take full advantage of those 600s subs unless the object is so bright that 600s would overexpose it. I have an image of both before and after I did the star shrinking. I could have even taken them down farther if I had wanted to.
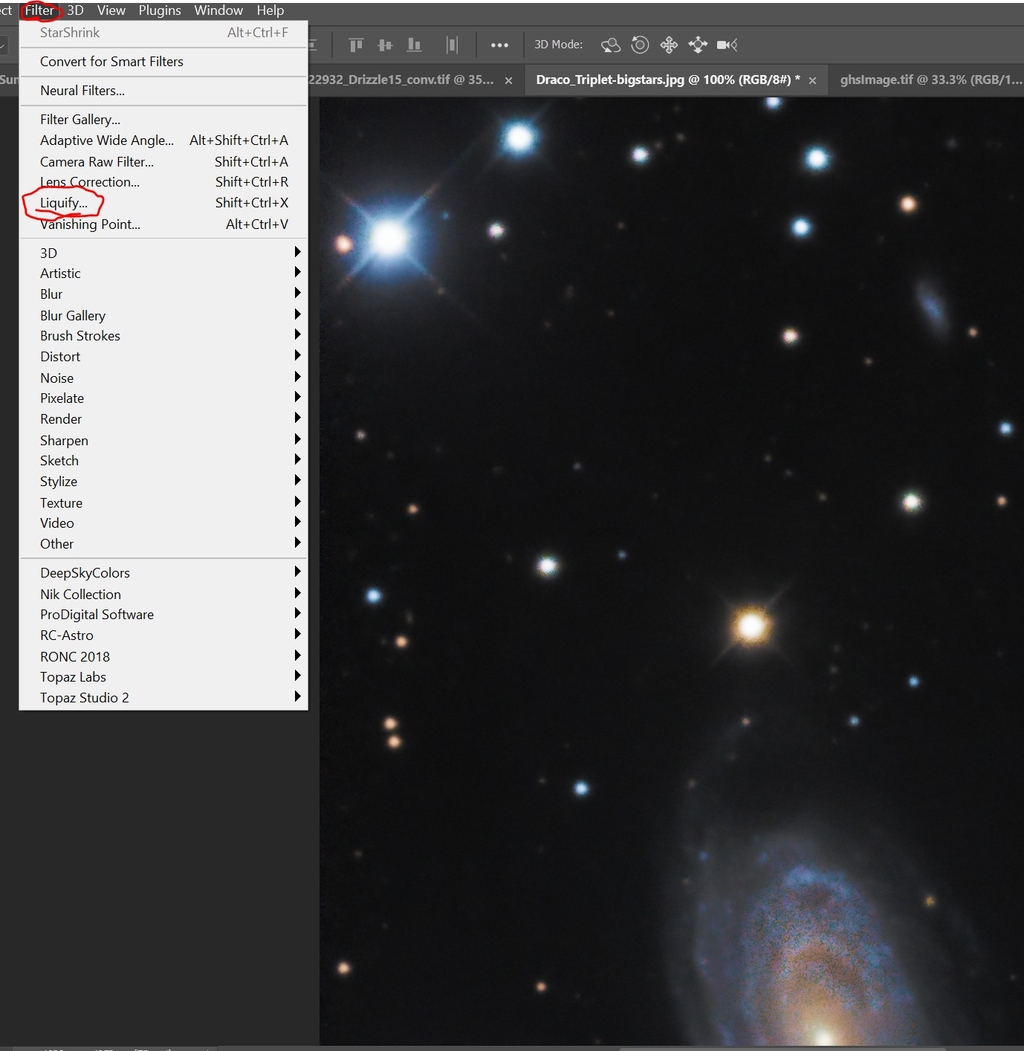
So what you need to do is get your image almost to it's last stretch to make sure you've gotten everything as bright as you want. You can still do some tweaking, and if you really want you can do some stretching after, but I like having the stretching pretty much done before it do this. Once you are there select Filter > Liquefy

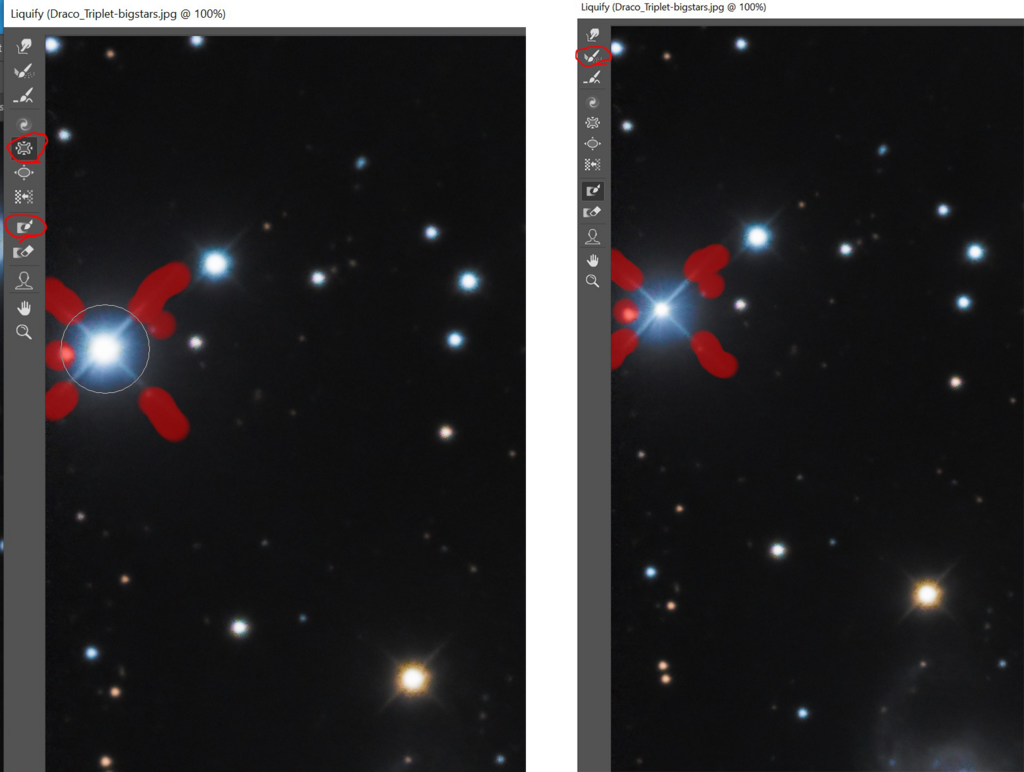
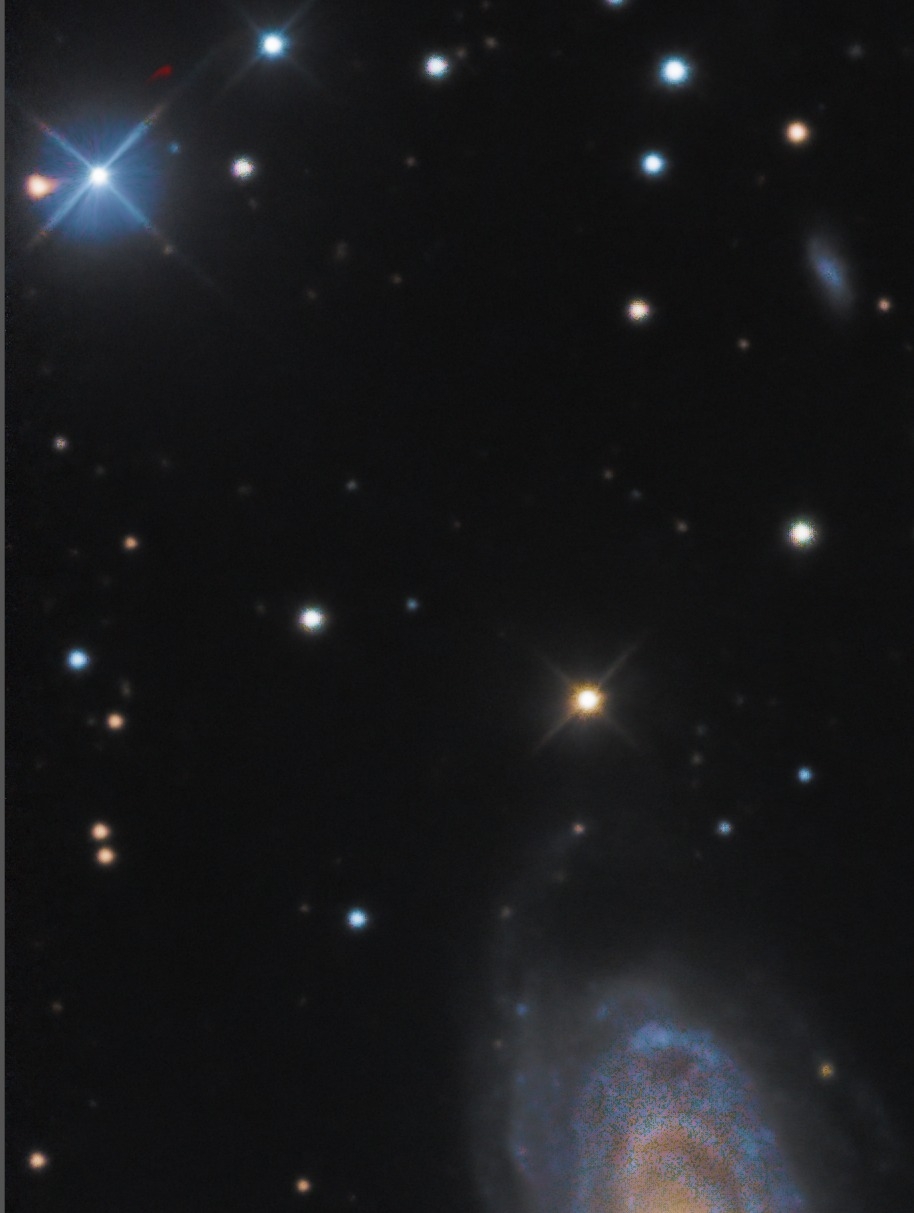
Now that you have it open you will want to use the freeze tool to freeze your diffraction spikes, and other stars close in, basically whatever you want to stay how it is. Make sure the pucker tool is big enough to get the star and the glow from it by using the adjustments for it off to the right side of the window this is working in. Then once on it with the star centered you click and hold until you get a star the size you want it. Note that if you overdo it you can use the reconstitute brush to undo it partially or fully. See the difference in star size here? Now go and do the same thing for any other stars that seem too big.

Once you get done shrinking the biggest ones then you can move along to some other way to do a broad star shrink over the whole image if you want such as using Russel Croman's Star Shrink or an action you might have made yourself in Photoshop like the one I made one that simply takes all stars and shrinks them by a percentage, but it also smooths the image out at the same time so it only gets used on certain images. You can also clean up any residual glow if you would like at this point because this is when you will tweak your image.

As you can see it works. The examples I have of it in action are before my final noise removal and my final microcontrast and sharpening is done, but it should give you an idea of what you can do with this. Why do you give it a shot on some of your images and see what you think?
This blog post was originally published in our Telescope Live Community.
The Community represents Telescope Live's virtual living room, where people exchange ideas and questions around astrophotography and astronomy.
Join the conversation now to find out more about astrophotography and to improve your observation and post-processing skills!
