How to Download Publicly Released JWST Data to Process
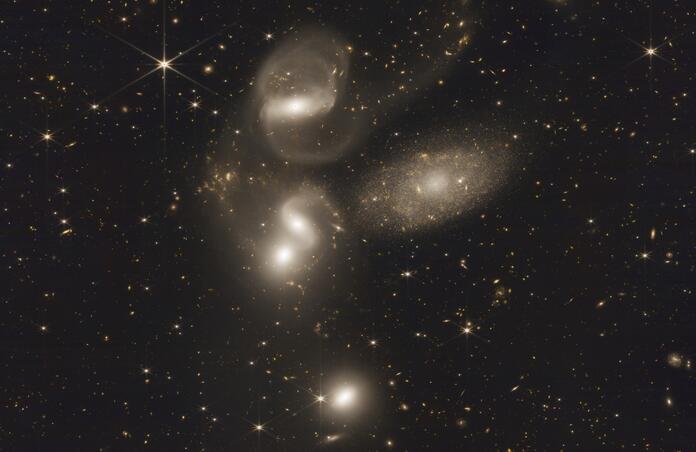
In case you weren’t aware, you are able to download imaging data from the James Webb Space Telescope (JWST) that you can process into an astro image. The process is pretty straightforward but there are a couple of curves that you’ll need to be aware of to have success.
Step 1 -Your first step is to go to the Barbara A. Mikulski Archive for Space Telescopes, known as the MAST Portal. On this webpage (Figure 1), you’ll see that JWST data became publicly available on July 13th. Keep this date in mind as you’ll need to do a search using this date to obtain the data.
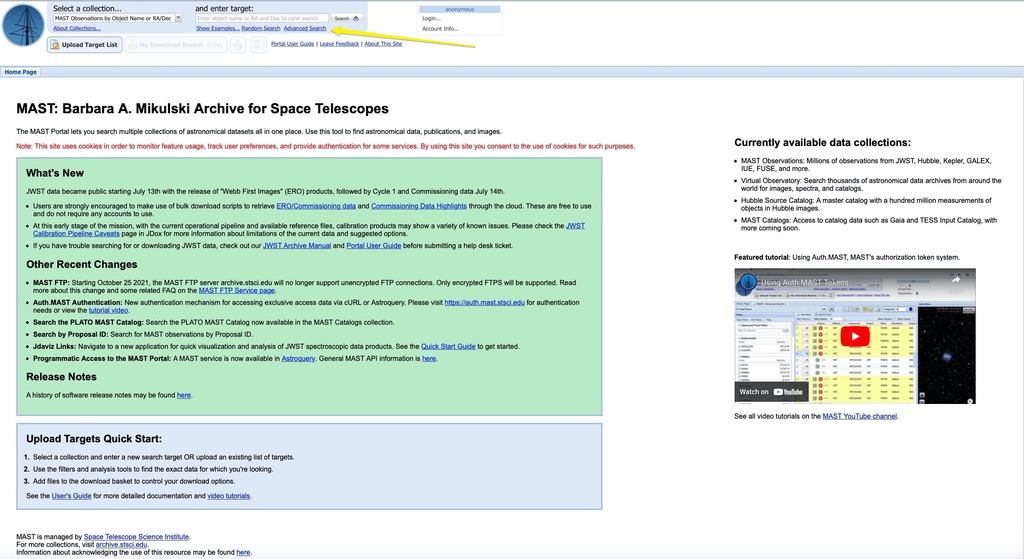
Step 2 - Near the top of this webpage you’ll see the “Advanced Search” link. Please click this to get to the search page.
Step 3 - On the search page (Figure 2) you’ll see several filters and a column on the left side to include even more filters. First, type in the filter box under “Mission” JWST and then scroll down in this filter selection and select “JWST”.
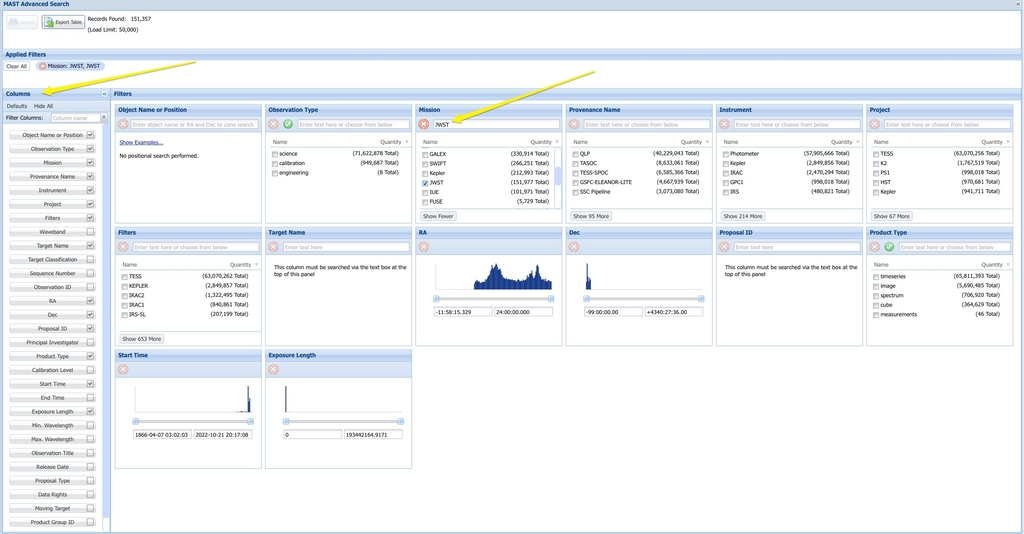
After this, go to the left hand column and place a check mark in the “Release Date” box (Figure 3). This will include the “Release Date” filter in the main window. Here you’ll put in the release date information; the JWST data was released on July 13, 2022. In the left box put in this date (2022-07-13 14:00:00). In the right box put in the same date with a later time (2022-07-13 16:00:00). This is because I learned the data was released at 3PM on July 13th.

After you’ve entered this information, you’ll note in the top left corner of the webpage the number of Records Found and the Search Button will become active. You can now click the Search Button.
Step 4 - When the search results are returned (Figure 4), you’ll see the list of data files for all Instruments listed. In the left column you can refine your search by selecting the items you’d like to use. In this case, you should check the box for NIRCAM under the Instrument filter. This is the data taken on the Near Infrared Camera.
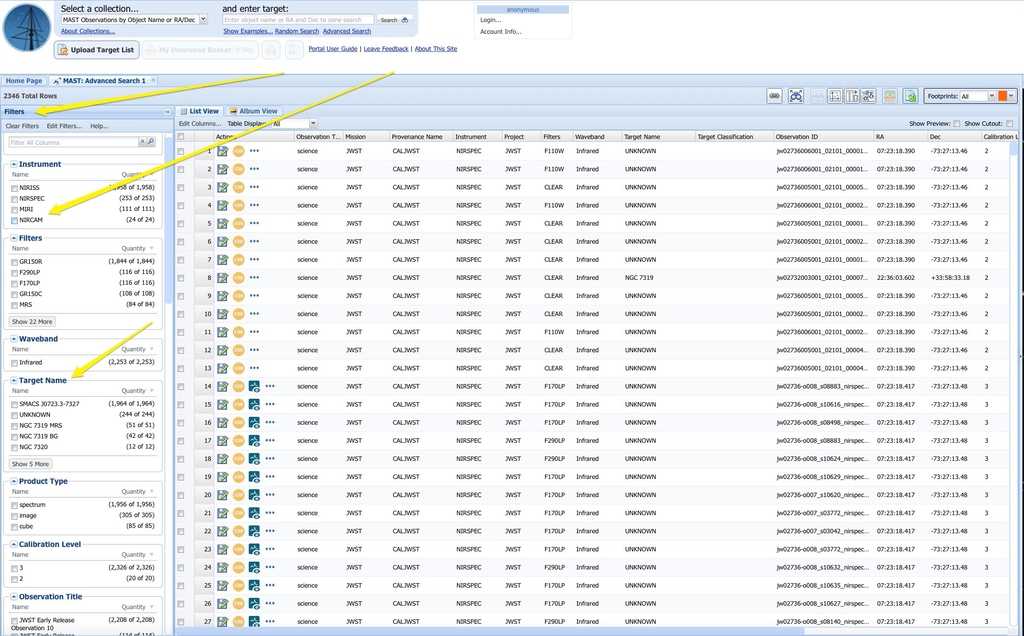
When you do, the list of data files shortens considerably (Figure 5).
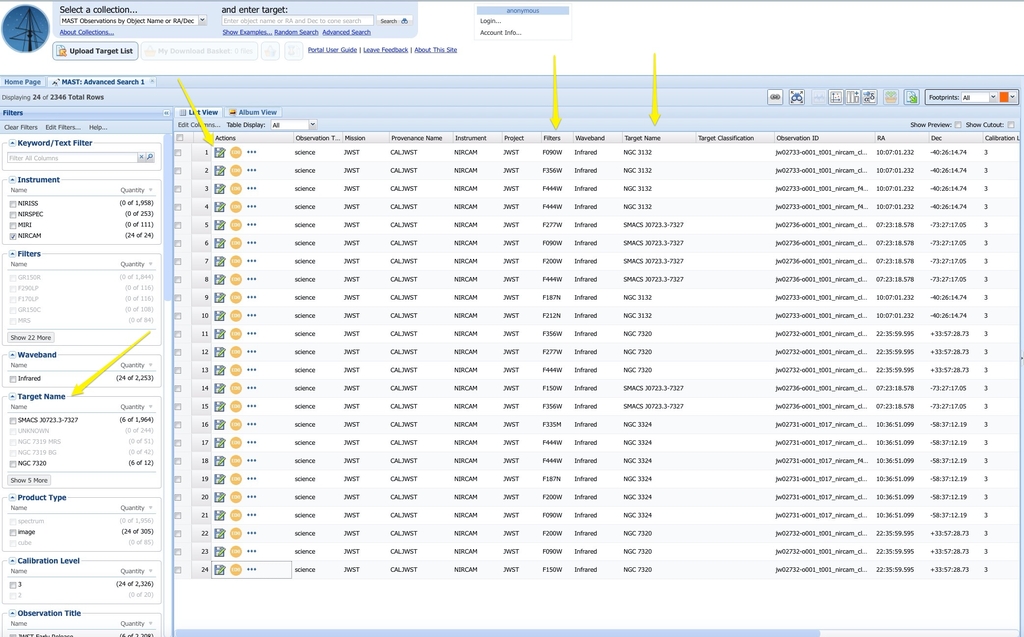
Step 5 - Scrolling the filter column on the left, you can select the data by Target Name. After this, download the data for each target by clicking on the floppy drive icon under actions. The data will now download to your computer. Keep in mind that each data file is for a single filter type.
When you open a file, you’ll find that the data is nested in several folders. When you finally come to the FITs files, you will have 2 files; the segm FITs file and the i2d FITS file. You want to use the i2d FITs file. When you open the i2d FITs file, you will get around 6 files, 5 of which are calibration files. The one data file that you want to use is the SCI file for the listed filter.
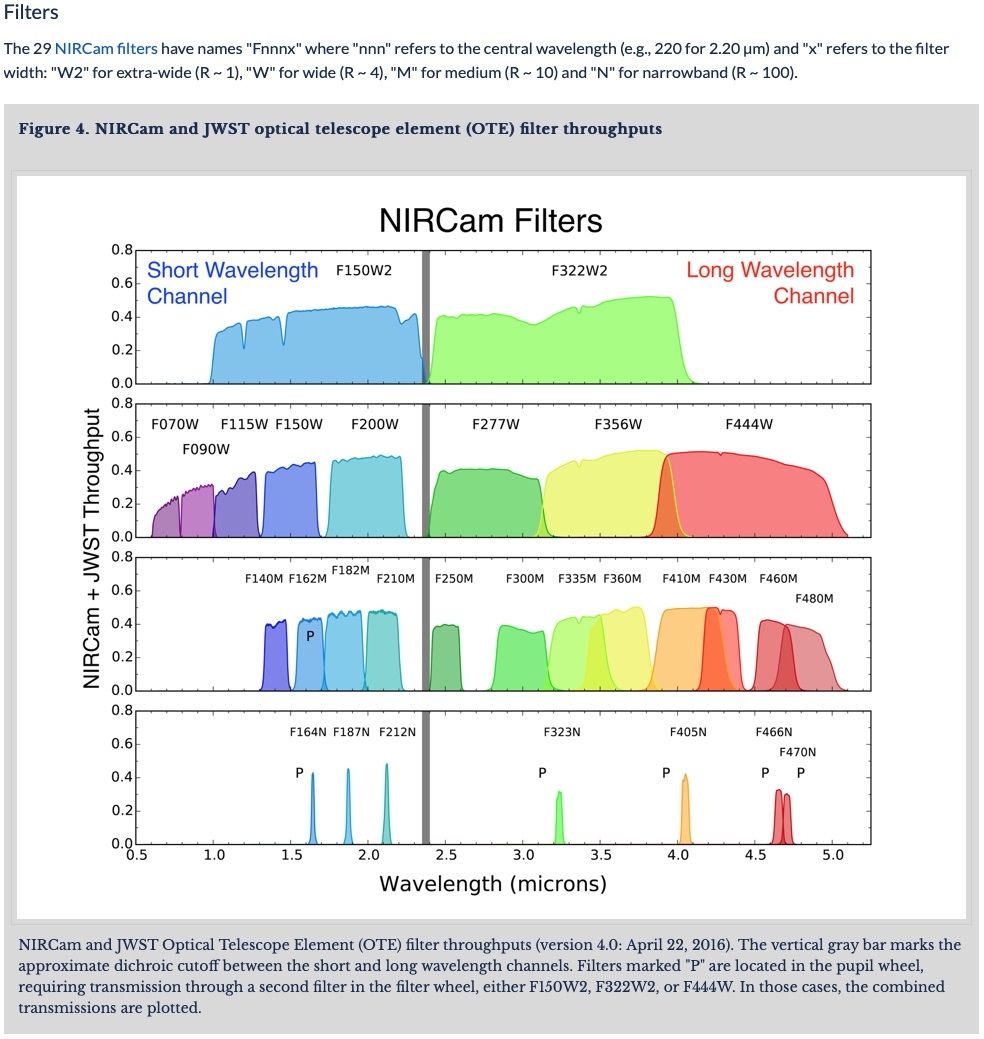
Once you have all the SCI files for each filter for a target, I recommend you align these files using Star Alignment in PixInsight or whatever alignment process that your processing software uses. From there, you can experiment and combine these files in different RGB channels to get a combined image and process from there. When you do this, use this chart as a guide as to what may be the best color channels to use depending on the filter you’re working with (Figure ?). This is what I used to develop the final images I’ve posted here.
Clear skies and have lots of fun!
Image Credits:
NGC 7320, Stephan’s Quintet
JWST publicly released Data downloaded from the Mikulski Archive for Space Telescopes (MAST) - Oct 2022
Filters; NIRCAM 444, 150, 356
Processed in PixInsight
