Three Lessons I Learned From Reprocessing Old Astrophotography Pictures


Have you ever gone back and reprocessed or reworked an image that you were never quite satisfied with?
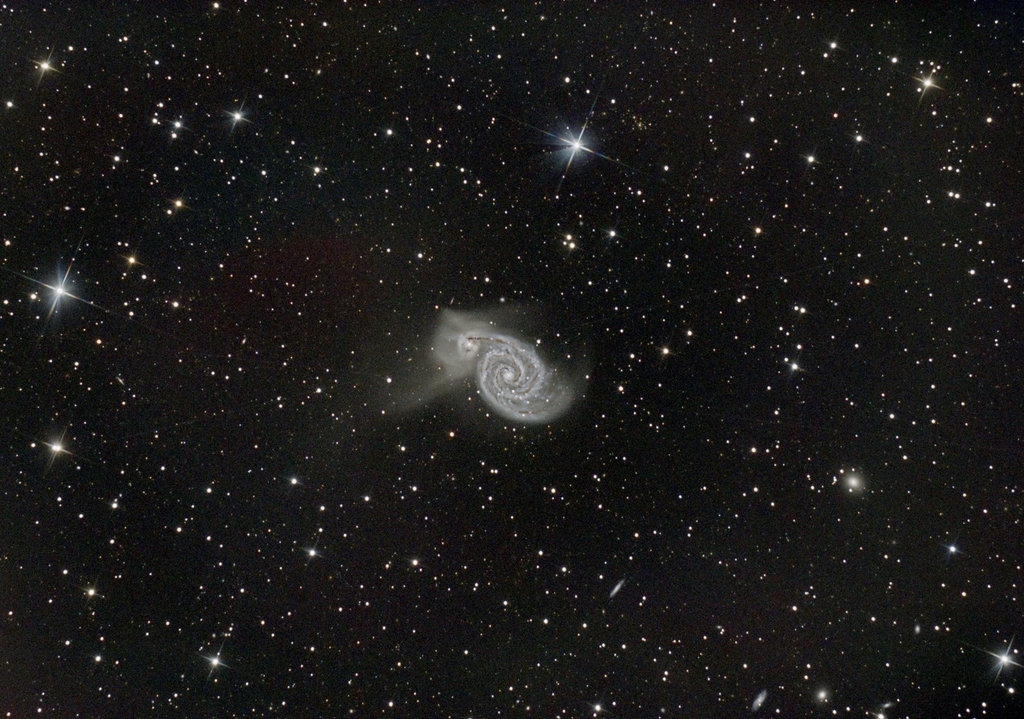
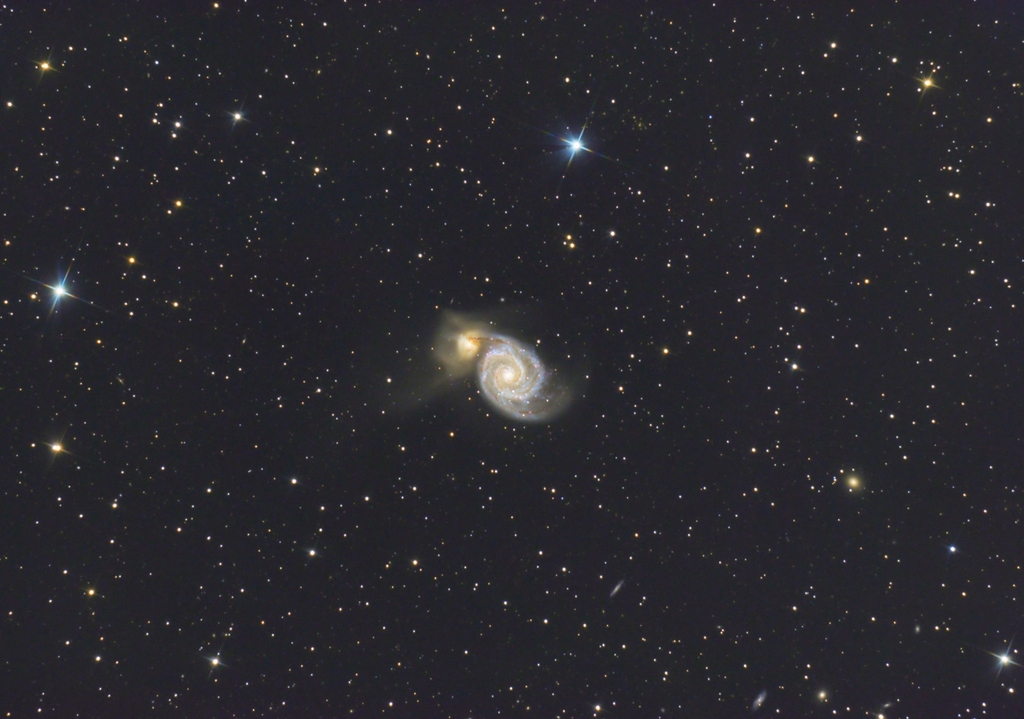
I’ve been doing this a lot lately. I went back and reviewed the first Astro image I ever took several years ago; it’s an imager’s favorite target, M51, the Whirlpool Galaxy in Ursa Major.
I’ve posted the original image I did and the much later reworked image.
This was the first light test of my first Astro imaging setup, which I still use today:
the Orion f/3.9, 8-inch astrograph on an iOptron CEM60 mount and a QHY10 One-Shot Color camera.
When I started Astro imaging some time ago, I didn’t know or fully understand what I was doing. Many targets I chose weren’t always the best decisions for someone at a beginner skill level. The main reason is that they were complex targets that required a minimum level of skill and attention that I’d not yet acquired. After a considerable amount of work and frustration, the results were more of a “hmmm…” instead of a “Wow!”.
I’ve been reviewing a lot of the past images I’d taken and worked on and the “hmmm…” was still there, but after seeing a few of these, I realized that I should be able to try processing these images again now that I have a few years of additional experience at doing this.
So several weeks ago, I started reworking a few of these past images to see how well I can improve upon them. I think I’ve been mostly successful with them, and I’ve come away with a few significant lessons that I’ve incorporated into my current work.
The first thing I’ve learned so far is to make sure you understand your target thoroughly to get the data acquisition piece right. There is no substitute for obtaining the best data possible. The better the data, the easier the processing will be. The old saying, “garbage in, garbage out” really applies. Included in this is to make sure you get enough data; if you don’t have enough data, you’re putting yourself at a disadvantage.
The second lesson that became clear is to not venture into territory that you haven’t properly prepared for. Narrowband imaging has been the bane of my Astro imaging existence; I started working in this medium without really understanding the hows and whys of processing this kind of data. I struggled with a lot of pain and suffering learning how to obtain and process this kind of data properly. I still suffer a great deal trying to process these kinds of images, but I think I’ve now reached the level of purgatory instead of being stuck back in the 9th Circle. Had I prepared adequately to understand how to work with narrowband data, a lot of this pain could have been avoided.
The third lesson that became obvious as I reworked some of my past images is that as much as I think I’ve progressed, I still have a lot more to learn before I could consider myself somewhat proficient. All I need to do is go on Astrobin or Telescopius or the Telescope Live gallery and review the work of others on similar targets. There are many great images posted out there, and they all seem much better than what I can offer so far.
Hence the work and rework are illustrated below. I think I improved on the initial image, but I’d like to know what you think. Please feel free to provide constructive comments on this work.
As always, stay safe, get more people to turn their lights off at night, and clear skies!
This blog post was originally published in our Telescope Live Community.
The Community represents Telescope Live's virtual living room, where people exchange ideas and questions around astrophotography and astronomy.
Join the conversation now to find out more about astrophotography and to improve your observation and post-processing skills!