How to Combine CCD and CMOS One Click Observations in APP


Hi all, now that we have data coming in on the CMOS setups, and some of these objects are also on the CCD setups you might want to blend both to get more integration on an object at times. Here is how you can do this using Astro Pixel Processor. I am using the 2.0.0-beta13 version, which should be pretty close to the final version of 2.0.0 and retain this same functionality. The One Click Observations I am using for this can be found here: https://app.telescope.live/click-grab/all?target=M104
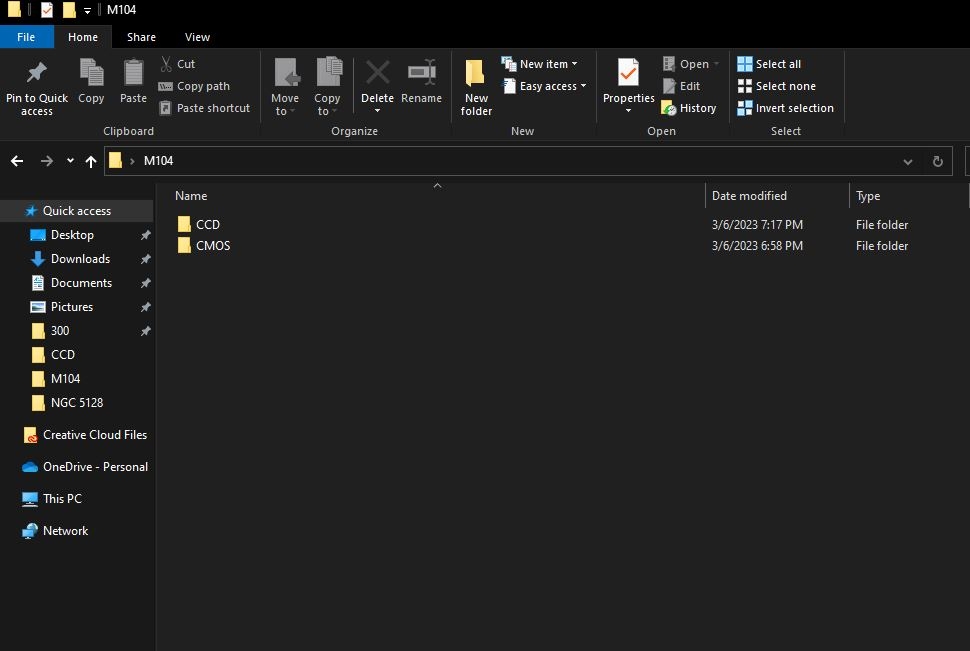
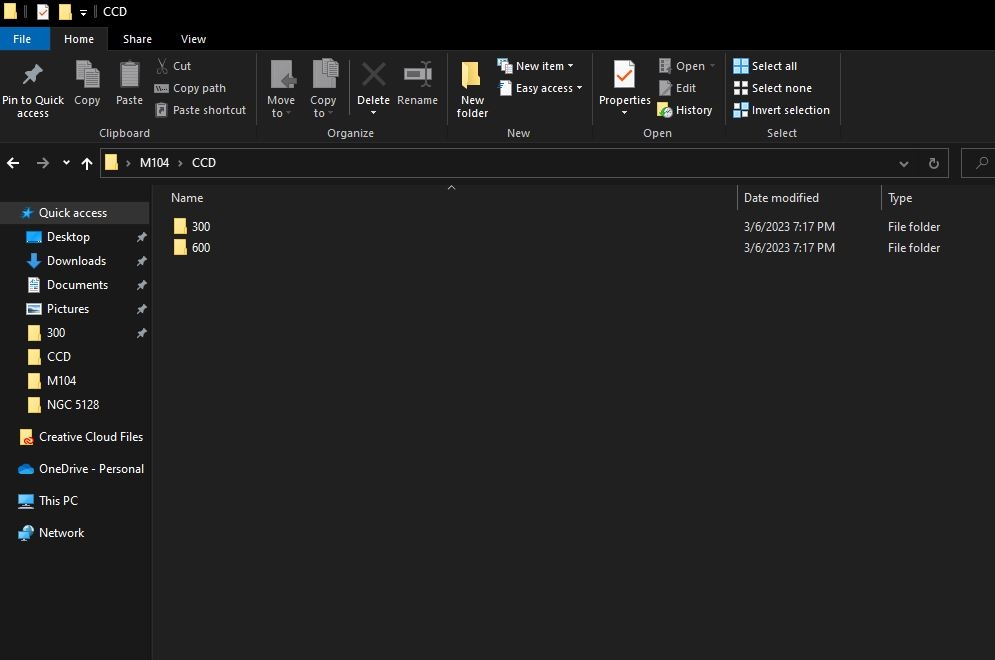
After downloading these there are a few steps to take for organizing them properly. First create a folder that is labeled M104 (or whatever object you will use in the future) and then inside that folder create two subfolders labeled CMOS and CCD. If you have different exposures, which we do with the CCD version, add subfolders within the camera type subfolder showing the exposure times. In the CCD folder we will create one that is labeled 300 and one that is labeled 600. Now extract all of your downloaded files into the proper folder.
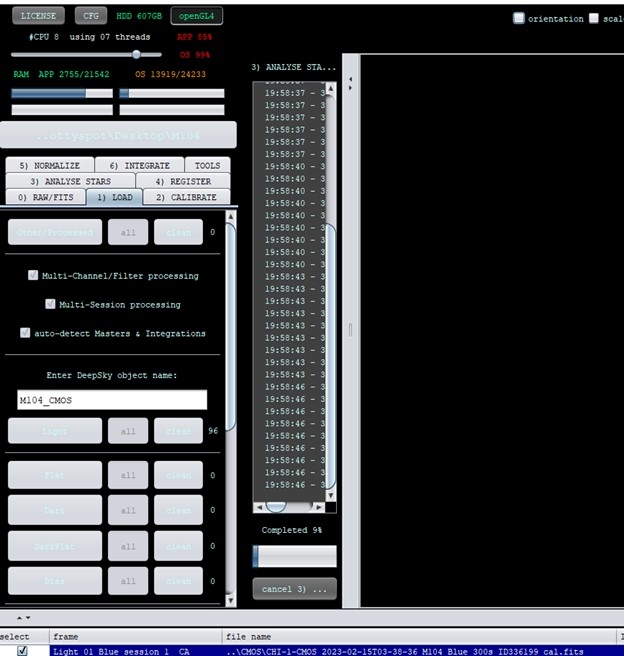
After this you will want to open APP, go to tab 1) LOAD and load one of the sets. In this case I have the CMOS set running as in integration first. All we want to do is integrate them so we have master integrations on L, R, G, and B at this point. You will do the same on SHO or whatever filters you use for an integration.
As you can see down at the bottom of this after integration I have 4 masters. Now we want to go back to the load tab and clear everything out using the clear button at the bottom, then load up the next set, this one being the CMOS sets. One thing to remember on these is you want to load them into 2 sessions because you have 2 different exposure times.
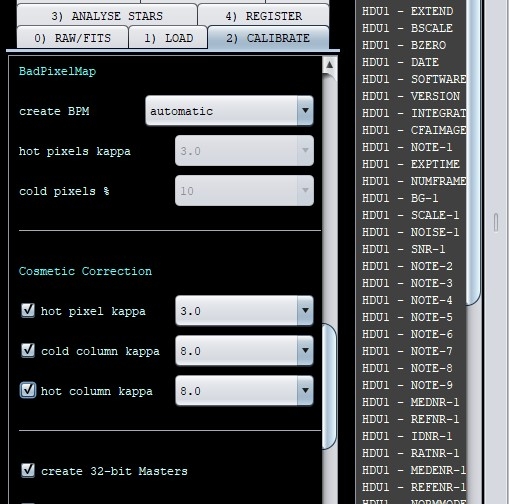
After you load up your CMOS ones into sessions go to tab 2) CALIBRATE and scroll down, then check the boxes for cold column and hot column for the CCD integrations. I generally always have the hot pixel one checked on any integration. I also find that leaving things at their defaults seems to work pretty well most of the time. You will also go to tab 6) INTEGRATE and set your Multi-Session options to integrate per session. That gives you a set of masters for the 300s set and the 600s set.

Now that we have ran our integration we should have masters for each session. Note that it will only give a master for the type of subexposure that you feed it, so we only have a luminance channel on the 600s set, which was session 2.
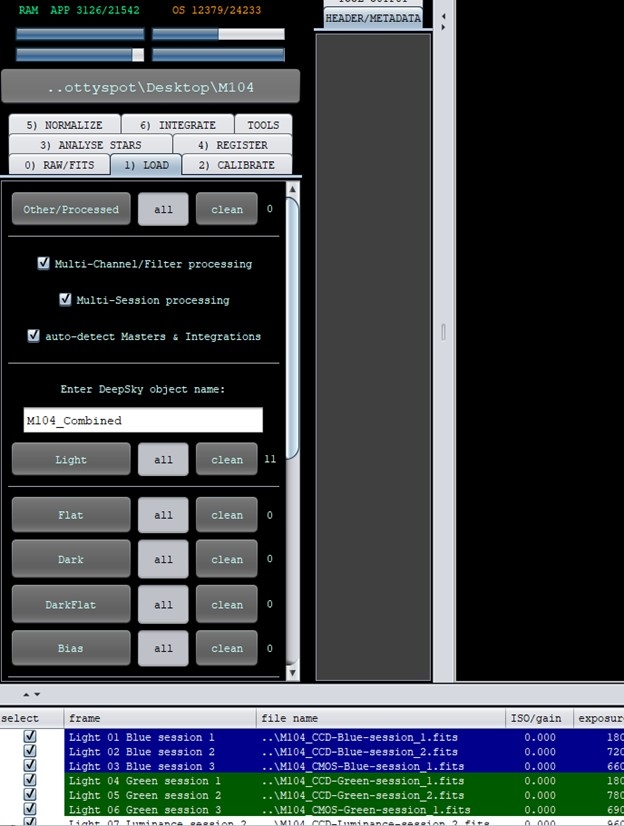
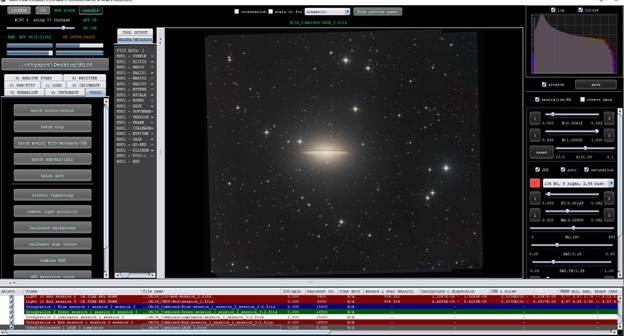
The next thing you want to do is to go back to the load tab and clear it all out again. You will do the 300s CCD masters as session 1, the 600s CCD masters as session 2, and the CMOS masters as session 3. The main thing is to have each set of masters as a session by themselves. You will get a warning about setting your masters as a light frame. Select yes.

You will have a total of 11 subs loaded. Now go back to tab 2 and unselect all of the cosmetic correction boxes. Since your masters have already been cosmetically corrected they will not need that again.
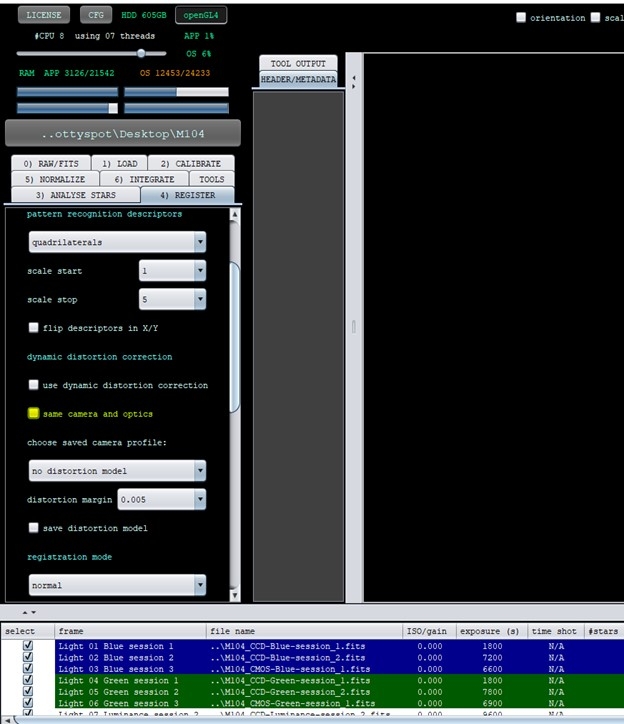
On tab 4) REGISTER you will need to uncheck same camera and optics. This is very important to be able to combine these. On 5 set your normalization to advanced in the mode section. On tab 6 you need to go ahead and change your Multi-Session options back to integrate all. Next step is to make sure you have multi-band blending unchecked on tab 6 and you can set your LNC to 2nd or 4th degree and 3 iterations for either. Now integrate.
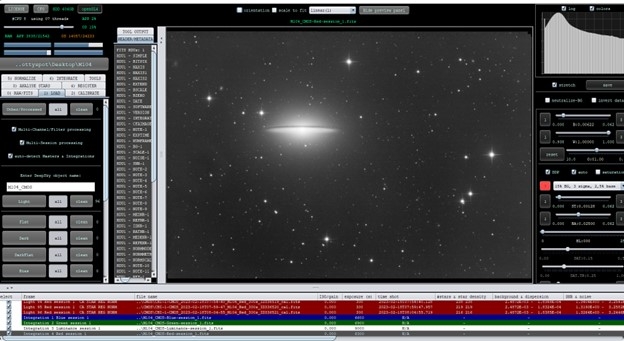
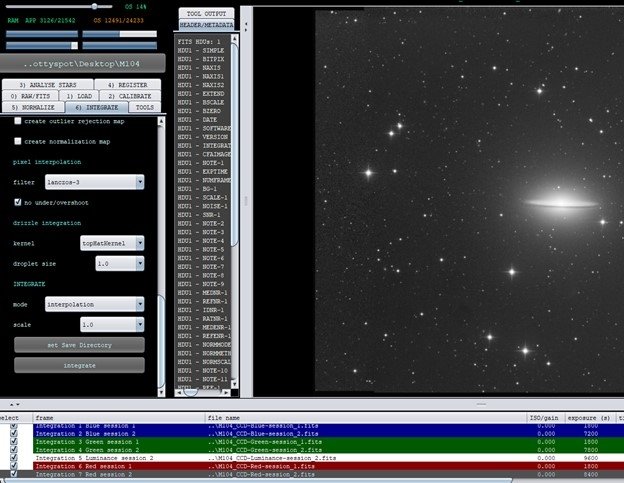
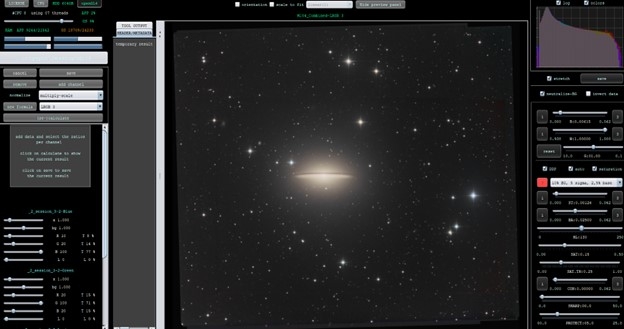
Once the integration process is complete you will have 4 new masters combining all sessions, and the display will show one of those sessions. You will see some strange overlap inside that because of how you are blending things of different sizes and with different background illumination. You will end up cropping that out, or if you like you can go in and blend it away in Photoshop or use the remove light pollution tool on the TOOLS tab after you do the combine RGB on it.

As you can see you can get a decent result with one of the standard output settings and tweak it in Photoshop, develop it in APP, or toss it into any program you like for adjustments.
After you have your combined LRGB hit save, then cancel, and then open it back up in the main window. At this point it is up to you as to where you want to go with it. I would do a batch crop to get what I wanted from it, then bump the default stretch setting up to 20%, and then hit it with the remove light pollution tool to even out any background or overlap points, then save it as a 16 bit tiff file with 0 stretch, and then take it into Photoshop and work it over how I want it to look, but at this point you have a nicely combined set with both the CMOS and CCD data that can be used to create a great image.
The first image on this post was a quick 10 minute post process in Photoshop after stacking, cropping, and gradient removal in APP, and was done on my travel laptop. The screen is only 1080p and is not color corrected, so I didn't put much effort in processing it at this time, but it does at least give you an idea of what the output of combining the CCD and CMOS One Click Observations will do.
If you are new to TelescopeLive or have not checked out the introduction to it follow this link and get started https://telescope.live/blog/new-astrophotography-start-here
The contents of this tutorial can also be found in the Telescope Live Community Facebook group here: https://www.facebook.com/groups/thetelescopelivecommunity/permalink/1607803076298742