Our tutors
Most Popular
All Tutorials
Siril Nebula Processing Master Class
[ Premium ]
Siril Nebula Processing Master Class
This complete intermediate Siril master class by Telescope Live Co-Founder Alexander Curry pushes Siril to its processing limit providing you with a comprehensive workflow for any nebula dataset.
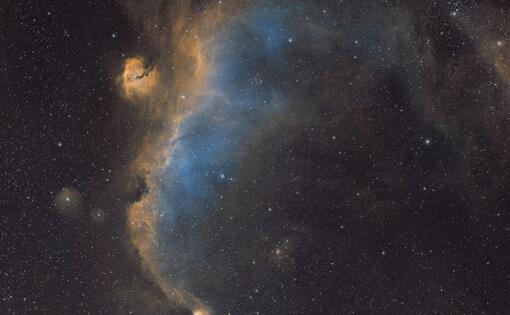
Across 6 episodes, Alex will guide you through all the techniques you would need to process a nebula dataset, focusing on a small 1hr dataset of the Seagull nebula, Alex will cover the following workflow:
Data Preparation and Stacking
- Satellite trail removal with Cosmic Clarity
- Data organisation and stacking with Telescope Live Siril scripts
Deconvolution with Cosmic Clarity
- Again using the Cosmic Clarity suite for a free “deconvolution” and sharpening tool
- Use your calculated PSF values for appropriate sharpening factors
Colour Calibration and De-Linearisation
- Plate solving and photometric colour calibration
- Histogram adjustments for first de-linearisation
Starless Workflow
- Star reduction using StarNet++
- Adjustment to star layers for colour clarity and halo reduction
- Subsequent luminance preparation
Colour Adjustments and Luminance
- Starless colour adjustments and balancing
- Optional (for HaRGB) Ha enhancement workflow
- Luminance integration
Denoise and Finishing Touches
- Denoising with Cosmic Clarity/GraXpert
- Star layer re-compositing
Streamlining Data Stacking with Fast Batch Pre-Processing
In this tutorial, Alexander Curry, Co-Founder of Telescope Live, introduces the Fast Batch Pre-Processing (FBPP) script in PixInsight, designed to speed up the data stacking process while maintaining high-quality results. Key points include:
FBPP vs. Weighted Batch Pre-Processing (WBPP):
- Learn how FBPP reduces processing times significantly—handling large datasets in minutes compared to hours with WBPP.
Simplified Workflow:
- Explore how to efficiently configure FBPP for bias, dark, and flat frames. Understand grouping keywords and automatic integration options for seamless stacking.
Comparison of Outputs:
- See a direct comparison between FBPP and WBPP results, including master frame quality, noise levels, and processing differences.
[Free] Mastering the Cosmic Clarity Suite: Sharpening and Denoising Tools
In this free intermediate tutorial, Alexander Curry, Co-Founder of Telescope Live, explores the powerful tools in the Cosmic Clarity Suite, including AI based sharpening and denoising features designed for astrophotography. This free tutorial and software provided by Seti Astro are an excellent alternative to the Xterminator plugins. Key topics include:
Denoising for Enhanced Image Clarity:
- Learn how to apply the denoising tool to smooth out graininess in images.
- Adjust denoising strength to preserve fine details, especially for high SNR datasets.
Advanced Sharpening Techniques:
- Use the sharpening tool for both stellar and non-stellar regions.
- Understand how to calculate and input PSF values manually for improved accuracy.
- Fine-tune sharpening levels to avoid over-enhancing stars or increasing noise.
Optimized Workflow and Compatibility:
- Discover how to integrate these tools with any post-processing software or workflow.
This tutorial provides practical insights into leveraging the Cosmic Clarity Suite to achieve sharper, cleaner astrophotography results.
Eliminate Satellite Trails with the Cosmic Clarity Tool
In this tutorial, Co-Founder of Telescope Live, Alexander Curry will introduce the Cosmic Clarity tool for removing satellite trails from astrophotography images. This AI-based standalone software is specifically designed for astrophotographers and works seamlessly with any processing workflow. Key steps include:
When and How to Use Cosmic Clarity:
- Learn how to apply the tool on raw data as a new “step one” before image stacking to ensure clean results.
Setting Up the Tool:
- Configure input and output folders, and disable the “clip satellite trail to zero” option to ensure smooth blending with the background.
Batch Processing and Live Monitoring:
- Run the tool in batch processing mode to batch process multiple an entire dataset folder.
- Explore the live monitoring feature for real-time satellite trail removal during image acquisition.
This tutorial demonstrates how Cosmic Clarity effectively eliminates satellite trails, making a significant improvement to low-integration datasets and enhancing image quality.

